|
Creating Transparent background for Photos and Graphics
Photoshop_Home -
Fred's_Photo
|


Here I will attempt to create a page that will demonstrate how to create and save a photograph or graphic with a transparent background. As you can see in the example on the left with the PPO Logo after scanning in the logo you have a white background. Even if you eliminate the white background and save it, it will again save it with whatever background color is on your palette. So how is it done? The following examples will show you not only the steps to create a transparent background but also how to create and save an oval photograph. If there are any other shortcuts that you know about, please let me know so that I can include them in a future example. |
|
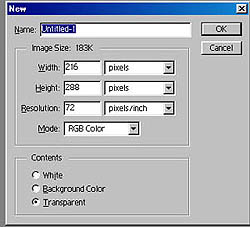 |
To start with open a New Page with a transparent background. Please note the Contents of the New Page, it shows that the Transparent is clicked or marked. If the White was active then as you saved your photograph or graphic it would have a white background. It is also important that you open a new page the same size as your photograph or graphic as you will be placing or pasting the photograph or graphic into that new page. |
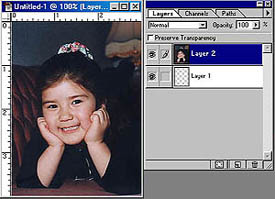 |
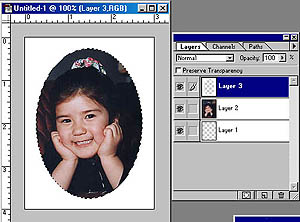
Next create a new layer and paste your photograph or graphic into that second layer. As you will see it is an important step in creating a transparent Gif. Please note the example on the left and take notice that the second layer is active and is where the photograph is placed. |
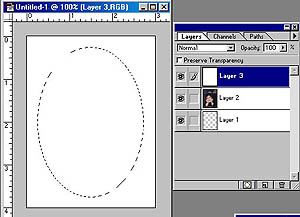 |
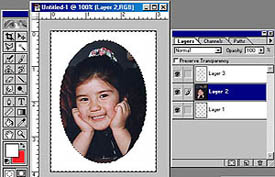
Next I created a new blank layer and with the paint tool made it all white. Remember that my goal is to not only create a transparent GIF, but also to make it an oval. Then using the Elliptical Marquee Tool I made an oval on the white layer. Once the oval is active I simply deleted that part of the layer. |
 |
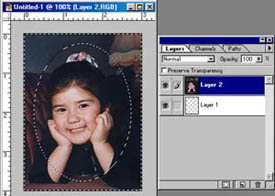
The result was the next example. Now if I was pasting this on a white background, all I would have to do now is flatten the three layers and save them. However if this was a graphic I might want to use it on more then one page and with different background colors. So let's have a look at the next example. |
 |
For our next step I used the Magic Wand Tool and selected the remaining part of the white layer. Once the white part of that layer was active I then deleted the white layer all together. This resulted with the active part still there were the white layer used to be. Take a look at the next example. |
 |
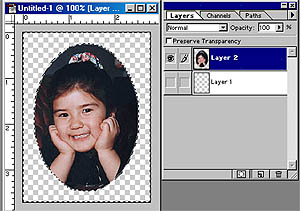
As you can see in our next example we only have two layers but the outside part of the photographs is still active were the white parts of the layer used to be. All you do here is hit the Delete button and you have an oval. |
 |
Once again here is the example on the left. Here is where the tricky part comes in. If all you wanted to do is save this with a white or colored background, you could just click on Save or Save As. However if you want a transparent Gif File, there is more to it. Here are the steps; 1. Make sure that the bottom layer is not active; please not the layer option. If the background layer is active it will produce a Gif with a White Background. 2. Under File click on Export -> Gif98a Export. 3. Under Gif98a Export Options click OK. 4. Save as, NAME.gif. (Whatever name you want to give it) |
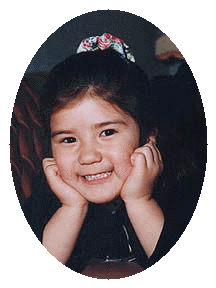 |
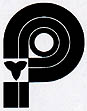
And there you have it - an oval photograph with a transparent background. You can now place this in any page, as the background is transparent. To see an example of this, look at the top of this page at the PPO Logo's and you will see that the next two have transparent backgrounds. Photographically Yours Fred Meulemeester |
All rights to this page reserved by Fred Meulemeester.