| One way to create a good looking border or frame around a picture. Photoshop_Home |
|
|
 |
Here's where to start. What I do is turn on the rulers to give me a good idea how far to draw the border. Then we use the Rectangular Marquee to draw a frame or border on the picture. |
 |
Next, click on select> Modify> Border |
 |
You will now get another option box pop-up. With this option you can select whatever size border you would like to have. Why not start with 25 pixels and see what happens. It is all a mater of taste and preference. You will now see a double border… |
 |
Now its time to fill the border, you can do it two ways. One is by the use of the Paint Bucket Tool and carefully fill in the border with whatever color you want or Two, Click on Edit> Fill. You will now have another option box pup-up what will give you unlimited variety. You can use the Background or Foreground Color, Black or 50% Gray, or white at 1-100% Opacity. Then you have the further option to fill it Normal, Dissolved or many different ways of doing it. Just try it and have fun… |
 |
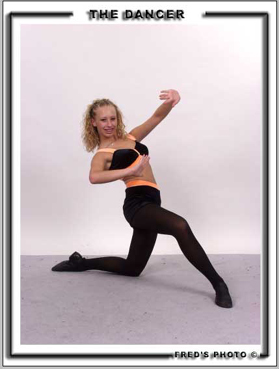
And there you have the final result |
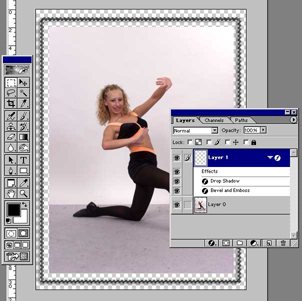 |
Add some flare... Here is where you can have some real fun! While the text is still selected, go to "Layer/Effects" and select "Bevel and Emboss" Now you can see the text starting to jump off the page. Again just play with the sliders until you get the desired effect. I used an "Angle" of 141, a "Depth" of 23 and a "Blur" of 10. However don't be afraid to play with it, you can always undo it and start over. |
 |
The Great Finish.. To finish it, I again selected "Layer/Effects" but this time selected the "Drop Shadow". This time I selected an "Angle" of -24, a "Distance" of 17, and a "Blur" of 15. However, play with the sliders until you have the desired angles and depth that you want. |
All rights to this page reserved by Fred Meulemeester.