
INSTRUCTIONS FOR FITTING THE FRAME COMPONENTS
Having never attempted a project of this scope, you will have to excuse my terminology. Sometimes I just don't find it easy to communicate, and to give detailed instructions for something I made up myself, is a monumental task. I could build one of these frames in a week if I had to, but telling someone else what is in my head is another story. Having never attempted to do this before makes it all the harder. So if I happen to refer to the front end as the "Leany Thing with the Wheel on it"...Well, I hope you just overlook that.
At a later date, I hope to be able to present a very detailed version, including wall to wall pictures, including many not included in this project, along with construction hints that make this much easier to fabricate, on a CD Rom...It shall also include sources for many of the parts. More in depth printed text for this project will also be made available later.
Slacker G.

Tools Required to complete project

After you have cut and test fit the frame components, clamp the components of the lower beam 'A' & 'B' to a solid surface, carefully aligning the inner and outer edges. Tack weld the outside and inside corners of the beam. Next complete the weld using short passes so you do not twist the beam components. I use a 3"X 3" X 1/4" angle bolted to the upper body mounts. These are structural welds, therefore you should use proper welding procedures. "There is nothing more disgusting than a fat man rolling down the interstate at 65 mph without his ride" You can quote me on that! Next fill in the side seams. These are cosmetic welds, so you may grind them flat after welding. Follow the same procedures for the other beam.

TC3
Next make and cut the upper angle of the lower beam where it is going to join the upper beam.

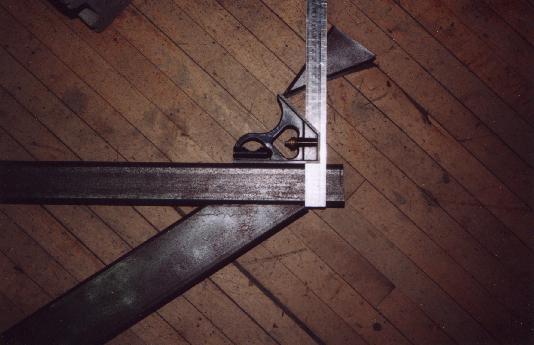
Laying the beams together, use the upper beam as a guide to square the lower beam joining edge. At this point it is good to buy some cheap gray primer and paint both sections. It not only makes it easier to see your markings, but it also prevents that nasty surface rust caused by acidic hands.

TC5
You can clearly see the 'True edge' when it is primed. Now staighten any curved area, until the beam has a flush joining edge. I flip the whole frame over and measure the other side the same way. If the side to side cut isn't uniform, use a square and slide it across the end of the beam along the 3" side, and you can easily see how much you have to grind to make a good fit. Sometimes even chopsaws make cockeyed cuts.

TC6
Make a 3/4" hole 1&1/2" from the front inside of the lower beam 'A' This will be used later for your brake light wires, your brake line, and your gas line to go through.
Now center a rectangular cut 1&1/2" x 3&1/2" in the rear BOTTOM of the upper beam. 'C'

Now cut a 1&1/2"X 4&1/2" hole in the TOP rear of the lower beam. 'A'. Forget the TAB...it turned out to be more trouble than it was worth.

TC9
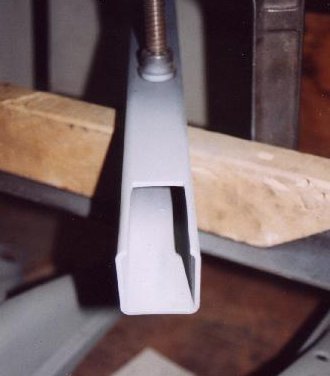
When both beams are aligned, the end view should look like this. (without the tab)

TC10
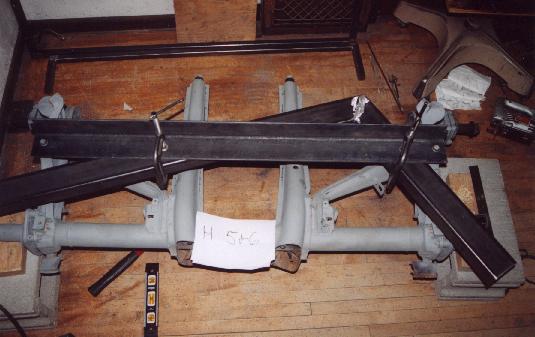
Carefully align, and clamp the twin-beams for welding
![]() :
: ![]() :
: ![]()