Tamiya Merkava Israeli Main Battle Tank
Model and Photos by: Anthony Manzoli
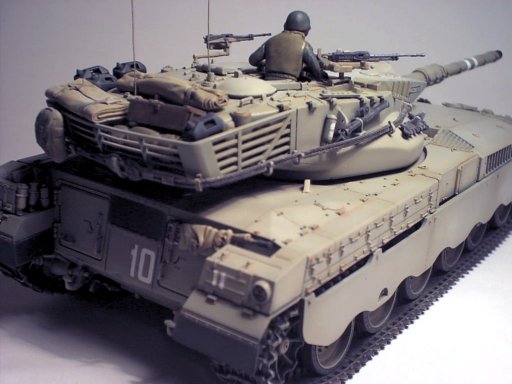
Major General Tal, known as the "Father of the Merkava", took command of the project to develop a main battle tank for use in the hostile environment of the Middle East. His results in development and design were proved out during the 1982 Lebanon conflict where the Merkava was cited as the strongest and most dependable weapons system on either side of the conflict. Designed to be utilized as a personnel carrier in addition to an effective tracked weapon, the Merkava has a larger rear hatch to effect the recovery of troops as well as safely embarking them. It is a masterpiece of design, and remains Israel's M.B.T.

Construction: There is not much to say about the construction of the kit, since it falls together quite well as most Tamiya kits do. I decided to build the entire kit before painting it. This works well with most kits, but I do have to say, when you get to painting the wheels of a kit, like this or any other that has rubber wheels, it can be a bit of a challenge. I would recommend painting the wheels separate and then installing them. The only difference would be the side skirts would have to wait to be glued in place after the wheels were installed.
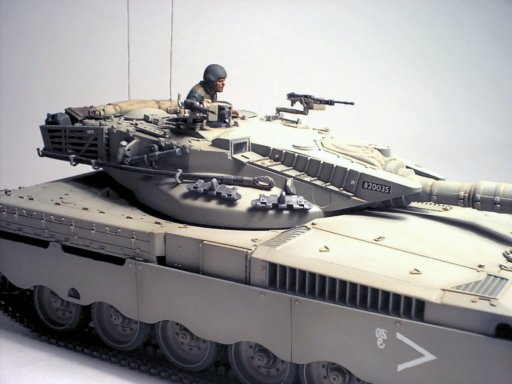
Painting and Weathering: I chose to paint my Merkava in the light sand colour used during the early years of the Merkava. The colour was mixed using Gunze RLM 02, white and buff. I tend to use many of my aircraft paints since I have been building so many Luftwaffe planes. I started by painting the entire kit with dark brown. Once this was dry I followed up with the base coat of the light sand mix. I made sure to go light so that the brown would still provide shadows in the recessed areas as well as panel lines. After the sand was sprayed on, I lightened it with white and gave he panels a mist so that it would highlight and accentuate the panels a bit more. Once all was painted I allowed it to dry for 24 hours and then sprayed a few light coats of Johnson's Shine Magic. This is a floor sealer such as Future. I also allowed this to dry for 24 hours and then applied the decals. I added a very thin mix of oil wash to all the bolts and along the panel lines. The wash was allowed to dry overnight and then a final coat of the Shine Magic was sprayed over the kit. The last phase of the weathering process was a light coat of pastels and some dry brushing.
Final Construction Notes: the last few details were added to the kit. I chose to use metal wore for the antennas. Another detail I didn't mention was that the lenses of the lights, the commander's periscope and the glass on all the hatches was made from Microscale Krystal Clear. This is like canopy glue it goes on white and dries clear. I really enjoyed the build and will definitely be interested in building some more modern AFV's.