Grooming
your Airedale Terrier
Plucking
& Clipping
I decided to
do this page because of the numbers of Airedale owners who don't want to
take their Airedales to a groomer anymore. I hope you find this page useful.
Some of the pictures may help your groomer to better understand the different
lengths to shave for a better look. I have tried to draw some pictures
to help me describe what I'm talking about. I am not an artist(!), so sorry
for the funny looking Airedales. I will be adding more as time goes on
with real pictures of the dogs. I just wanted to get this up to at least
start to help people get started.
Tips and things
you will need
1. Grooming Table
with noose
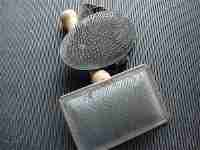
2. Slicker brush
3. Combs; most
are good but try to get a very fine toothed one. They are very handy for
getting out the undercoat.
4. A boar bristle
brush, they are good for brushing down the wire hair as it is growing in.
It is also good for knocking off the dirt from the longer leg and face
hair.
5. Latex finger
cots. They are the best thing for grabbing the hair without damaging it,
AND YOU DON'T GET BLISTERS.
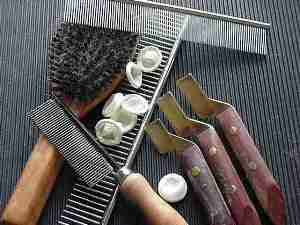
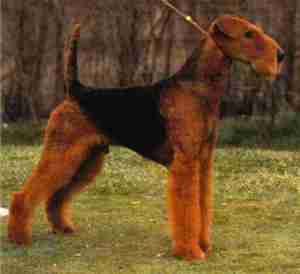
6. Find lots
of pictures of Airedales that you like. You should pin them up wherever
you are grooming. Some people like a dog with more coat and others prefer
a dog with a shorter coat. There are many different ways to do the eyebrows.
Some like them long and some like them shorter. The same with the beard.
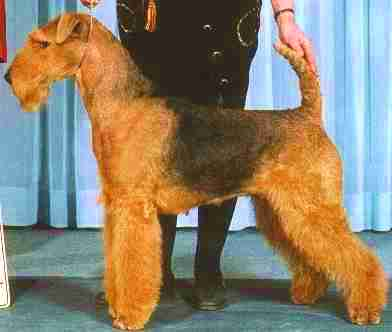
The picture below is my Lacy's dad, I love him and I always have. I have
this up in my grooming room and I strive to groom like this.
 7. Take breaks;
it is very important that you don't do to much all at the same time. Your
wrist will get sore, plus it's good to let the dog down and let out for
a few minutes so you can see what you have done.
7. Take breaks;
it is very important that you don't do to much all at the same time. Your
wrist will get sore, plus it's good to let the dog down and let out for
a few minutes so you can see what you have done.
8. I like to
have a mirror up in my grooming room. I place it up level with the height
of the grooming table. I find it convenient to be able to look across
the room from another view, and see how what I am working on looks from
a different angle. I am happy to say that I have already had a grate idea/suggestion
from someone who has come to see this page. You could find an old dresser
at a SALE somewhere, one with a mirror and then you can use it to put all
your grooming, plus other dog stuff in it.
9. If you have
a hard time pulling out the hair then you have too
much hair in your fingers.
10. This is
a very important one. If you do one ear then you do the other. If you do
one side of the neck then you do the other. If you do one side of the shoulder
then you do the other side the same day. Don't ever do one side and not
the other. You will soon learn that your dog will look lop sided because
the hair on one side is older then the other. You don't want that to happen.
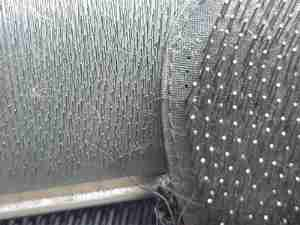
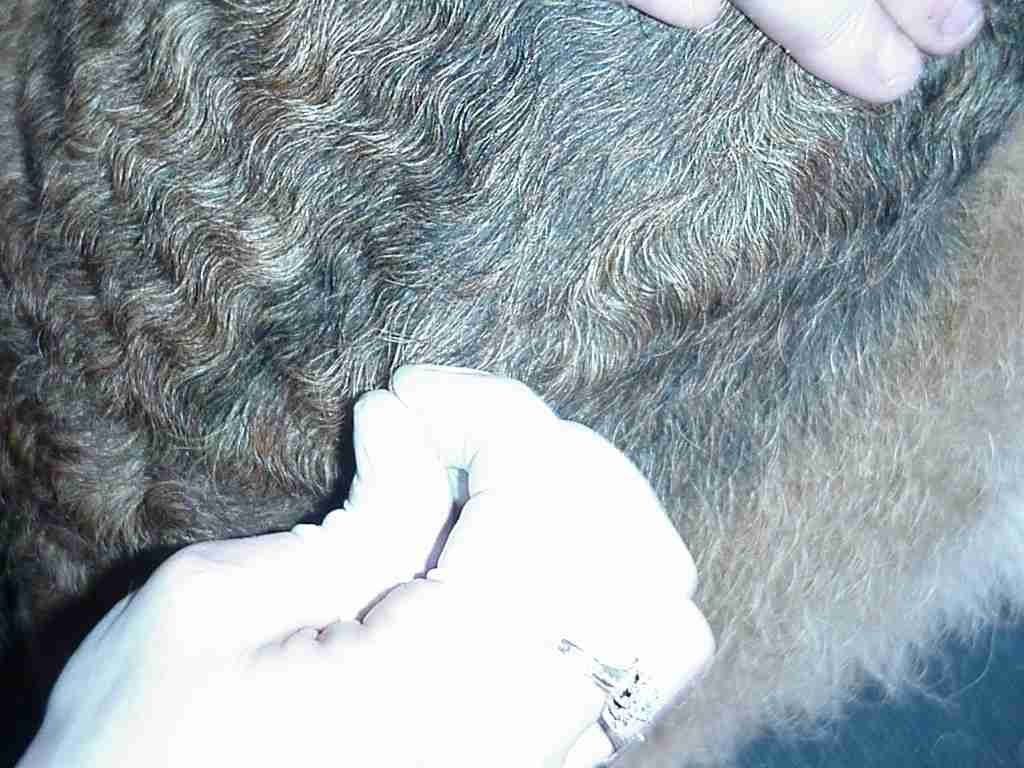
The first thing
you need to know is that plucking the coat with your fingers ( I use latex
finger cots ) will make the coat healthier in colour and texture, AND it
will allow the coat to lay close against the body of the dog. You can also
use stripping knifes but you must make sure they are very
very dull. If you break the wire hair it will change
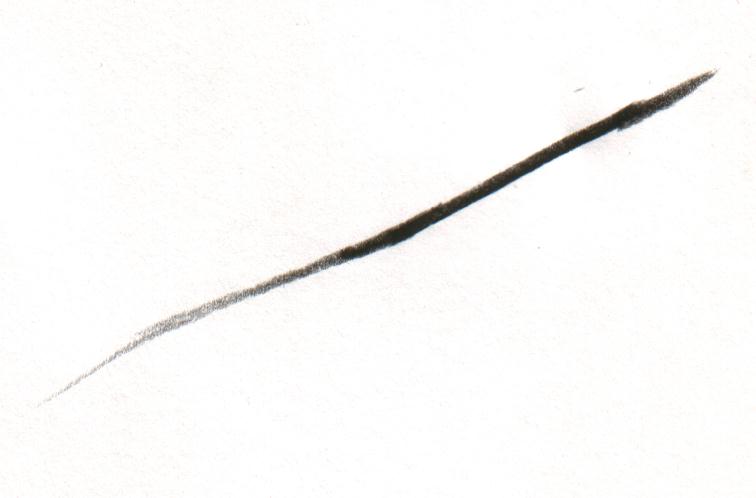
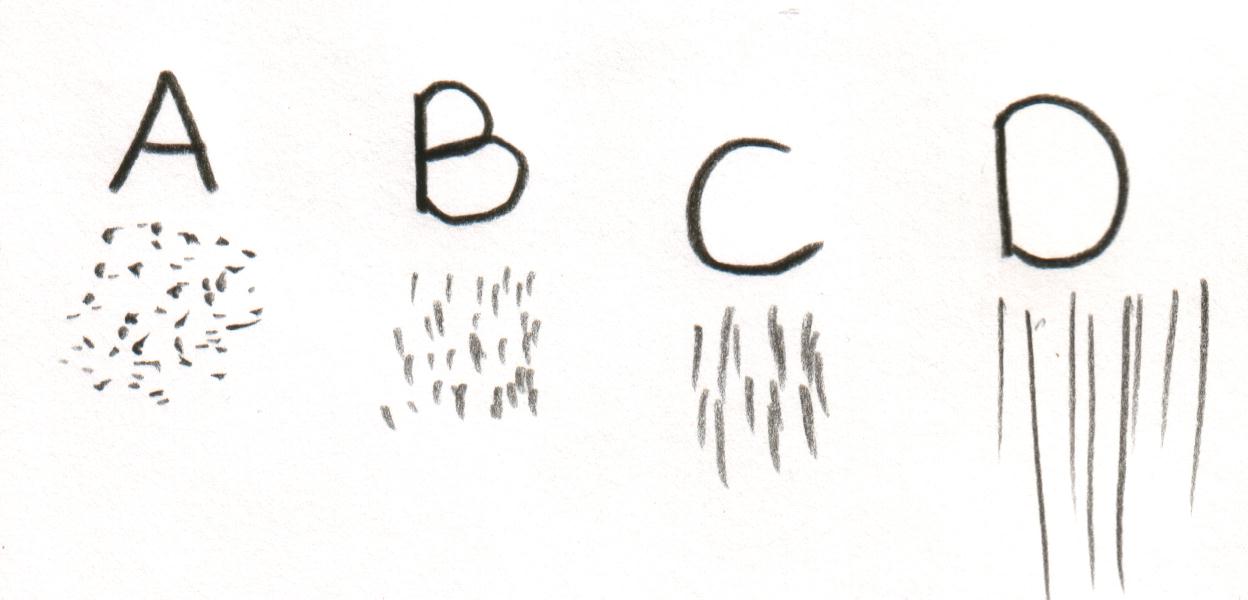
in colour. The Airedale has two kinds of hair, Wire and Undercoat. Picture
A: You can see the wire & undercoat but! It is not laying close to
the body.

WIRE HAIR:
The wire hair itself tells you when it is ready to be removed from the
dog. The wire hair grows like the shape of a knitting needle. Pointed
on both ends. When the hair starts to grow it comes out with a point on
it that is dark in colour. As the hair grows, it thickens and gets a little
darker in colour. As the hair reaches its life span it starts to lighten
in colour, and gets thin towards the root of the hair, making it easy to
pull out. This characteristic of the wire hair is also what is responsible
for the colour and texture change resulting when you clipper a dog or break
the wire hair shaft with a stripping knife. All that is left on the dog
is the dull fuzzy root end of the hair, which blends right into the undercoat.
UNDER COAT:
The under coat is short softer hair. The under coat doesn't grow as long
as the wire hair does, BUT it grows faster. It is also the under
coat hair that poses the problem to people trying to get the wire to lay
close to the body of the dog. Because it grows in so close together, it
forces the wire hair to grow away from the skin ( curl up ) like in Picture
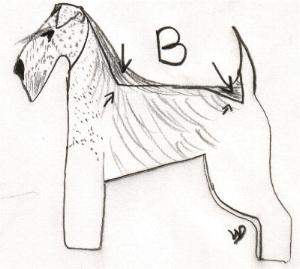
A: What we want is for it to be close like in Picture B:

 Here
I have tried to show you how to pluck and what the coat will look like
when you are doing it for a while. Lacy's coat is already to be plucked.
In the picture I hope you can see that under the hair that I am taking
off. To start I rub my finger against the direction of the hair so it will
stand up for me to grab it, then I pull in the direction in witch it is
growing. In the next picture you can see the difference in the colour of
the hair like I mentioned before, you can also see the new hair laying
very tight to the skin. The older hair is wavy and the new hair is straight.
Here
I have tried to show you how to pluck and what the coat will look like
when you are doing it for a while. Lacy's coat is already to be plucked.
In the picture I hope you can see that under the hair that I am taking
off. To start I rub my finger against the direction of the hair so it will
stand up for me to grab it, then I pull in the direction in witch it is
growing. In the next picture you can see the difference in the colour of
the hair like I mentioned before, you can also see the new hair laying
very tight to the skin. The older hair is wavy and the new hair is straight.


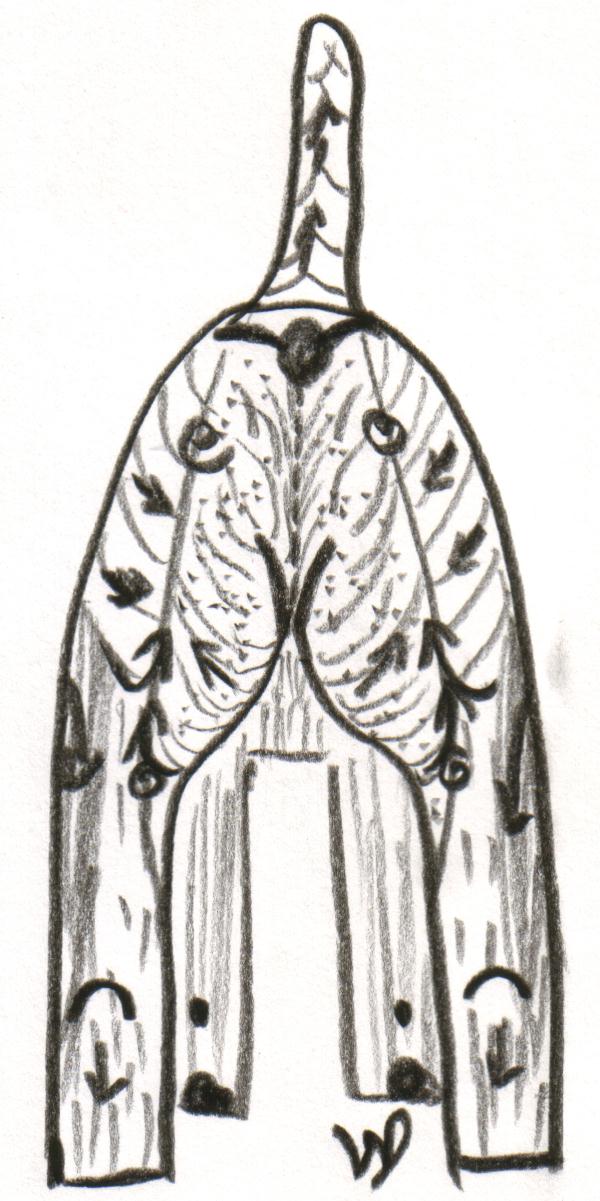
The idea is to
get that undercoat off of the dog. First you have to realize all dogs grow
their coats at different speeds. Some take 8-10 weeks; others could grow
it as fast as 6 weeks. Then there are real slow growers that can take as
long as 13-15 weeks. It's good to keep a log of what hair you pull and
how fast it takes to grow back in. This I have learned by experience, I
have one of each. You also need to realize that whatever hair you want
to be the longest on the dog is the first hair you must take out of the
dog. It is also a good thing to know were the different lengths and directions
of the hair come together on the dog. Blending is very important. Try to
have NO noticeable lines from one area to the other. BLEND, BLEND, BLEND.
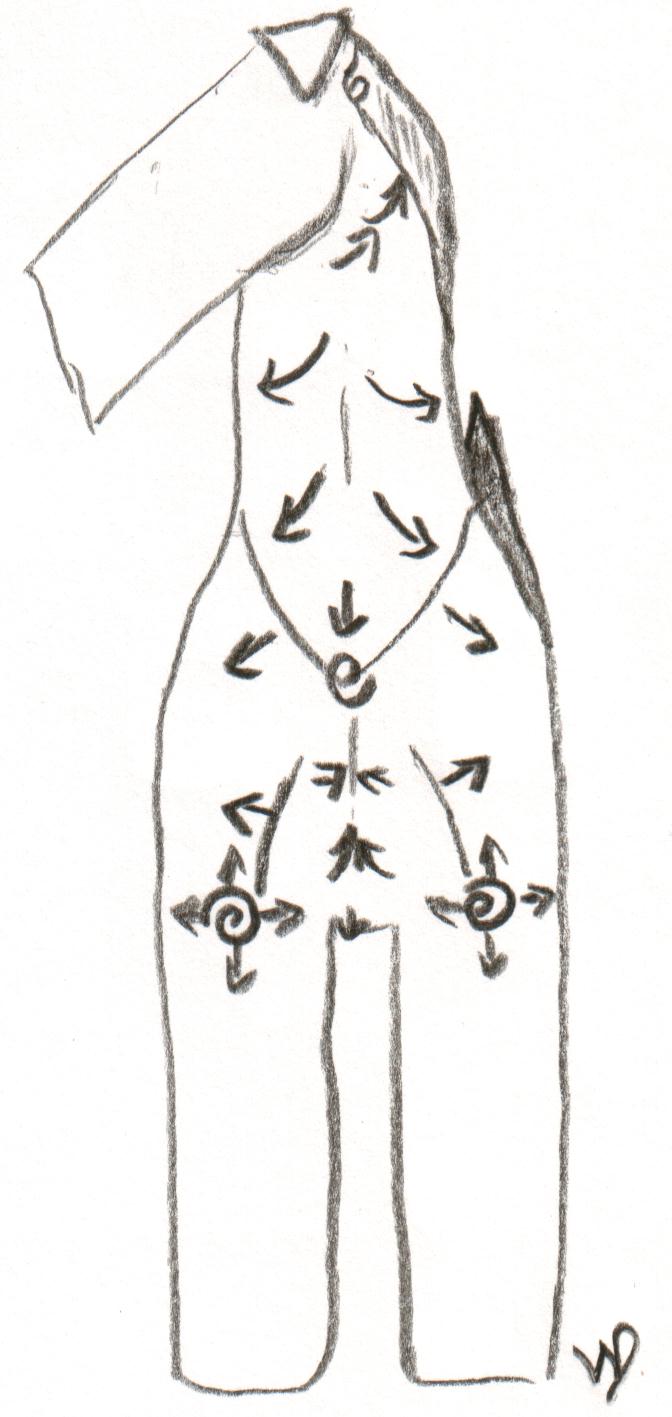


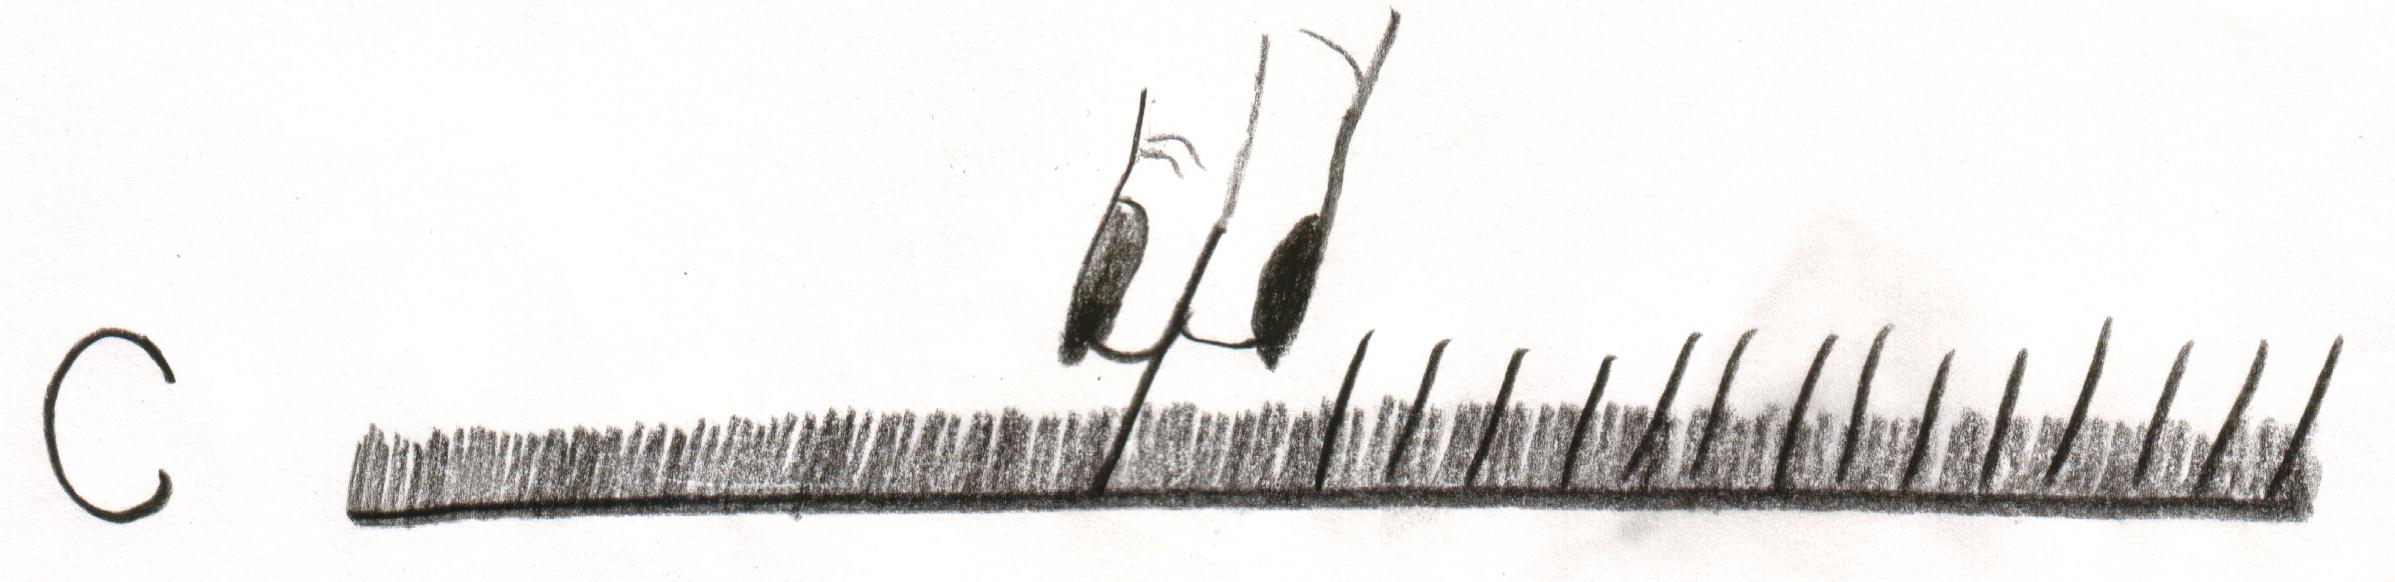
Front
Neck
Rear
It is these areas
that are the shortest parts of the groom. So we start by pulling out the
wire hair only on the body of the dog (like in Picture C: above )
Because it needs to be the longest when the groom is finished.
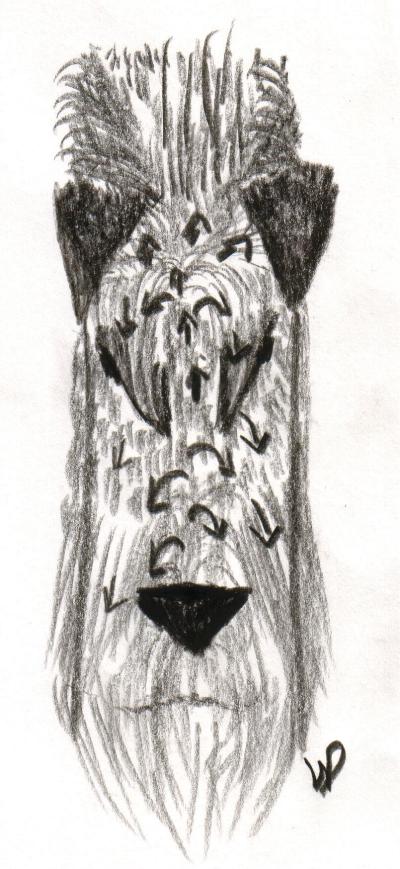
On the pictures
below I have tried to show how long the hair is by the length of the strokes.
I have tried
to show the direction and length.

So after pulling
out the wire hair from the body of the dog, I wait for about two weeks
before I take out the under coat, ( If I am getting ready for a show then
it would all come out together ) from the same area. Now remember we have
to work backwards to achieve the finished look. So then you do the areas
the same way around the shoulder and bum area like in Picture A: moving
up towards the side of the neck. If your dogs shoulders and croup look
like the dog in Picture B:
Pull the hair
out in those areas before you do down the back and along the ribs. Again,
the idea is to let the hair in these "fill-in" areas grow longer. The last
parts to be done are around the bum and head. Use a stripping knife for
around the face. When you start on the face, do around the cheek area first
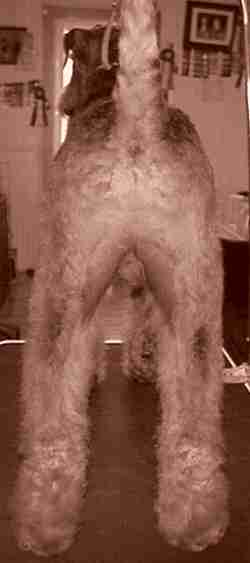
so you can get the correct " brick" shaped head while viewed from the front.
In the picture of the front view of the dog I drew two lines straight down
from the cheeks to show how I would pull out the hair from beyond the line's.
Remember the length of stroke is the length of hair.
When it all comes
together and the whole dog is done, and you are waiting for the longest
wire hair's to come in on the body you can comb the dog every day with
a very fine tooth comb. It pulls out the undercoat. This groom will last
( if you top up every now and then, the hairs that are sticking up ) about
2-3 months. Comb the body of the dog everyday to help keep it close to
the body. I hope this can help get you started. If you have anything to
add, or disagree with me in any way, please contact me. If you have something
you could teach me please share. I love to learn new ways to do things.
If you feel I could help in any other way just drop me a line. I will help
if I can.
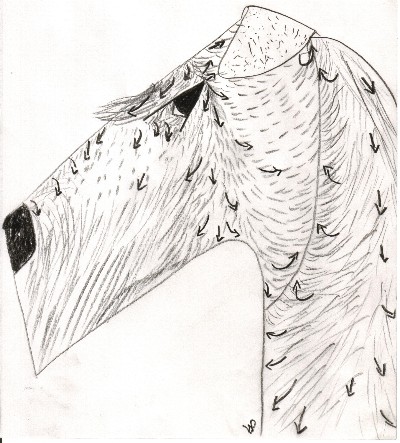
Grooming
with clippers
When using clippers
on your Airedale you need to keep in mind the direction of the hair growing
on the dog, or you will get clipper marks. I always move the clippers around
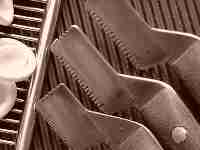
so that the blades are moving in the same direction of the hair. TOOLS
YOU WILL NEED: Electric clippers, Comb, Thinning shears, Large size slicker
brush cotton balls, Blades size 7, 10, 30, and a pair of small scissors.
Tip: the larger the number of the blade the closer ( shorter hair) you
get to the skin. The smaller the number the longer the hair will be. So
you would use the 7 for the body, the 10 for the shoulder, side of neck
and the tuckup, and the 30 for the through, head, ears, under side of tail,
and the butt.
1. With most
dogs I would say clip then bath/dry, BUT with an Airedale you bath/dry
first. The wire hair of an Airedale is hard enough to get through without
having to fight the dirt. Between the wire hair and the dirt, your blades
will loose there edge sooner then they need to PLUS the clippers will start
getting to hot to be near the dog. Bathing/drying also lifts the hair away
from the skin of the dog so you will have an easier time of clipping it.
After the dog is clipped you may ( I would and do ) want to bath/ dry the
dog again. No, I'm not nuts, you don't want to leave all of those poky
little hairs left on the dog after clipping, it will irritate the skin
and you may end up with a hot spot on the dog. Most hot spots on dogs don't
start out being that bad, it is the dog licking and licking that makes
it bad.
2. OK your dog
is bathed/ dried, now were to start. Using a Size 7 blade, I like to start
at the top of the dogs spine. Behind the head BUT not the head, put
the clippers at the top of the neck. Then make one clean sweep down the
center of the dogs spine towards the base of the tail.
Never go against the direction of the hair, move the clippers the same
way the hair is pointing. After you have the
line down the middle of the back then it is easy going from there. Just
stay go with the direction of the hair with every stroke of the clippers.
Use the pictures at the top of the page to help you figure out what hair
is long or short. |
Back
to the home page
Every thing on
this page is the property of Wanda Purvis. Please don't take anything from
this page without permission.
© By
Wanda Purvis 2001