In this lesson, we are going to create a seamless topper for a top scrolling
stationery. This is a fun one and it will be nice if you have some plugins, but its
not necessary. Blade Pro is a good one and Eye Candy. E-mail me for sites to get
these plugins from. Follow along carefully. This may or may not get confusing
to you. The template you will need is in the shared files location as well as
the texturizer, but you should already have this. You will also learn how to make your own textures.
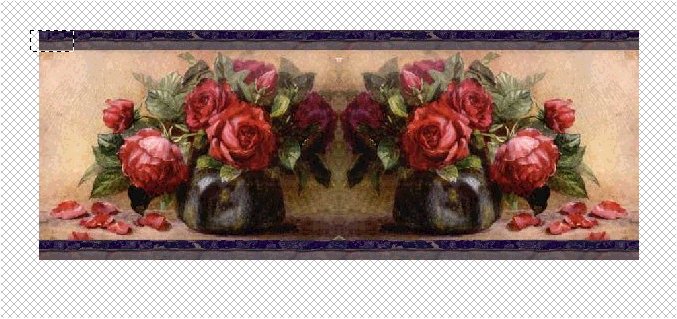
Step 1:
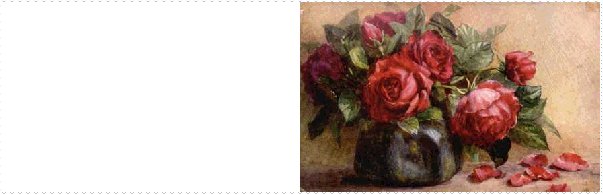
open an image that you want to use and make sure that it would look nice if it were mirrored side by side:
go to view>image information, to look at the image size and maybe write
it down someplace handy. The image here that I used is 300X190
Step 2:
open up a new image that is the exact same height as your graphic that you want to use and double(exactly) the width. For example I will have to open up a white backgrounded image which is 190 in height and 600 in width.

Step 3:
go back to the original image and copy it and paste it directly on the left side of your graphic(as a new selection)so that no white shows( you may want to practice this)

(forgive this pic, that is what it looks like when you print screen, just make sure no white showing around the graphic itself, the right part of your new image will be the only part that is white)
Step 4:
mirror you image by going to image>mirror and move it to the right side and then your graphic will look like this:
Step 5:
go to edit>paste>as new image once again and paste>as a new selection for your right side graphic and butt then together so that no white shows:
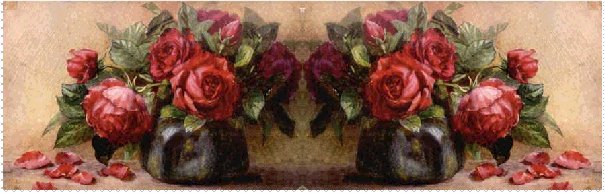
Step 6:
we need to go to selections>select none. and here we are ready to add our top and bottom border. go to image>add borders and set at these selections:

use any color you want, play around with it or whatever.
We need to select one border and add what we want to do from our plugins.

(when you select the border,make sure you are starting at 0,0..which you will see in the left corner of your PSP screen and then drag it across to look like the above)
here, we will buttonnize or add a Blade Pro preset or do an Eye Candy Glass feature to get a standout effect. Do both borders, make sure you deselect the top before working on th bottom. When you are done it will look something like this:

to make sure that you do not get a drop off on the border, select part of the inner border..copy
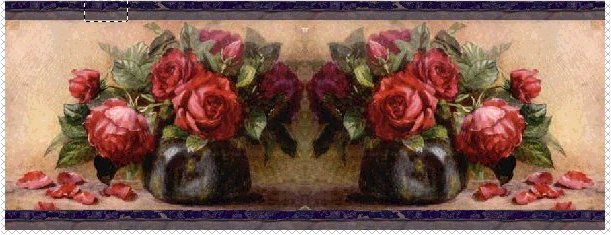
and paste it as a new selection over the edge:
ok, so this is your "topper"...now, let's work on the background!