169040
Refitting the clutch
![]()
Before we go any further I would like to correct a question on an earlier page showing us doing a removal of the clutch in 169040. The point was put to me that I was misleading people with both names of items and also giving the impression that anyone after reading the article would think they could remove a clutch from a Centurion.
At the start of my search and with the website I have stated that I am not doing a historical project. What I present is items of interest, and while I try my hardest to deliver correct information, and in a lot of cases what I deliver is what I have been told. You want more ----- buy a workshop manual.
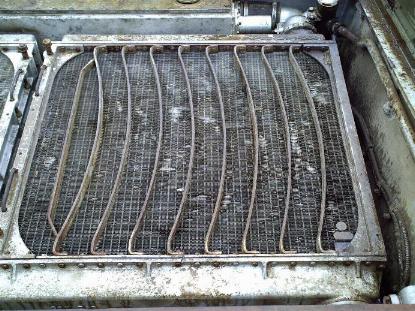
The first question was the name I gave to the items in the transmission compartment, which I freely admit are most likely not the names designated by the Army. There are three plates in the transmission compartment, that the radiators rest on when in the closed position. These are the first items that need to e removed. Two are fitted on the rear of the compartment, one left and one right of the third plate, the third plate goes from the centre position, on the rear of the compartment to the centre position just below the radiator header tank. The centre plate is removed first and then the left and then the right plates as were shown in the attached photos which are again shown below.
The second point was that the names Rear Transmission Plates (three) were mistaken by a RAEME tradesman as meaning the Transmission Covers of which there are five, ( see top photo.) Whilst I may be wrong I never heard the Transmission Covers referred to as Transmission Plates. It was my mistaken impression that anyone would know the difference. Also the design of the Centurion is such that neither the Transmission or Engine Covers need to be removed for either a transmission, motor or clutch removal. If anyone else was upset or mistaken by this point, all I can say is I am sorry,
Point three was that people would think that after reading my story, that they could remove a Centurion Clutch. Well we did! But you need the correct tools, a crane, and some instructions, all of which we had.

Time to start, Radiators in the raised position resting back against the hull. The top of the left hand radiator you can see the drop down handles used for raising the radiators, they are extended now but when radiator is dropped down they also slip down out of the way. Then the lock down bolts make the radiators secure.
The cover plates are still fitted in this photo. The left hand one, a tool box is sitting on it and the centre one is just under the ring spanner, being held by Aub.

Removing the centre support bracket

Removing the left hand side plate

Removing the right hand side plate seen at Stu's elbow---The centre and left hand plates are laying on the rear of the tank

Both radiators in the closed position --- note the bent bars over the radiators, you can stand on them without causing damage
Right hand radiator in the down position --- Note the drop down handles and the bolt lock downs on the LHS.

Stu's 100-gallon fuel tank.

As can be seen the number 169041 belongs to the Atomic tank, which at the time of the Atomic test it never had a tank fitted and still does not today. The question is was this tank ever fitted to 169041?? The painted number is very new as is the unit number of 206, (note the run of paint on the ARN.)
Where as everything else is old. My guess is the number was painted on to
give some value to the fuel tank---wonder why?
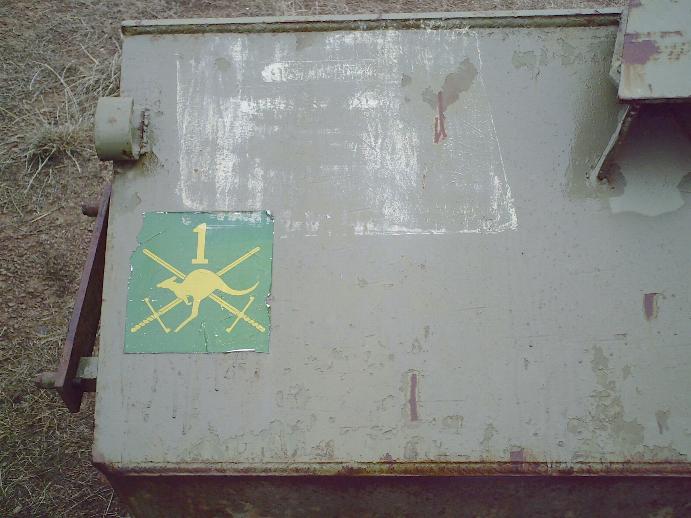
Its a long while since I have seen this emblem!

One of the old roadwheels replaced---it was in a bad condition

They weigh enough without the added clay and stones

Another one replaced, you are looking at $250 a pop, and there are 24 of them, $6000 to replace the lot, and you have to pick them up or pay big chunks of money for delivery
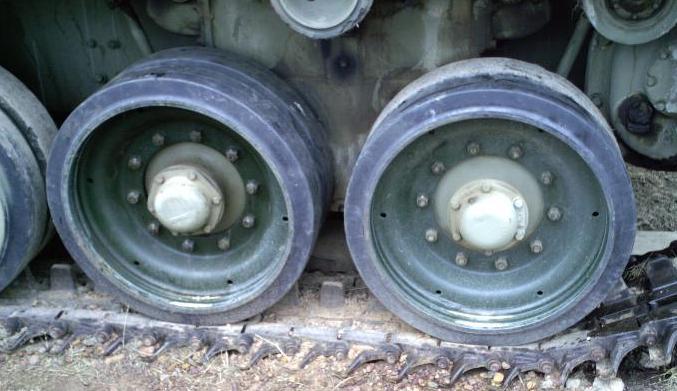
New roadwheels fitted

The spare clutch which was useless

The old clutch plates from the spare clutch

They were shot
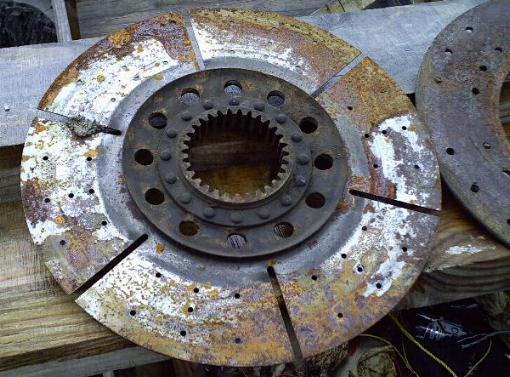
Worse than the clutch that died in the Cent

The new clutch arrives

The transmission area waiting for the new clutch

The new clutch with the lifting gear

The lifting gear being fitted to the new clutch

Up she goes

Resting the clutch on the rear of the transmission area---The lifting frame is removed and the sling fitted

In she goes ---resting on a wood block so as no strain is put onto the motor output shaft while the clutch coupling is connected

The transmission waiting to be refitted

The lifting chains are fitted and its ready to go

Up she goes the clutch output connection plate can be seen quite clearly, or should I say transmission input connection? Whatever.

The transmission is in place---its now a matter of connecting it all back up, adjust the clutch and hope it all works. The refitting time was 7 hours with a few more bolts and the clutch adjustment left for the next day.
In all a big job and one not to be taken lightly. if you ever decide to do one, you will need a good set of tools. a good mate that is not afraid of work, a crane and CORRECT information on how to do it. make sure that the person giving you information has in fact done a clutch replacement, as some advice given to me was way out.
The next section on this saga I hope will be a drive in 169040
169024

This photo arrived today --- Bob Gay standing in front of 169024
Bob is an ex member of 1 / 15 R.N.S.W.L

169075
Glen Griffen giving his Centurion a run up near Surfers paradise----Rusty and I both drove this tank last year and had a great day with her, thanks to the generosity of Glen.
The Vietnam Veterans Museum
Yesterday I travelled down to San Remo with a trailer load of parts for the museum. The new museum has jumped ahead in leaps and bounds, and is now starting to show just what a massive display it will be. I have watched the building going up from the frame stage and have been down a few times during its construction. But until this trip I never really realized just how big it will be. It is massive and has progressed a heap since I last saw it. As I have shown the building earlier in the site I have only taken a few shots inside this time.

My car parked outside--the Museum is on the San Remo Airfield and as this shot shows there is a heap of room around the building.

This little corner holds the truck, a land rover and a large trailer plus an Artillery piece. There will also be a Cobra Gunship and a Centurion MBT inside as well, plus other exhibits, and there will be heaps of room left.

The Land Rover

The Artillery Piece

The Tandem Trailer which has a mobile Display

The right hand side view

This view of the left hand side wall shows the display alcoves, which will line three walls of the display area.
There will also be a Mezzanine above the three display areas which will also have more display areas above the floor level ones.
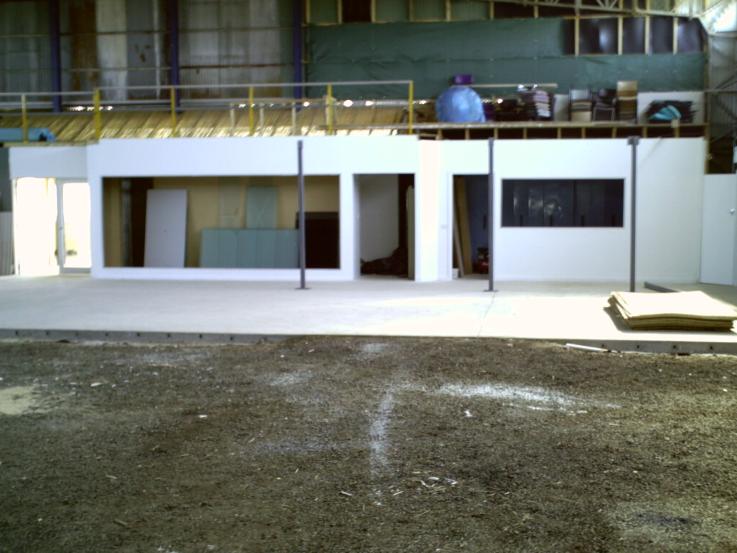
Looking back from the display area towards the front of the building showing more display sections. In behind this will be the main entrance, with a cafe and toilet area, a sales room and offices. The plaster is now finished and most of the fitting out will soon be completed.

The entrance from the floor level up to the Mezzanine floor. Only the over office area is up but it will go down both sides as well, allowing a massive extra display area as well as a look down onto items like the Centurion MBT and the Cobra Gun ship, which will be a great display.
20 Pounder Projectile
I noticed an EBay item last week, a 20 pounder projectile made into an ashtray. I was under the impression from the photos shown that it was both sides but in fact it was two photos of only one side of the projectile. But this was my mistake, not the seller. Anyway I won the auction and today drove over to the Silvan Dam area, in the Dandenong ranges to pick it up.
On the way, while driving across the Kinglake Ranges, I noticed out of the corner of my eye an old BSA side valve ex army motorcycle.

I hit the brakes and reversed back and parked outside

Nicholson's British Spares, a small country Motor cycle shop specializing in British Motorcycles, The old British bikes were a past love of mine , so I was quite pleased to notice these. The old BSA had telescopic forks, where as all the ones I had seen, had been fitted with Girder forks.

Anyway it was a nice bike

There was also a couple of nice Triumph's, one of the bikes I owned when a lot younger. After a nice talk with the owner he mentioned a chap in the area who was into restoring Army items and promised to pass on my card to him. Hopefully it will produce some items of interest.
Then it was off again driving through some of Victoria's lovely ranges and across to the Dandenong Ranges and Silvan Dam.
What a nice area a farm right in the middle of a State Reserve. Kangaroos and heaps of bird life, it was a great drive into the property, where I met up with David the owner of the projectile. David is a keen buyer and seller and has promised to keep in touch and keep his eye out for items of interest.
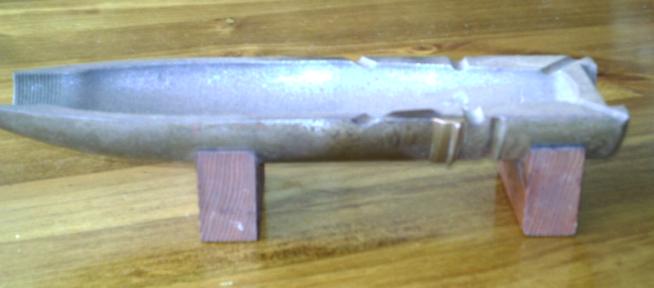
Note the brass ring is still intact, I would imagine this was made by some RAEME guys when they had time to spare

It was a neat cut and the cut-outs for the cigarette are very nicely done

I tried it out in a brass case I was polishing and it fitted nicely
ON THE WAY HOME

I stopped at a Servo for a cup of coffee and look what stopped beside me!
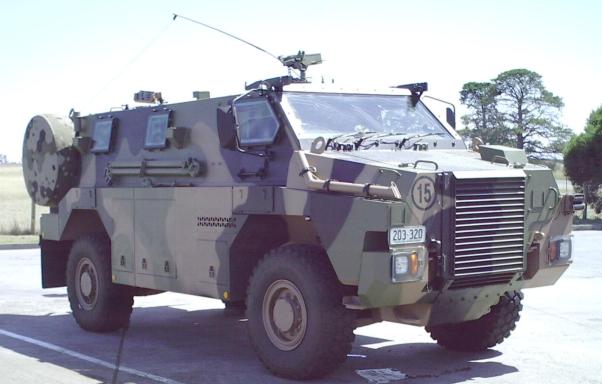
I would have liked to have got my hands on that flex gun mount on the top
As a courtesy I asked if I could take these photos, which was ok but I was not allowed to take any inside, which was fair enough. They carried a heap of bodies inside, all who appeared quite happy to disembark and head for refreshments. This sort of capped off my day.
.

A close up of the shell
This will give me an accurate template to turn up some wooden projectiles, and then the item will be put back together as an ash tray and put into the Vietnam Veterans Museum