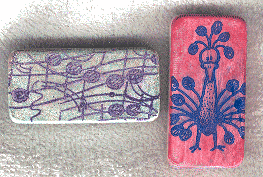

Dominoes Mini Lesson an easy project
domino gesso inkpads stamps sealer spray small paint brush colored pencils krylon pen
2. Take inkpads and either smoosh onto domino or you can use your fingers and rub the color on, you can also stipple the color on. Do one color at a time. If you are using dye ink you can quickly go from one color to the next. If you are using pigments you can heat set them after each color or let them stay wet and blend them with each color.
3. Ink stamp and stamp onto domino.
4. Color image with colored pencils.
5. You can outline the domino with your krylon pen at this point.
6. Spray with sealer (you can also use crystal lacquer or another sealer). Let dry.
7. If you want to add the mini glass beads around the edge use a good adhesive and paint it on the sides of the domino and then dip the domino into the beads and press them in place. Let dry.
If you don't have a drill add a pin back or magnet.

domino reinkers spritz bottle w/alcohol cotton balls heat gun pigment or permanent inkpads stamps krylon pen crystal lacquer small paint brush
2. Put a drop of reinker onto cotton ball and spritz with alcohol. Gently blot or smoosh onto domino. Each will put different amounts of ink onto the domino. Dry with heat gun in between each color. I have found that if I don't, the first color will come off when I apply the next color.
3. For an added touch, take your krylon pen and put some onto a plastic lid and pick it up with the colored & spritzed cotton ball and then blot onto the domino. If you place the pen directly onto the cotton ball your tip will get all fuzzy.
4. Make sure to heat dry before you stamp.
5. Using pigment or permanent inks, ink your stamps and stamp the domino. Heat set so that the image doesn't smear. I also let them sit for a bit before I color or lacquer them.
6. Color image with pencils if desired.
7. With paint brush, put a layer of crystal lacquer on and let dry. If you have drilled holes, take a pin and clean them out so that the lacquer doesn't dry in them and clog it up. Let dry.
8. You can add beads, fibers, etc at this point.
