Formica Tiles
#1
tiles
reinkers (I have studio 2 and posh brand)
cotton balls/pads
rubbing alcohol in spray bottle
heat gun
ink pads (brilliance is what I used)
stamps
krylon pen
fibers (I used our line)
beads
- Take
tile and if it has the number, etc in the corner, you can remove that very
easily with polish remover (acetate).
Be careful to gently wipe only that area as it can take the finish
off the tile.
- Put
a couple drops of your reinker color on a cotton ball and spritz with
rubbing alcohol. Gently smear
onto tile. It will kinda
marble if you spritz the tile with the alcohol as well.
Colors will not always turn out the way you thought when you place
them on the prefab tiles. If
you don’t like the color it will wipe off with a alcohol spritzed cotton
ball.
- Heat
dry the each color with your heat gun as I have found the first color will
come off on the cotton ball of the next color.
- You
can put some of the krylon pen onto a plastic lid and pick it up with a
colored cotton ball and apply to the tile as well.
- Try
not to rub the tile, gently swipe cotton balls over it.
Some tiles do not have much finish on them and it will start to get
a fuzzy look.
- Ink
your stamps and stamp. Remember
to heat set each stamped image.
- When
you are done stamping you can color in images with colored pencils (I used
prisma colors).
- Take
krylon pen and go around the edges of tile to finish it up.
- You
can also take a clear ink pad, ink tile and put clear ep on it and heat
(careful not to scorch it).
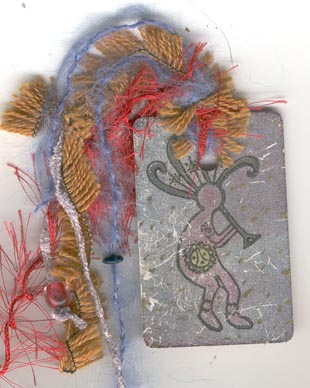
- Add
fibers and beads. You are
done.
Have fun.
Catrina
Back to
lesson page