
City Light Install
Thanks to Bryan
Step 1: Go to Honda and order (2) of part number
34303-SS1-003
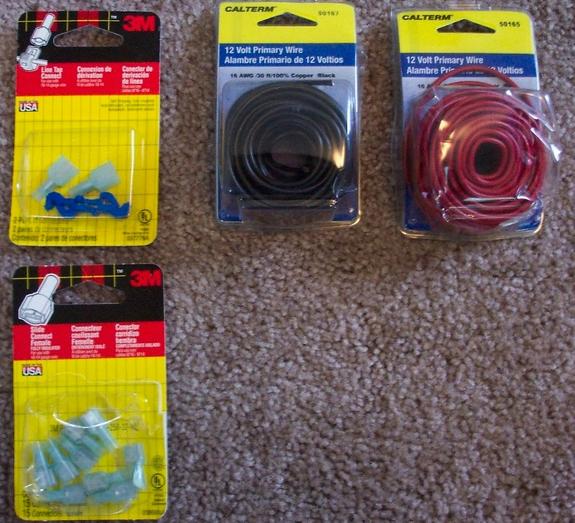
Step 2: Go to local auto parts store and get the
following:
-194 bulbs (in color of your choice)
-16 gauge wire (red and black)
-Insulated Female wire connectors
-3M Line Taps
-Tube of Dielectric Tune Up Grease (optional)

Step 3: Remove bumper cover and install headlight
housings.
Step 4: You will see that there are three wires that go to the turn
signals. They are red (switched power), black (ground), and green (turn signal).

With the line taps, tap into the red, and the black wires. Cut
about an 8" piece of each color of your new 16ga. wire and crimp on
insulated MALE connectors (that came with your line taps) to one end of both
wires. Crimp the female connectors to the opposite ends on both wires.
Run the wires from there to the insulated female connector. Plug the male end
into the line tap, and the female connector into the city light socket from
honda.


That should do it! The city lights will now illuminate with the
parking lights. Use the dielectric grease on all connections. It prevents
arcing, provides a good connection, makes the connection weatherproof, and makes
it easier to remove the connectors in the future!
The best part about using the line taps is that you simply tap into the factory
wiring. The associated male connector acts as a plug, making your connection
removable. The line taps also only tap into the wiring, so that in any event
needing so, they can be removed with no permanent damage to the wiring harness
that they tapped into.
This How-To is based solely on my own experiences. I take no responsibility
for your actions when attempting this install.