|

| |
Inner Primary Gasket Replacement
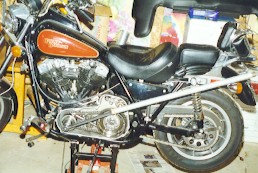
This page will detail with text and images the main tasks involved in removing the
inner and out primary covers on the 1982 FXRS. The main goal being to replace a
gasket between the lefthand engine crankcase and the inner primary. Some of the
pictures are not too great, so bear with me.
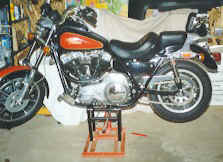
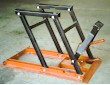
| First, get the bike up on the bike lift
as shown, with these lifts is really simple. Push the lift under the bike and then
use your foot to operate the bottle jack. The lift comes with a set of springs to
raise the handle on the bottle jack when you take your foot off the handle. |
 |
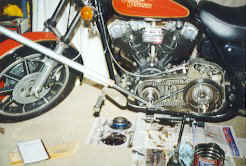
| Now, here is what the outer primary bolts on the front of the engine
looked like! Whoops, they are not there. Went for a 100 mile ride and thought
the engine was shaking a bit more than usual. I have a solution for this problem a
bit further down the page! |
 |
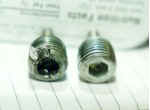
| Now, drain the oil from the primary case using the drain plug located in
the lower rear of the primary cover. With mine, the drain plug was jammed in so
tight I could not get it out, so I had to cold chisel it out after cutting a notch in it
with a Dremmel tool. Shown to the left is the original mangled plug and the new
replacement plug fresh from the shop. |
 |
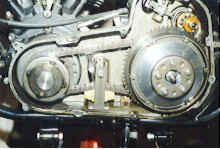
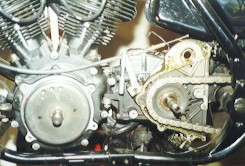
| Remove the left foot rest and the gear shift lever. Then remove all
the primary cover screws, lift off the primary cover to reveal the inner workings of the
primary. Note on this picture the M1 Chain Tensioner. This is a great product,
so if you are messing around inside the primary, replace the factory tensioner with this
one. |
 |
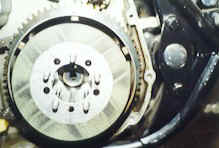
| Now, compress the clutch springs, using a couple of washers and the clutch
adjustment locknut. Note the aluminum releasing disk and the blue clutch springs (by
Barnett). Once the springs are compressed, the nuts on the clutch studs can be
removed, allowing the removal of the pressure plate, compressed springs and the releasing
disk. |
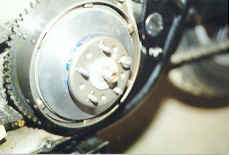 |
| Now, observe the dark markings on the kevlar friction plates (by Barnett
again), this indicates that the plates are not evenly sitting on the steel clutch plates,
or that the clutch springs had not been correctly tensioned the last time I had the clutch
apart. I suspect the latter as I checked for warped steel disks last time. I
made a note to be especially carefull about adjusting the tension. |
 |
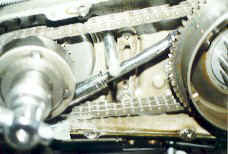
| Once the clutch plates are removed, remove the chain tensioner by removing
the retaining bolt. On factory original models, there will be an oiler pipe,
disconnect this where it is attached to the inner primary. Note that mine does not
have this. When I installed the M1 Chain Tensioner, it was not fitted with an oiler.
So, I closed off the oil lines and made the primary self contained, which means I
must add primary oil to my service list. I dont mind this as I would rather not have
my dirty old primary oil running around inside my engine! Anyway, next, brace the engine
sprocket and the clutch sprocket. There are a couple of methods of doing this, I use
a socket extension bar and a socket, other people use a piece of 1 inch pipe cut to the
right length and with the ends flattened down. Note where it is braced on each
sprocket, this is important as if you brace it incorrectly, you will NEVER get the
compensator nut off. |
 |
| Now remove the compensator nut. You can see that my tools include a
sophisticated piece of pipe, to provide an extension to my socket bar. This is
needed as the amount of torque applied to this nut is pretty huge, after all, it has to
handle 70+ horsepower being applied directly to it. At this point you can remove the
starter solenoid and the starter motor (no pictures supplied). Depending on your
exhuast system, you may need to remove the rear exhaust pipe as well. |
 |
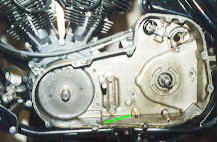
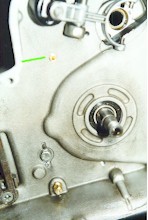
| At this point, you can remove the clutch hub nut and then remove the
primary chain, compensator & front sprocket and the clutch hub. If you still
have the factory chain oiler, remove the oil lines from the rear of the primary, plug up
the oil lines with some rag or something else to stop oil dripping from them. Note
the green line, the right hand end of which points to the brass plug I used to seal the
incomming oil line when I removed the factory oiler and chain tensioner. |
 |
| Now, remove the bolts retaining the inner primary, there are four on the
side facing you, and two on the gearbox side, on the lower left side, one of these has a
grounding strap attached. Remove the inner primary, this can be difficult if you
have used any sort of sealing compound in the past, just tap it off with a soft faced
mallet. |
 |
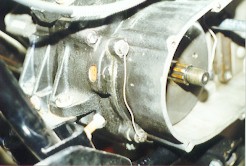
| OK, this is where I screwed up. I got so into it I forgot to take
pictures of me installing the inner primary back on, including the gasket itself, the
gasket compound etc. Damn. But, it was pretty easy. Just make sure that
you clean the whole area very carefully, firstly with some sort of solvent, then with
rubbing alcohol. This includes ALL bolt holes. If you have a tap set, tap out
the holes to remove any loose material, then clean again. This helps the Loctite
bond. This picture shows the inner primary installed, but not yet bolted up tight.
The top green line shows where I installed a small brass fitting to allow pressure
developed during riding to vent. Late model bikes have this sort of setup, although
it is somewhat different. You can also more clearly see the brass plug I used to
close off the oil line. |
 |
| Once everything is in place, you can install all of the inner primary
bolts. The two inner rear bolts have lock tabs installed, use safety wire to retain
these once they have been torqued (use Loctite!). The front bolts on the inner
primary have holes drilled through them, but no locking tabs, wire these to each other
once they are torqed.
This picture shows how I am going to prevent the outside bolts shaking loose again.
I bought two more drilled bolts and used safety wire to hold them in place.
Not factory spec, but it works. |
 |
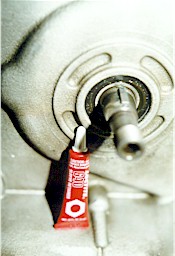
| Next, install the key on the gearcase drive shaft. I used to have
all sorts of problems installing clutch hubs on keyed shafts until a friend said "Use
retaining compound knucklehead!". So, now I use Loctite 640 to hold the key in
place while I slide the hub on, works great! |
 |
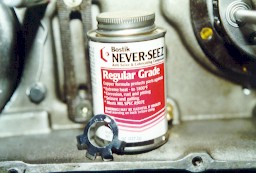
| With the clutch hub, install the clutch hub nut with the locking tab,
ALWAYS use a new locking tab as there may be a weakness on an old one and ALWAYS ALWAYS
use a seizing prevention compound on both the locking tab and the hub nut, otherwise you
may never get it off again and the hub nut binds in the locking tab, either tearing the
retention tab off or bending it so it cannot be used. It can be used for all
sorts of things, it prevents rust on axle shafts etc, its expensive, but worth it.
The one shown is Never-Seez brand. |
 |
| Once the clutch hub is back in place, reinstall the starter motor, the
solenoid and exhaust if removed. If you disconnected the battery, reconnect it.
Test to ensure that your electric start works now, its better than having to pull
the primary cover off because you screwed something up! Reinstall the chain and the
compensator assembly. Brace the sprockets in the exactly opposite manner as when you
were removing the compensator nut. Tighten the nut up REAL tight. I dont have
a torque wrench large enough to measure the torque required, so I just give it heaps! |
 |
| Once you get to this point, just install the clutch plates, adjust the
tension according to the manual (if you need this, contact me and I can post the
instructions on a seperate page). Install the primary cover & gasket, install
foot peg and gear lever. In my case, I have to fill the primary with about a quart of
primary chain oil, if you still have the factory oil system you dont have to worry about
it. |
|
Results
Well I have been for about three outings on the bike, so far the inner seal is working.
BUT, my method of venting the primary case needs to be adjusted, the clutch hub
throws a lot of oil around and the fitting I used does not have any splash cover, so
primary oil that is running down the inside of the pirmary seeps out the vent line.
I will worry about this another time.
|
