
Compressing Wavs with Sound Recorder
(Note: This method is best for those with at least 32 MB of RAM installed in their computer. Opening up an uncompressed wav in Sound Recorder can stop the machine from responding.)
Sound Recorder is one way you can compress wavs to MPEG Layer-3. Although I feel it is not the best way because I find that wavs compressed this way acquire a hiss on the S, it is best for those who would prefer not to download a separate compression program.
The first step is to run your Sound Recorder program. It is not in the same place on all machine's Start Menus, so we will take the "Run" approach.
Click on your Start Button, and then click Run. You can either browse to your Windows folder and double-click on the file Sndrec32.exe, or you can type this in exactly as follows C:\\Windows\Sndrec32.exe
Click OK and this will open up the Sound Recorder program.

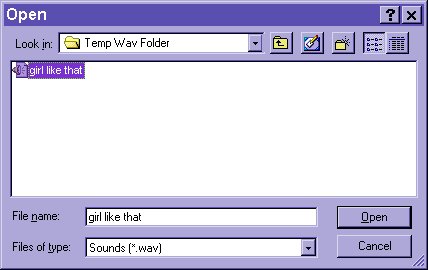
Click on File, then Open. Then you need to browse to where your wav is that you want to compress. When you find it, either double-click it or click it and click Open. (For example, I am going to compress a wav named girl like that.wav found in a folder on my Hard Disk named "Temp Wav Folder".)
When your wav file loads completely in Sound Recorder, click on File then Properties. A new window called Properties will open up.

Click on the button Convert Now.

This is now the step that you will choose the setting your wav will be compressed to. Under Format, scroll up to MPEG Layer-3 and click on it.
For Attributes, this is all depending on your preferences. The higher the Hz, the higher the quality. Ahything higher than 11,025 Hz will not play in a chat room, unless it is a very short song.
I personally prefer the setting 24 kBit/s, 11025 Hz, Stereo.

This setting would be my recommendation. I find it to produce a high quality sound in comparison to file size. Once you have decided on your settings, you can save them so it will be easier to navigate to them the next time. Just click on Save As and type in the name you would like this setting to be saved as. I named mine "My Default MPEG".
Click on OK, and the wav will begin to compress.

When it is done, click on OK on the Properties window to get back to Sound Recorder. You may want to preview the wav to check sound quality before you save. If it is not to your liking, simply click on File, then Revert. You can then recompress using the same steps.
If it is to your satisfaction, either click the X or hit File and Exit and click on Yes to save the changes.
~written by RnA Julie~
![]()
If you have any further questions feel free to email Julie :)
Previous l Next l Home l List Rules l Disclaimer l About Us l Software l MPeg Layer-3 l How to use a CD Ripper l How to Compress Wavs l Technical Support l Other Lists l Wav Sites l Email