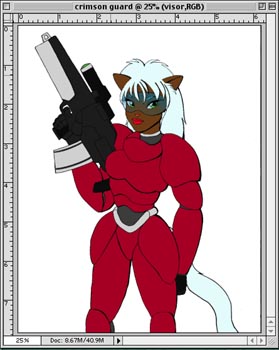
First, you need to have something to use your metallic textures on, and lucky for you I've got a cat-girl ready as an example:
So, here's our test subject - now let's make that armor slick and shiney! The key to my chrome style is picking your shade and hi-light colors:
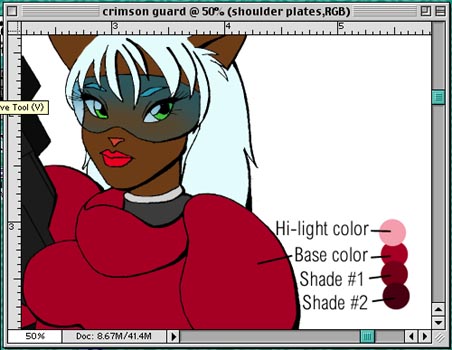
Here's a closer look, and as you can see I've chosed the colors I'm going to use. I find it very useful to stick to a few distinct colors when doing shading and just paint samples of them (like a palette) in blank space so that I know I'm always using the same colors.
Now, note the different colors I've chosen - the Base color, a dark shade (Shade #1), a darker shade (Shade #2) and the Hi-light color. The two different shades are key to getting a very metallic look to the shading, while the hi-light color adds that glossy shine. It's important to choose colors that will not only have good contrast with the base color but also with each other - it's especially important that your Shade #2 is very noticeably darker than Shade #1.
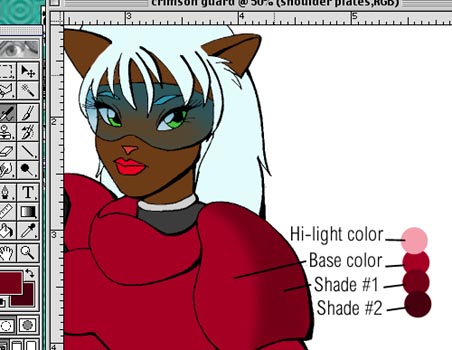
Okay, now we've started shading her shoulder armor. I always start off with Shade #1, and unless you want to do this in cel-style, always use the airbrush tool. Try to be careful with your shading in this stage - this will lay down the extent of the shading for your metallic sections so make sure that it won't look strange when finished. Also, be sure to leave yourself adequate room for laying down your hi-lights.
Go back to main page of the OTP site.