Lesson 3
MIDRIF WAISTBAND and SKIRT

With photo's and instructions by
Marsha Olson
(printout 6 pages)


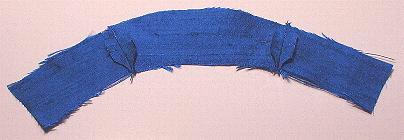
Pin the pleats in the skirt front and front lining.
Staystitch and press lightly to hold in place.
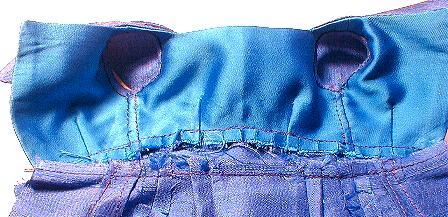
Stitch the darts in the skirt back and lining.
Press darts away from each other. Stitch the
skirt front to the back at the side seams.
Clip curves at the hip.
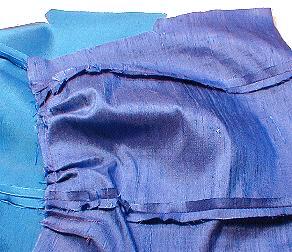
Press seams open.
Using the curve of your pressing ham works
well at this point. If you do not have a
pressing ham, there are instructions and a
pattern to make one on the Perfect Patterns
website. Here are the direct links:
HAM PATTERN
HAM INSTRUCTIONS
NOTE: The waist band for this dress was designed
to sit slightly above the waist of the doll when
completed to give it an empire look. If you want
the lower edge of the waistband to sit right on
the waist add a 1/4 inch to the bottom edge of the
waistband pattern pieces. You may have to take in
the skirt side seams slightly also, from the hip up
to the waist.
Cut your waistband pieces.


Stitch the waistband pieces together, trim seam
allowances to a point on each end of the seam
allowance. This eliminates most of the extra
fabric that would normally be left in the seam
to cause a bulky look from the outside. Get into
the habit of trimming seam allowance ends on all seams.
Staystitch the long upper edge of the waistband
LINING. Press in lightly along the
staystitched line.
Stitch the waistband to the skirt. Stitch the
waistband lining to the skirt lining.
Staystitch the bottom edge of the bodice,
clip to the staystitching.
Mark the center front of the bodice and skirt.


Pin the bodice to the top edge of the waistband,
leaving an overhang of 1/4" on the waistband end. Stitch.
Press both raw edges towards the waistband.
Right sides together, pin the lining to the
skirt. Fold the upper waistband seam allowance
out. Start your stitching at the staystitch line.
Stitch the lining to the skirt, leaving an opening
between the center back clip mark and the top of
the kickpleat on both sides. The left side will be
stitched down in a straight line ignoring the overlap
notch, or if you prefer, turn that side in and stitch
down by hand to make the left side straight.
Trim corners, turn and press.
Stitch the center back seams of the skirt together.
Hand stitch the lining opening.


Hand stitch the top of the kickpleat overlap to hold in place.
Hand stitch the waistband lining. Finish with snap closures down the back opening.
Done!

I know my instructions are slightly different than the written instructions that came with the pattern, but while compiling the sewing lessons I found easier ways of doing some steps and have passed them on to you through the lesson pages. Have fun!
Marsha Olson

This page can be printed out or saved as complete webpages (including photo's).
Instructions For Making a Desktop Folder and Saving Lesson Pages!

You are visitor number


HOME CLASSES CLASS 8 INDEX LESSON 1 LESSON 2