Lesson 4
Perfect Pattern #2018
"Sewing the Petals to the Skirt"
With photo's and instructions by Marsha Olson
(printout: 9 pages)
Now that we have our 5 rows of petals constructed, sewn together,
and the raw edges finished,
we need to gather the top edges.
1. Using a long gathering stitch (longest straight stitch)
place 2 rows of gathering stitches along the top edge of each row of petals.
The first row of gathering stitches should be 1/8" from the finished edge.
The second row 1/4" from the edge.
Using this double row gathering technique stabilizes the area to
be gathered and gives more strength to the bobbin threads
which will be pulled as a pair. For now, do not gather the petals.
General Sewing Tip
The easiest way to determine the grain line of any fabric is to remember that the grain line
is always parallel to the selvage or finished edge of the fabric.
For your skirt front the grain line is the center front marked FOLD.
The skirt back is the same, the center back is the grain line.
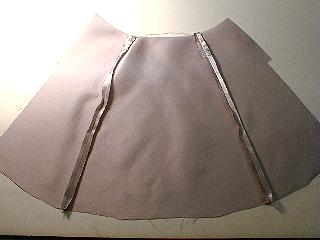
Skirt
2. Cut Skirt Front and Skirt Back following the
cutting directions on the pattern pieces. Cut linings.
3. Stitch skirt front to skirt back at side seams.
Press seams open.
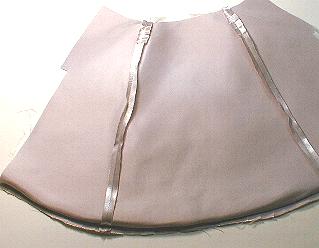
4. Assemble skirt lining. Stitch the lining to the skirt
along the bottom hem edge only.
5. Turn the skirt and press the hem edge.
I know this is an unusual method of doing the skirt and lining,
but bear with me, we need the hem edge completed at this point.
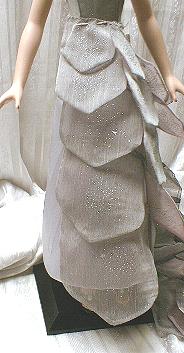
6. Pin the skirt to the doll and check the hem length - it should appear about an inch too short. The pattern is made this way to accommodate the curved openings of the bottom row of petals, so the
skirt won't show between the petals after the row is gathered and sewn on.
7. Using the hem of the skirt, and the petals themselves as your
guide, pin on a petal of each size up the front of the skirt in order
to mark the skirt with your petal sewing lines. The largest bottom petal points should overhang the hem of the skirt by about 1 inch.
Overlap the petals so that the side curve of the petal on top is covering the stitching line of the petal underneath. Mark all the
petal sewing lines with a pin so you can measure and mark all the
way around the skirt.
8. After marking where each petal row will be placed, remove the skirt from the doll.
9. using pins or a fabric marker, measure and mark your stitching lines.
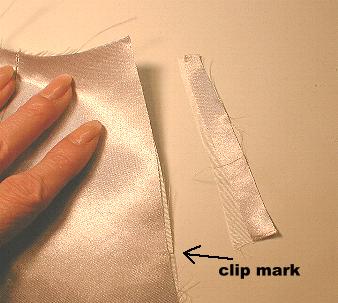
10. Aligning the edges of the skirt and lining, make a small clip
at the bottom of the skirt extension on the left side (when skirt
is viewed on the doll, from the back)*.
11. Trim the extension off.
This leaves a straight edge for the skirt back overlap of the
extension when the skirt is finished.
note*: I was taught that for any clothing overlaps, the female overlap is always left over right,
and male overlap is always right over left. I have always followed that rule,
but it is only personal choice. follow your own inclinations.
For the moment, we will leave the skirt and go back to the petals.
I will be showing you a way to gather your rows of petals
and insure that the gathering is evenly spaced all in one easy step.
We will start with the bottom row of largest petals (#5) and work our
way up.
12. Fold the skirt in half. Fold the row of petals in half.
Anchor the row of petals to the skirt
or your cutting board with a straight pin, along the marked stitching
line on the skirt.
13. Separate the bobbin threads (if you stitched your gathering threads from the top side of the petals, your bobbin threads will be on the underside).
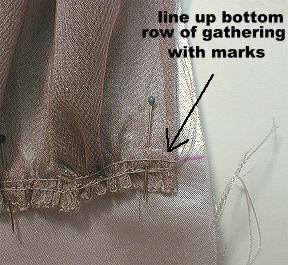
14. Pulling evenly on all four bobbin threads at the same time, gather the row of petals until it fits the marked stitching lines on the skirt.
The row of petals will be gathered down to 1/4" shorter on each end than the skirt to leave room to seam the skirt.
15. Adjust the gathers across the row of petals evenly.
16. Separate the skirt and lining. Pin the gathered row of petals
(right sides together), upsidedown to the stitching line on the skirt.
17. Stitch in place.
Follow these instructions for each row of petals up to the row of #2 petals.