Perfect Patterns
Class Style 22
Lesson 5 Part 1
HAT BANDS

(Printout 4 pages)


1. Draw the hatband pattern twice on to heavy buckram.


2. Glue the buckram to 1/8" foam or craft batting. Cut out the hatbands.

3. Iron strips of iron-on adhesive
to the fabric. This is just enough
adhesive to hold the hatbands in
place on the fabric. Glue can be
used, but sometimes shows through
the fabric.
4. Press the hatbands to the
fabric (from the fabric side).
5. Trim the fabric to 1/4-3/8"
all around.
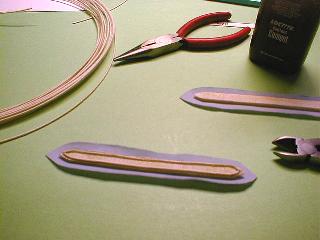
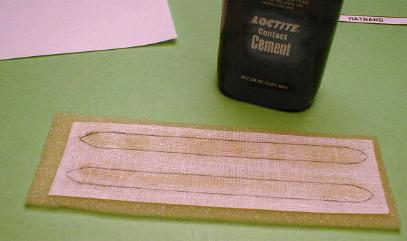
6. Cutting strips of milliners wire or
painted floral wire, glue the wire down
the center of the hatband (Gene size).
On the larger sizes you may want to do
as I show in the picture, gluing two
pieces one down each side. Curve the
ends in to conform to the shape of the
ends of the hatband.
7. Trim the fabric ends and clip the curves.
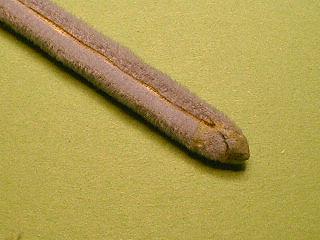
8. Brush glue down the entire length
of the hatband including the top edges
of the wires. Avoid getting glue on
the long edges of the fabric.
Fold the long edges of the fabric in
to meet in the center of the hatband.
9. Brush glue on the open ends of the fabric.
10. When the glue becomes very tacky,
almost dry, fold the ends in one
piece at a time as neatly as possible.

Hat Lesson Part 2


This page can be printed out
or saved as complete webpages (including photo's).
Instructions For Making a Desktop Folder
and Saving Lesson Pages!


You are visitor number


HOME CLASSES CLASS 22 INDEX LESSON 1 LESSON 2 LESSON 3 LESSON 4 LESSON 5 DARTS