| Kites Student Comments | |||||||||||
| Sharing Science | |||||||||||
| Kids Teaching Kids | |||||||||||
| On-Line Physics | |||||||||||
| Enrichments | |||||||||||
| Collaboratives | |||||||||||
If you would like any information on these or other collaborative programs please use the following e-mail address: send mail to kskrutvold@uswest.net.

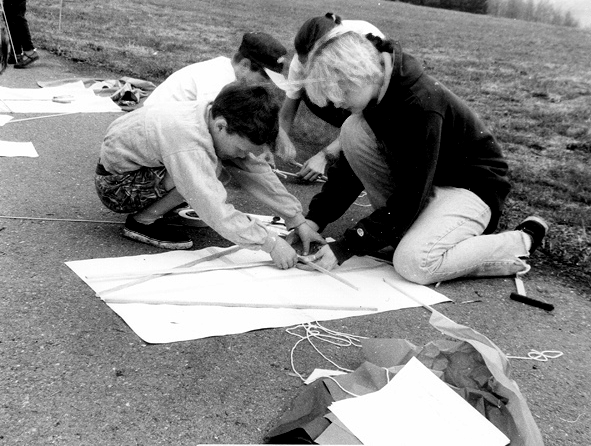
While pondering another collaborative activity with the International School of Prague's elementary first graders and the high school physics students, Mary and I developed the following Spring activity to continue our advancement in the Sharing of Science for all students. The exercise is designed to teach students about aerodynamic principles behind flight as they discuss, design, build, explore and explain the physics involved. We strongly believe this type of activity is science at its best. The students in collaborative teams of one first grader and one high school physics student must decide for themselves on a hypothesis, determine what factors to test, how to test them, and then draw their own conclusions. Through construction of their "Floating" or "Flying" apparatus, the student teams will be allowed to discuss sample prototypes, and creatively develop a plan of building and testing their design during the "Fly Day", which will take place the following day.
Making a Kite:
Kites work in a similar way to parachutes. As a kite is held into the wind, the air is squashed under it, thus the compressed air pushes the kite upward so it can fly. Kites are made of very light materials so they stay up in the air easily. Remember as a parachute falls, the air is trapped inside the "umbrella" part. This air is squashed (compressed) so it has greater pushing power than the air around. It presses up from under the parachute and pushes it upward. The push is not strong enough to stop the parachute falling but it does slow it down. Most parachutes are umbrella-shaped but some are special shapes or have extra panels to allow parachutists to steer them. This is also very true for kites. Research some of the possible designs that you might want to try, and you will quickly notice that they come in all shapes and sizes. Quickly you begin to notice that their are as many types of kites as the imagination of individuals allows, such as, tissue kites, newspaper kites, Franklin kites, kite base, fish base, triangle base, square base, bird base, city kites, carp kites, weather kites, and miniature kites.
Possible Construction?
Possible Equipment: Thin material about 3 feet x 2 1/2 feet
( 1 meter x 75 cms), thin sticks, a ball of string, sticky tape,
glue,
scissors, needle, thread
- First choose two sticks to make the framework. The exact measurements are not important but one stick must be twice as long as the other. Make a cross shape with the sticks and bind them together with string. Then join the corners with short sticks to make a diamond shape.
- Lay the frame on top of the piece of material. Carefully cut the material around the frame leaving about 1 1/2 inches (3 or 4 centimeters) all around. Fold over the material to cover the frame and sew or glue down the folds.
- Make a tail for you kite using a piece of string about twice as long as the kite. Glue or tie the tail to the tip of the kite. Then attach two strings to the long stick of the frame--one above and one below the crossover point. Join the two ends together and tie them onto the end of the ball of string.
Making the Kite Fly?
On a windy day, you can just hold your kite up into the wind. As you let go, the kite will float upward, pushed by the air. (Don't forget to unwind the string to stop the kite being pulled down again.) If it is not very windy, you can get your kite to take off by running forward into a breeze, pulling the kite behind you. As you run, air is squashed into the kite and this lifts it up!
More things to try!!
- Longer strings
- Different shapes (such as circles, boxes, trapezoids, rectangles, cylindrical wings)
- Different materials (such as plastics, cotton, silk, wool, cardboard)
- Use your imagination and creativity
- A variety of sizes and a variety of weights
- Windmill, sailboat, helicopter, fan blade, parasail and wing designs
On the Side.....
During your collaborative discussion period, you should try to formulate a number of possible designs and design variations. This will allow your team to try and pinpoint how the kite's structure affects its performance. For example, what happens if it is weighted and how is it weighted? What if you constructed weighted folds at both the top and bottom of the kite? During the discussion you should be able to highlight the construction design in such a way that you have an accurate prediction of how it will behave on "Fly Day".
During each flight, observe the kite's performance and discuss the results with your team member. What conclusions can be drawn from the activity? What physics concepts and principles are at work in the flight of your kite? Is your kite stable? What is the importance, if any, of the tail on the kite? What modifications or adjustments would you make if given the time and opportunity? Explain in as much detail as possible....
The design categories that will be considered are the "high flier", the most creative and functional design category, decorative and functional design category, the miniature category, and the gigantic category. The challenge of this collaborative task will culminate with a picnic and the enjoyment of an afternoon of flying your kites on "Fly Day".