Decorating with Balloons
Nothing packs as much color into a large area for as little money as balloons. Did you know that a fully-inflated 11" balloon has nearly 3 square feet of surface area? That's a lot of color.
So naturally, every festive occasion or party calls for balloons. But when it's just a low-key shindig for a handful of friends, or even a family get-together on the Fourth of July, you don't need to call a professional decorator. If you're like me, decorating a party with balloons can be the most fun part of the occasion! (And cleaning up afterwards can be even more fun, if you're so inclined...)
Here's a quick guide to the materials and techniques you can use for do-it-yourself balloon decor. These will just be the basics: what you do with your balloons is limited only to your imagination!
Types of Decorations
Balloon decor falls into lots of categories, from most elaborate to easiest.
- Helium decoration. These types are often best left to professionals, but helium tanks are fairly widely available to rent if you're willing to pay deposits. Resist the urge to buy the inexpensive "Balloon Time" helium cylinders available at department stores, unless you're only planning on a dozen or two helium balloons. These tanks have a very small capacity. Under the umbrella of helium decoration are several options.
- Helium sculpture. This includes such things as balloon arches, tunnels, canopies, and freestanding columns. Some of these, particularly arches and columns, are fairly easy to do yourself at home. Canopies and more elaborate designs take practice.
- Helium bouquets. The most common type of helium decoration, there is in fact such a thing as a messy bouquet, and there are a wide variety of things you can do with bouquets. These are dirt easy to do yourself, if you get the helium.
- Helium ceiling. The easiest type of helium decoration, this consists of helium balloons, with ribbons optional, inflated in such quantity as to cover a ceiling. It makes for a dramatic effect, and makes it easy for guests to take balloons with them.
- Air decoration. The most accessible and cheapest decorations there are on the market today, air-filled balloons are a staple. But too often people just tape a balloon here and there and call it "festive." We know better. Here are some ways of using balloons wisely.
- Balloon drops. Should this be classified as a decoration, or an activity? No New Year's Eve or
presidential convention would be complete without balloons showering down on people. Unfortunately, most venues just have ceilings too low to make drops practical, and nets are often frustrating to deal with. But why should professionals have all the fun?
- Round sculpture. The air-filled equivalents of helium arches and columns work perfectly well. Hang an air-filled balloon arch on the wall for a professional look, or a shorter arch can be attached to the ceiling to hang freely as a column.
- Twisty sculpture. 260, or twisty, balloons are most often used for sculpting animal shapes, but they can be used for decoration as well. They can be blown up into spiral shapes and combined for a neat centerpiece, or combined with other round balloons for other unique design ideas. Twisting animal shapes is difficult for beginners, but these balloons have many other uses that are easier to implement.
- Round clusters. Clustering is the best way to make even small balloons seem bigger and have more visual impact. Clusters can affix to walls or ceilings, or stand on tables and floors; they can also be stylized to resemble flowers, etc.
The Basics: A Short Course in Balloon Decor
This short tutorial will give you a solid grounding in the basics of balloon decoration. The rest is up to you!
Lesson 1: Balloon Pair
The basic unit of balloon sculpture in both helium- and air-filled balloon decoration is the balloon pair. Essentially this is just two balloons of the same size, tied together. Here's a method you can use that's secure.
Materials: two balloons of the same size.
Procedure:
- Blow up one balloon, with either helium or air, and tie it with any secure method you like, permanent or temporary.
- Blow up the second balloon to an identical size as the first, but don't tie it yet.
- Begin to tie this second balloon, stopping before you cinch the knot. You should have a loop of balloon neck around your fingers.
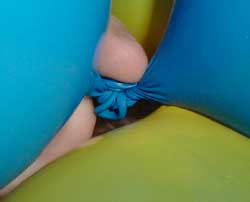
- Insert the tied neck of the first balloon through this loop, so the knot itself is just through. (See picture at right.)
- Hold the already-tied neck to prevent it from slipping out, and pull the knot of the second balloon tight.
| 

12" Uniques, fully inflated |
You'll see how balloon pairs are used later on. Right now let's do one quick example.
Lesson 2: Balloon Cluster
For free-standing clusters, small multiples of two work, from four up to eight, or more if you can manage it. For those that you plan to affix to a wall or ceiling, four or six are the practical limit.
Materials: 4, 6, or 8 balloons of the same size
Procedure:
- Blow up and assemble the balloons into balloon pairs, above.
- Cross the knots of two pairs, and twist them together to make a four-balloon cluster.
- Arrange the four balloons either into a flat arrangement if you're adding more, or a pyramid shape.
- Add more pairs to the cluster by threading their knots into the twist point of the cluster, and twisting them around other balloons.
| 
12" Uniques, fully inflated |
There are two configurations for four-balloon clusters: flat and pyramid.

The flat configuration, in which all balloons are in one plane. This is the configuration with which you should attach balloons to a line, below. | 
The pyramid configuration hides the twisted knots, so it is the best to use for free-standing clusters, or ones that get attached to a wall or ceiling. |
To hang clusters on walls, thread a loop of string or monofilament through the cluster, wrapping around the twist point. Tape the loop to the wall as close to the cluster as possible so it hangs tightly. Alternately, tie a length of ribbon into the knot of one of the balloons before twisting it into the cluster.
Lesson 3: Cluster on a String
Materials: four balloons of the same size, and a length of thin string or monofilament (fishing) line
Procedure:
- Blow up and assemble two balloon pairs, above.
- Attach the string to the backs of two chairs, or any other objects which will allow the string to be pulled taut.
- Twist the balloon pairs around each other as in a cluster, but with the string in the middle. (See detail at right.) One or two twists is sufficient.
- Arrange the cluster into a "flat" configuration, and slide it up and down the string as necessary. (Note: monofilament can slice the balloons' necks, causing leakage or popping; moistening the line before sliding balloons around on it will help.)
|  |
Lesson 4: 260-Chain Arch
Materials:
three or four round balloons, and one 260 (twisty) balloon
Procedure:
 (1) (1)
 (2) (2) |
- Fully blow up the 260 balloon, then let enough air out so that two inches of uninflated balloon remain at the tip. Tie. (If this is tough, use a pump.)
- Inflate the round balloons at least to full, and tie.
- Twist the round balloons into the 260 at evenly-spaced intervals, as follows:
- Twist a 1.5 - 2" bubble in the 260 (Fig. 1). This bubble should be neither too soft nor too tight - but err on the side of tightness. (To make a softer bubble, squeeze some air out of the vicinity before twisting.)
- Hold the 260 in one hand, pinching the twist points of the bubble together (Fig. 2).
- With your other hand, reach through the little "window" between the twists and pull the knot of a round balloon through. Pinch the knot between the twist points (Fig. 3).
- Now twist the u-shaped bubble so formed. Make sure the knot of the round balloon has been trapped in the u-shaped bubble, not on the other side of the
twist (the round balloon should turn as you twist the bubble). Use as many twists as you need to make it stable.
- When finished, twist the bubble around as necessary to hide the knot of the round balloon (Fig. 4).
- Repeat with more round balloons as desired. Twist 260's together to continue the chain to the desired length.
The twist you're actually performing is known in the biz as an "ear twist," since it's often used to make ears on balloon animals. Ear twists can be difficult, even impossible, if you either start with too small a bubble or make your bubble too tight (ear twists are notorious for popping in the line of duty).
|
 (3) (3)
 (4) (4) |
Some Tips for Success
It's the little touches that make the difference between balloon decorations that you do yourself, and balloon decoration that looks like you did it yourself. Here are some tips.
- Pick a Color Scheme. Sometimes the choices are obvious, sometimes they're up to you. Either way, having a coherent color scheme will make your decoration look more professional and well thought-out. And yes, multi-colored is a valid color scheme.
- Sizing, Part I. Make sure the size of your balloons fits the size of the space you're decorating. Small apartment, small balloons (read: nothing over 17"). Low ceiling, small balloons. On the flip side, large spaces demand at least some large balloons. Also keep vertical space in mind: if your room has an 8-foot ceiling and you're putting a bunch of 24" balloons on the ceiling, they'll be just about at eye level.
- Sizing, Part II. It's especially true of balloon arches and columns, but also in general: balloons of the same intended size should be blown up to a uniform size within one decoration. That is, all 11" balloons in an arch should be the same size (even if that size happens to be bigger than 11 inches). Professionals use templates, cardboard circles, and so on to make sure all the balloons they're using are the same size.
- Fresh is Best. Whenever possible, use new balloons for your decorations: ones that haven't been inflated too many times before (you may want to preinflate balloons once or twice to help them achieve maximum size, if that's your goal, but no more). This will ensure that the balloons are at their shiniest, truest color and predictable size. Use old, prestretched balloons for games, or informal decorations (e.g. lay them on the floor in the corner).
- Stability, Part I. Whatever method you use to attach balloons to things, make sure it's secure. Scotch tape on a spackled ceiling won't hold; helium ribbons tucked under a chair leg might fly away if someone moves the chair. Outdoor decoration calls for even more planning in this area.
- Stability, Part II. Decoration pieces, intricate or otherwise, should never be subject to unexpected popping. In particular, you might want to reconsider using badly overinflated balloons for that arch of yours, especially in a warm environment. This also means, if you expect guests to take balloons for themselves, don't attach them with any Scotch-tape on their inflated surface, since balloons can easily tear and pop when they're removed.
- Proximity Issues. Balloons don't mix with sharp objects, or extreme temperatures. Keep balloons away from the stove, any arrays of knives, scissors, or games of darts, and candles. The latter is especially common, but one balloon accidentally falling onto a birthday cake provides both a big surprise and the loss of that all-important birthday wish!
- Consider Your Audience. If you're decorating for senior citizens, I'd advise against overinflating balloons, though it might be fitting for parties of children or young adults. Try to anticipate how much the guests will interact with the balloons. If you expect lots of horseplay, consider using temporary or loose knots on the balloons, and methods of attaching them which are easily undone. Encourage guests to take balloons with them when the party's over; it's less cleanup work for you.
- Disassembly. If you want to disassemble your sculptures, arches, and clusters and retain the balloons after the party's over, be careful. Where balloon clusters are twisted together, they can stick to each other around the neck area, unless they're overinflated so that the necks space out. When clusters are taken apart, the balloons can pop, so un-stick each balloon from each other with care. The danger increases the longer the sculptures are assembled.
- Take Your Time. Rushing leads to sloppiness. Besides, nothing that's this fun should be hurried.