|
Many Uses for Concrete
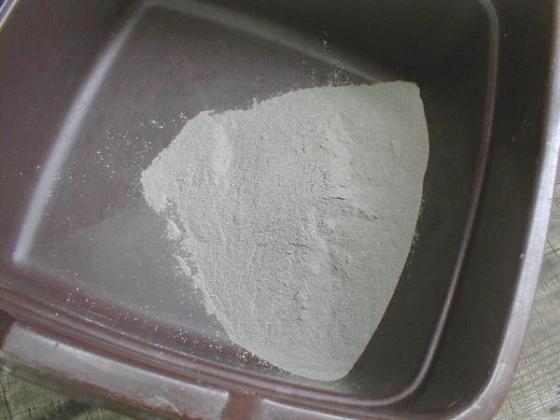
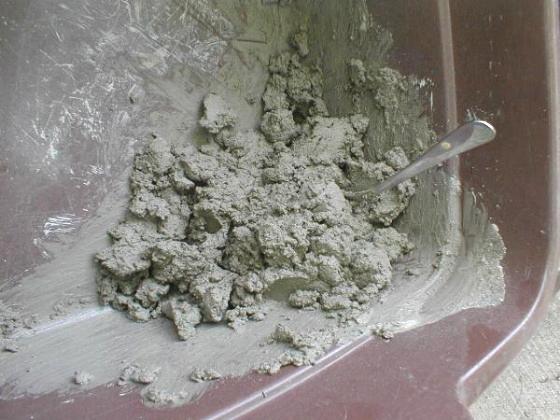
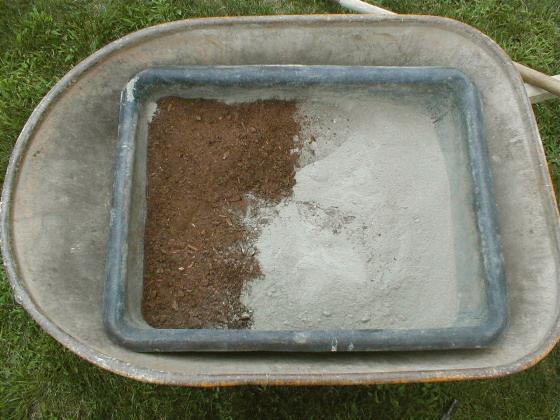
Lets begin with a simple lessen on concrete. Cement is the dry mix or wet mixture of material that when cured becomes concrete. Your sidewalk is concrete. We purchase 60 or 80 lb bags referred to as "ready mix" because it is ready to use, just add water. There are three basic mixtures. Concrete mix contains three basic ingredients - Portland cement, sand, and aggregate (stones). The aggregate will vary based on location. It can be crushed rock or pebbles. Sand mix does not contain course aggregate and is often call "topping mix" because it is used on top of concrete mix to make a smoother finish. Mortar mix is mostly Portland cement and is used to lay bricks, blocks, and stones. For our purpose sand mix and mortar mix are better than concrete mix. If you want to purchase a smaller quantity of ready mix, you may find special purpose mixes in buckets such as patching or resurfacing cements. Some craft stores have kits for making and decorating garden stones. If you want color, tile gouts come in a wide variety of colors and are available in 5 to 25 pound containers. Almost any mix will do. When water is added to the mix, a chemical reaction called hydration starts. This chemical reaction can continue for 28 days providing the mix stays wet. The chemical reaction stops when the mix dries. The concrete becomes stronger the longer the chemical reaction continues. That's why you see workers wetting newly poured concrete. Likewise, if the water is absorbed too quickly by a form, the resulting concrete may be weak. Lumpy dry mix results when dampness has caused the mix to hydrate a little and these lumps will not produce good results. Lumps that break easily are just compacted mix and are okay to use. Wet mix can be stiff (not much water used) or wet (sloppy). Generally stiff mix makes stronger concrete than wet mix. Stiff mix becomes wet mix when more water is added and can be stiffened by adding more dry mix. When mixing, be sure all the material is uniformly mixed. It should not be mixed before needed because the chemical reaction begins immediately when wetted. The wet mix when poured
on a flat surface in a lump will sag which is called slump. This was mentioned
in Tour One. Too much slump is overcome by using the mix and then letting
it harden for several hours and then reworking it. Lastly inexperienced
users will play with the newly poured cement too much. Let it set for a
few hours and then rework it if needed. Users will improve with practice.
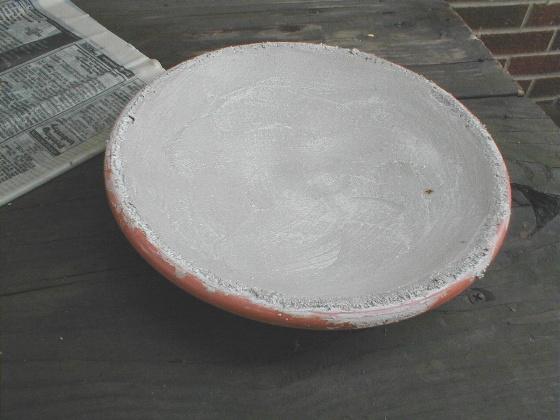
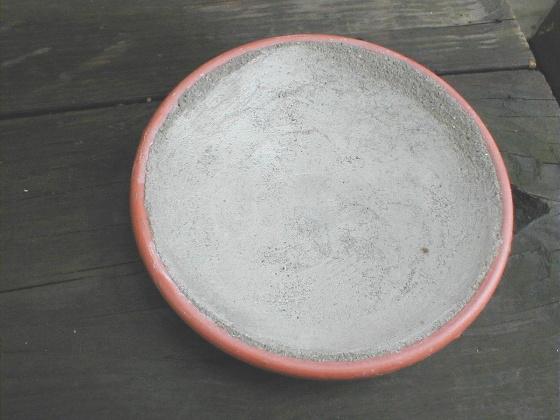
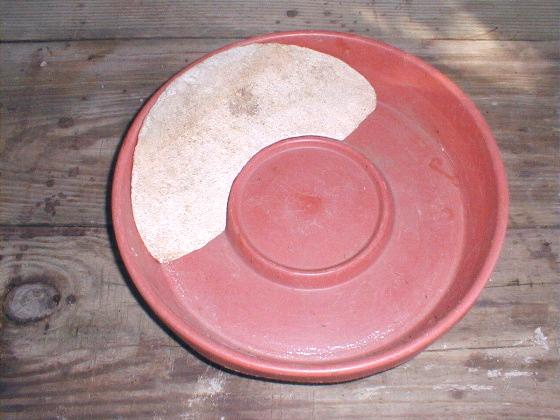
Baby Turtle Water Bowl Lets start by revisiting our baby turtle water bowl. Place stiff cement in a flower pot saucer and shape it with a spoon. Don't fuss with the edges. Set it aside for several hours and then rework it if needed. Clean the edges but don't be a perfectionist. If it is your first try, consider making several dishes. Let it harden overnight. Ruff edges and surfaces
can be smoothed by rubbing with a grinding stone, smooth pebble, or metal
spoon. Use a liberal amount of water while rubbing. Then soak it in a bucket
of water for a week to allow some of the chemicals to leach out changing
the water daily. We call this seasoning. Lastly scrub it with a stiff brush
and water.
Juvenile Turtle Water Bowl Bigger turtles need bigger bowls. We made a ramp for a bigger saucer using concrete. It is easier for the turtles to use than stones. The ramp does not stick to the plastic so it drops out for cleaning. The possibilities are
endless. You could make similar ramps for garden ponds with rubber or plastic
liners and various tubs and containers. The concrete is heavy so it stays
in place and it is easy for the turtles to climb on. It molds to any shape.
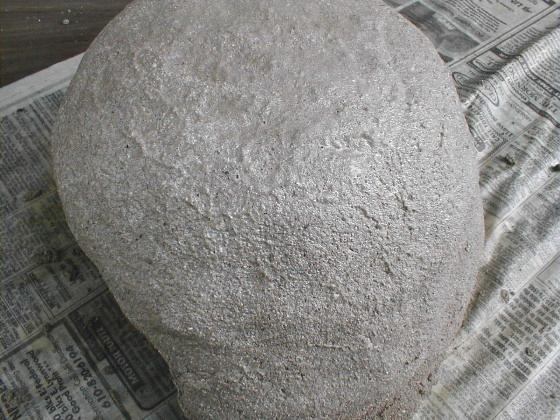
Water Turtle Hide Box Basking Rock We had a hide box we made by grinding a large hole in the side of a clay flower pot. It can be seen in Tour Nine. We also used it in water for juvenile water turtles. We wanted to make it a little higher and round the edges so we covered it with concrete. Grinding the hole was a slow dusty job. You can use plastic food tubs or balls of wet newspaper to form the interior to make similar hide boxes. We shaped it by hand and
then left it harden over night. It did not look pretty during this phase.
Then a grinding stone was used to rub the surfaces smooth. The resulting
surface is ruff enough for the turtles to climb on without being too hard
on their plastrons. With use it will accumulate some algae and stains that
will not scrub off naturalizing its appearance. It is now a basking rock
as well as a hide box that water turtles use under water.
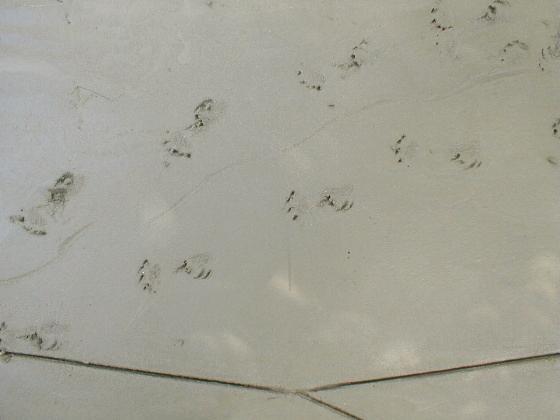
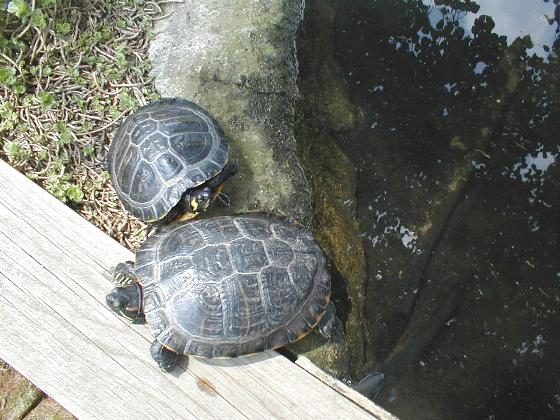
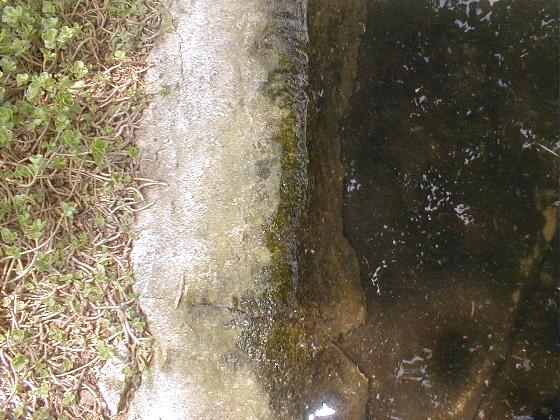
Turtle Tracks in the Sidewalk We had a dog for many years who has gone on to doggy heaven. She lived her whole life with turtles and liked them very much. She also liked to leave her footprints in concrete. On more than one occasion after we laid a new slab of concrete, she stepped on it after it was beginning to set. Just one or two footprints; no real harm done. So we would leave them. | pic 16 | About a year after she was no longer with us, we decided to extend a walkway. Her last footprint was only a few feet away. But she was not there to step in the new concrete. Good memories clashed with the current reality leaving us with an empty feeling. Our turtles were nearby and many of them were watching as they usually do. So we picked two turtles and let them walk through the concrete. Pictures were taken. It seemed a little silly at the time, but the turtle tracks complemented the dog's footprints. A year later it did not seem silly at all. If you have pets, you understand.
So if you have turtles and you lay a concrete slab, you may want to try
adding turtle tracks. Smooth the concrete and let the water drain off.
Then before it sets, allow some turtles to walk over it. Rinse the turtles
afterwards. If you don't like the results you can smooth over the tracts.
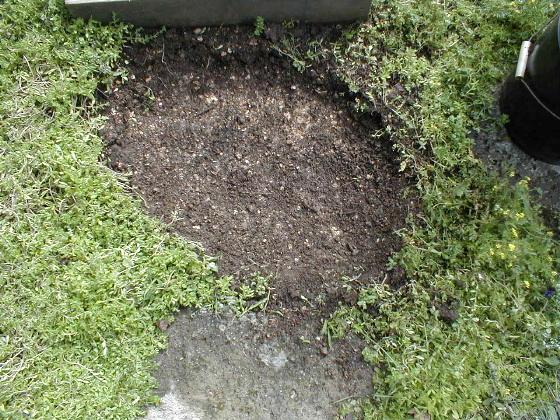
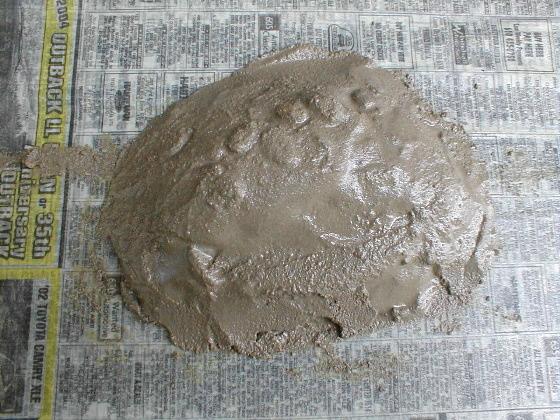
Peat Moss Mix Stepping Stones We find that stepping stones make moving about in turtle pens easier and safer. We don't want to step on any babies or buried turtles. The stepping stones are not obstacles or obstructions to the turtles. Take a look at these natural looking concrete stepping stones. These stepping stones were made by adding peat moss to the cement mix. It makes the concrete porous and darker in color. The peat moss on the surface will wear or wash away leaving the surface irregular and good for moss to grow on. In a short time it does not look like concrete at all. Use about one fourth to one third peat moss. Add the dry peat moss to the dry ready mix and mix the two together. Then add water. You can also use dirt, soil, fine mulch or potting soil. Too much peat moss will make the concrete very weak. You can also mix the concrete without peat moss and press wet peat moss or dirt onto the surface of the concrete after it is placed. This is inexpensive so play around a little to get the look you want. To form the stepping stones, scoop out depressions where you want the stones to be. The finished stones should be at least 2" thick. Let the edges and bottom of the depressions rounded. The soil underneath should be firm. Place mix in the hole taking care not to cover any turtles in the hole looking for worms and bugs. Shape it like a big mud pie. That is all there is to it. They will weather naturally. If you don't like a stepping stone, remove it and make another. These stepping stones are located in our Court Yard Garden Turtle Pen. We used some pretty weak peat moss mix to form a rain diversion channel. We just wanted to maintain the shape without weeds. It worked as intended for several years. But look what a box turtle did to it while this tour was being written. It was the big Gulf Coast
box turtle "Gulf" shown on the "Box Turtles Pictures" page. She laid nine
eggs. There were four other nests within three feet of this nest. Two painted
turtle nests were in the grass in pic 29. Another was in a well maintained
nest site used by the box turtle featured in Tour 8. The fourth nest was
in a new sandy site created for nesting. Why she chose to dig through this
peat moss concrete only she knows. We would not have even checked it for
eggs had we not seen her digging. Therein is probably her reasoning. Smart
turtle!
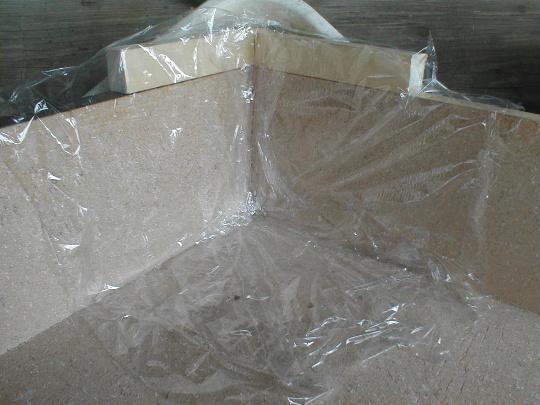
Aquarium Rocks Choosing the right rock for an aquarium can be a problem. Turtles will scratch their plastrons on rough rocks. Smooth river rocks are much better but hard to stack. All turtles are strong so stacked rocks must not pose a risk of falling on and pinning a turtle causing it to drown. Of course dirt accumulates under most rocks and rocks take up a lot of space. We have a solution to our needs. We make rocks out of concrete and stones. We use round river stones and pebbles held together with concrete to make stones that are exactly what we want - safe, functional, and attractive. Safe and functional are the important requirements. This method could also be incorporated into making any of the projects described in this tour. For an instructive example we will show you how to make a basking rock for a corner of an aquarium. For this we need a three sided wood form that is square. A rock that would fit against the side of an aquarium would need a two sided form. For the corner rock set the form in a plastic tub so that it sets with the corner down to lessen the effect of slump. Line the form with plastic food wrap to prevent the concrete from sticking to the wood. Plastic shelf liner, plastic sheet, or wet newspaper are also good lining materials. Do not use aluminum foil; it sticks to the concrete and does not peel off. When using large stones, do a dry fit first. Then set the large stones aside in the order you intend to place them. Here use a wet mortar mix. Fill the corners with mortar. Roll the large stones around in the mortar to make sure they are wetted with mortar. Then place the stones in the form with more mortar. Lastly add pebbles to the mortar and mix in. Then place more mortar with pebbles around the big stones. Use more pebbles and mortar than you need so that you are sure you have enough. Then let it set overnight. The next day carefully remove the rock from the form and place it into a container of water. Remove the plastic if it sticks to the rock. At this time the concrete will still be very soft. We cannot resist starting to play with it at this time by rubbing off some of the concrete from the rocks and pebbles. Use an old metal spoon and a small screwdriver to wear away the concrete washing it constantly. Play with it over several days always leaving it in fresh water. Wear away pebbles and mortar until you get a shape you are pleased with. Then trial fit it in an empty aquarium to be sure the corners are rounded enough to fit tightly in a corner. The last operation is to allow the rock to dry completely and then coat the sides that fit against the sides and bottom of the aquarium with aquarium sealant. The sealant will help prevent accidental scratching of the aquarium glass. For large rocks, the weight can be lessened by embedding a piece of foam in the rock as shown in pic 39. Roughen the surfaces of the foam that will be in contact with the concrete for good adhesion. Again the possibilities are endless. We made a two piece rock to cradle a filter. We wrapped the filter in plastic food wrap using the end of the wrap as a separator between the two pieces. Then we put it in the form and placed the concrete over it. You can also use items like a plastic cutting board as a permanent base to make thin islands. Remember the cost is mostly your time so you can discard pieces you are not pleased with and try again. Have fun! During the writing of this tour, the seven painted turtles shown on the "Baby Turtles Pictures" page hatched. We placed them in a plastic tray and needed an island for them. So we quickly made an island out of concrete. We placed wet newspaper on our outdoor work bench and made a concrete mud pie on it. Almost instant island! And it is completely safe and easy for the baby turtles to use. We think these baby turtles just wanted to get into the act. Garden Ponds Garden ponds are great for turtles. We have a turtle pond in a large turtle pen. However, standard instructions for installing garden ponds show covering the edges of rubber pond liners and plastic ponds with stacks of rocks. Our box turtles would have a rough time on the rocks and our water turtles need smooth rocks. You guessed it; we use concrete around our pond. We installed a rubber liner in the normal way. However, instead of rocks we placed concrete on top of the liner edge and extended it below the waterline. We free formed it with our hands. Our pond is between three trees so we expected cracks to form which did. No matter. It is far better than stacks of rocks. When we replaced this pond, we covered the new rubber pond liner completely with concrete to eliminate all the slipping and sliding. If you have a turtle pond
lined with rocks and the plastrons of your turtles are badly scratched,
consider replacing the rocks with concrete. Lower the water for the placing
of the concrete and do not refill it until the concrete is dry. New concrete
will change the ph of the water as it seasons so monitor it for a few weeks.
Treat or replace the water as needed.
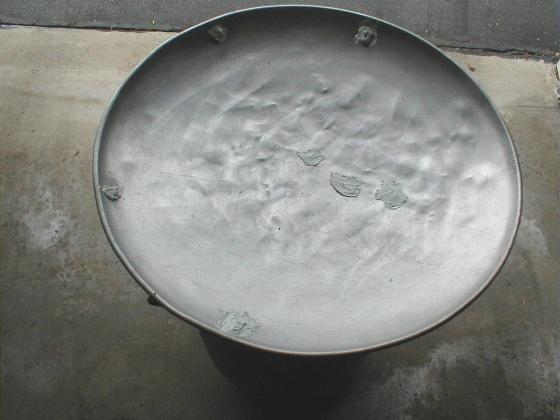
Wading Pools Box turtles and other terrestrial turtles and small semi aquatic turtles like spotted turtles who do not have a garden pond to swim in will enjoy a wading pool. There are many items that can be used as wading pools such as concrete bird baths and large plastic flower pot saucers. Of course plastic and rubber items will be slippery for turtles and bird baths may not have the ideal shape. We just had to make our own using concrete. Our technique was the same as making smaller water bowls shown above. This time we took an old aluminum saucer that was made for playing in snow. We cut off the hand straps and closed all holes with epoxy paste to make it water tight. We then used concrete to line it. After the concrete dried we rubbed it smooth by hand with a grinding wheel and water. Since the bottom was not flat, we placed the disc on a trash can while we worked on it. We made the aluminum saucer water tight because our wading pool will remain outside in the winter and freeze. So if the concrete cracks, the wading pool will not leak. The aluminum saucer is also strong and stiff which allowed us to use less concrete; completed it weighs about 40 pounds. And, the disc will not rust or crack. Besides the ideal shape and non slip surface, the pool meets another critical need - cleaning. We simply take a broom and sweep the water out scrubbing it as we do so. It only takes a minute. A little chlorine bleach once in awhile will also disinfect it and kill algae. Other items can be used such as plastic saucers and trash can lids. The bigger the diameter the better. If freezing is not a concern, the concrete could be poured in place. Use a large piece of plywood and a level to get the top level.
That concludes our Tour
Twelve. We have additional projects using concrete planned and completed
which we may cover someday. For now we hope you enjoyed our twelfth tour.
|
