Using Paint Shop Pro: Select a 60x60 area of a source image, the source
image can be a photograph or a texture you've created yourself. Once selected
choose "Selections" -- "Convert to Seamless Pattern" in the menu, this will
create a new image that is supposed to be a seamless tiling pattern.
Note: Alternatively, you can select any size rectangular region IF you take
into account the information discussed in the "Color Depth & Resizing"
section of this tutorial.
The region you select should have similar characteristics on the opposite
edges of the selection, if it does not then the resulting borders will not
merge into seamlessness in a convincing way.
The region you select needs to be well away from the borders of the entire
image, if it's not then PSP will complain. If necessary, just add border space
to your source image using the "add borders" feature.
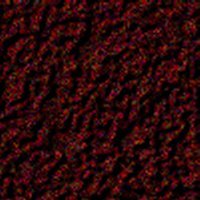
Using a large photograph of a cabin with a field of flowers in front of it
as a source, I decided to zoom into the flower field and select a 60x60 region
of it for "conversion to a seamless pattern". I chose this as a seamless
candidate because the flowers are already quite uniform, making it easy to
blend opposite edges of the selection into seamlessness.
 |
= |
 |
Upon testing this new seamless pattern I discovered it had some visible
seams, when you create a new seamless pattern be sure to test it to make sure
it shows no such hard edges when tiled. Simply start a new large image, select
the fill tool, set the pattern fill to your new seamless pattern and fill the
new image. Zoom in and see if there are visible lines in the tiling pattern.
If your fill texture is truly seamless then save it, if it needs repairing
then follow the procedure described next.
"Copy" your current 60x60 "seamless" texture to the clipboard. Start a new
60x60 image. Paste your pattern into it as a floating selection or layer,
positioning one of it's corners somewhere near the center of the new image,
then paste another one in, move it opposite of the first one and align the
corners precisely, as pictured below.
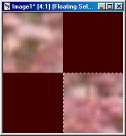
Next, paste in two more, aligning the corners precisely to fill the two
gaps that are left. What this procedure does is shift what used to be the
edges of the old image into the center of the new image, forming a
cross-section in the middle of your texture, this allows you to easily see the
lines causing your texture to show seams and also makes sure the outside edges
align perfectly. The product of this procedure is depicted in the
before image below:
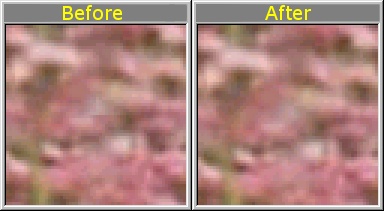
The before image depicts the lines I saw when I first tested my
seamless texture by using it in a fill. If you look carefully at the area of
the cross section and particularly at the center where all four corners meet,
you should see there is a visible line where the textures edges did not
perfectly blend. To repair this flaw just select the "soften" tool and set it
to 3 pixels, with a hardness and density of 25%. Gently stroke away the
visible lines seen in the cross section, blending them just enough to make
them disappear. You should now have a perfect seamless texture, as pictured in
the after image. Test it as a fill texture if you like and then be sure
to save it.
Admittedly, this example depicts a very faint non-aligning edge, but even
one this faint will become noticable in your finished composite textures, so
please do take the time to make your source textures perfect. Ideally, this
tiling verification technique should be used on all source textures you choose
to use, especially if they have been resized.
In the absence of the PSP seamless pattern feature you can use this edge
shifting technique to see and then blend your edges manually with your paint
program's retouch tools.