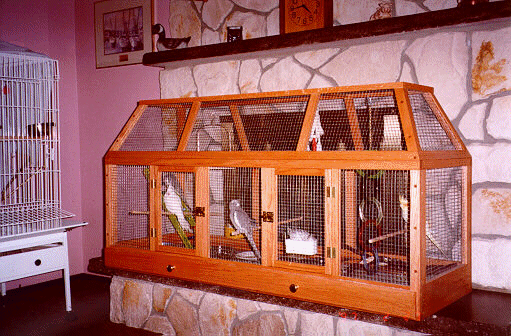
Oak Cage Comments
The second flight cage I built was made for the weaned babies to
be located in our living room in front of the fireplace. We wanted
something attractive. After looking through some cage catalogues, I
formulated a design concept in my head, put it to paper, purchased
some 3/4" thick oak board and started cutting. I have learned over
the years that these little guys cannot eat through oak, not even our
Amazon. I still had a bunch of aluminum hardware cloth left over from
my first project that I applied to this cage. With a radial saw, I
cut a groove into the framework for insertion of the hardware cloth.
I also cut strips of oak to insert into the groove to wedge the
hardware cloth in place and minimize the gap into which food and
other debris could become trapped. I made a removable (ie., pull out)
tray and a screen at the base of the cage. Also, the top is
removable. Since this structure is somewhat heavy, having a removable
top and a removable bottom tray and screen makes for easier cleaning.
All the wood on this project was given several coats of polyurethane
for rot protection and easier cleaning. We have not really had it in
use too long, but the little guys love it. Also, it will just fit
into our minivan should we want to take our birds on the road to an
exhibition or fair. This is a project for the more experienced
woodworker.
BACK TO AL'S WORK SHOP
BACK TO THE COCKATIEL CABIN