Pantry
Raisin Ideas
Raisin Ideas
Raisins are a great food to promote with kids. Did you know that they have almost as much iron by weight as ground beef or dried beans? To make the most of the non-heme iron in raisins, serve them with a food containing vitamin C, such as orange juice. They are also a concentrated source of calories, sugar, potassium, fiber, and some B vitamins.Raisins straight out of the box is the simplest recipe. Just be sure that the raisins are purchased in tightly sealed bags or boxes. Squeeze them if you can to see if the raisins are soft. If they rattle, they are dried out, and aren't as tasty, or as appropriate for little ones. For long term storage at home, keep them in an airtight container for up to a year in the fridge, or indefinitely in the freezer.
Although I can't guarantee the popularity of the following recipes,they are all good ways to include raisins in the diets of kids (and adults!)
Ants on a Log: Spread a celery stick with peanut butter, line up raisin ants marching across the top.
Trail Mix: Mix raisins into a combination of other dried fruits, peanuts, chocolate chips, sunflower seeds, puffed cereals or popcorn.
Cottage cheese and raisins: Add cinnamon and raisins to cottage cheese
Yogurt and raisins: Plump raisins in a little water on the stove, cool and add to vanilla yogurt
Oatmeal and raisins: Add raisins and brown sugar to oatmeal or other hot cereal
Raisin muffins: Add a half cup of raisins to your favorite muffin recipe. They are particularly tasty in banana, apple, or pumpkin muffins.
Oatmeal Raisin Cookies: Check the side of the Oatmeal box for a great recipe.
Baked apples: Core, but do not peel a large apple. Place in a baking dish. Fill the center with raisins, chopped walnuts, cinnamon and brown sugar. Add a little cider to the bottom of the pan. Bake or microwave until soft. Top with cream, vanilla yogurt or vanilla ice cream.
Raisin Bread: Purchase raisin bread, toast and spread with peanut butter or honey.
Raisin Bagels: Buy fresh from your local bagel bakery and spread with low fat cream cheese.
Rice Pudding:
One serving provides a 150 mg. of calcium, plus lots of high quality protein, and plenty of B vitamins.Ingredients
2 cups cooked brown rice
2 eggs
2 cups milk
1/4 cup nonfat dry milk powder
1/2 tsp. Cinnamon
1/2 cup raisins
1/2 tsp. vanilla
1/3 cup honey1. Combine all ingredients and pour into a greased baking dish.
2. Sprinkle with fresh grated nutmeg.
3. Bake at 350 degrees for 30 minutes, or until set.Raisin Pancakes: Add raisins to pancake batter
Carrot Raisin Salad: Grate four good sized carrots, add 1/2 cup finely chopped peanuts and 1/2 cup of raisins. Toss with a low fat mayonnaise. Add a little brown sugar if desired.
Baked Custard: Add raisins to your favorite baked custard recipe
Peanut butter faces: Spread peanut butter over a rice cake. Create faces with raisins, for eyes, mouth and nose.
All of these suggestions are simple ways to add raisins to anyone's diet. Have fun!!
|
|
|
LIQUID REDUCTION |
|
| honey | 1/2 - 2/3 cup | 1/4 cup | all purpose |
| maple syrup | 1/2 - 3/4 cup | 1/4 cup | baking and desserts |
| maple sugar | 1/2 - 3/4 cup | none | baking and candies |
| barley malt syrup | 1 -1-1/4 cup | 1/4 cup | breads and baking |
| rice syrup | 1 - 1 1/3 cup | 1/4 cup | baking and cakes |
| date sugar | 2/3 cup | none | breads and baking |
| molasses | 1/2 cup | 1/4 cup | breads and baking |
| fruit juice concentrate | 1 cup | 1/3 cup | all purpose |
| cane juice crystals | 1 cup | none | all purpose |
| crystalline fructose | 1/2 - 2/3 cup | none | baking |
| stevia powder | 1 tsp/cup of water | 1 cup | all purpose |
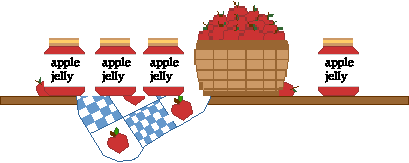
Southerners have a real weakness for sweet spreads. During the summer you'll find Southern cooks busily putting up jellies, jams, and preserves destined to lather homemade bread, to be sandwiched with peanut butter, or to be enjoyed in a slice of jam cake.
EQUIPMENT
Before you begin, check to see that you have all the necessary equipment: an 8- to l0-quart deep, heavy, flat-bottom kettle; a jelly bag or cheesecloth; a jelly, candy, or deep-fat thermometer; a timer; a jar filler or funnel; a boiling-water bath canner with a rack and lid; and jelly jars with metal rings and new lids. Jars need to be sterilized thoroughly since they won't be processed in the water bath longer than 15 minutes. To sterilize, place them in boiling water 15 minutes.
INGREDIENTS FOR SWEET SPREADS
The ingredients are simple for these tasty summer-fresh treats. Only fruit, sugar, acid, and fruit pectin are needed. Three-fourths of the fruit should be just ripe and the remaining one-fourth slightly under-ripe for the best jelled product.
The proper amount of sugar is important for achieving a good jell, so never reduce the recommended amount. Sugar contributes to the taste of the product and acts as a preservative, too. You can substitute mild-flavored honey or light corn syrup for some of the sugar, but adjustments are sometimes necessary in other ingredient amounts. If you choose to use another sweetener, be sure to check with your local Extension agent for advice.
Acid and pectin, contained in the fruit itself, are necessary for jell formation, as well. Fruit contains varying amounts of both, depending on the type of fruit and the degree of ripeness. Pectin is at its highest quality in just-ripe fruit, and acid content is higher in under-ripe fruit. If the fruit is naturally low in acid, lemon juice may be added.
Some of the guesswork as to acidity level and doneness of the cooked mixture can be eliminated with the use of commercial pectin. A disadvantage to using added pectin is that the natural fruit flavor may be masked to some extent since more sugar is needed with this product.
WHEN MAKING JELLY
Be sure to follow recipe directions exactly, and never double the recipe. Each batch should start with no more than 4 to 6 cups juice.
When your recipe calls for juice extracted from fresh fruit, prepare fruit as the recipe directs first. Then pour fruit into a damp jelly bag or four thicknesses of damp cheesecloth, and allow juice to drip into a bowl. Jelly is clearer when allowed to drip rather than being squeezed or pressed from the bag. If using a fruit press, strain juice again.
When making jelly without added pectin, it's tricky to tell when the hot fruit mixture has reached the proper consistency since it will thicken as it cools. Use one of these methods to test for the proper jelling point.
To test for doneness, dip a cool metal spoon into boiling jelly and lift spoon out of steam so syrup runs off side of spoon. When two drops of the syrup form together and "sheet" off the spoon, the jellying point has been reached.
For another doneness check, spoon a small amount of boiling jelly on a saucer and place it in the freezer a few minutes. If it jells, the mixture should be done. Be certain to remove remaining jelly from heat during this doneness test.
When jelly is done, remove from heat, skim off foam, and pour into hot sterilized jars, leaving 1/4-inch headspace; wipe jar rims. Cover at once with metal lids, and screw on bands. Process as directed. Jams and other fruit spreads that contain crushed, whole, or chunks of fruit require cooking to a slightly higher temperature than jellies, and the sheeting and freezer tests don't work for them. Follow your recipe for specific cooking directions.)
PROCESSING FRUIT SPREADS
Processing in a boiling-water bath is now recommended for all jellies and fruit spreads except for freezer fruit spreads to remove air so mold can't grow. Place jars on the rack in a water-bath canner with the water hot to gently boiling, and add additional water to reach 1 to 2 inches above tops of the jars. Cover and begin to count processing time when water returns to a boil. If no time is suggested in the recipe, process 5 minutes.
TIPS FOR PRESERVING FRUIT
Jelly or jam that is runny can be remade with the addition of lemon juice or commercial pectin. Call your local Extension agent for proportions and directions.
Jellied products should keep well at least one year if stored in a cool, dark, dry place. However, they should be used as soon as possible since flavor and quality begin to decrease within a few months.
Mold on jellied products is the result of imperfect sealing or underprocessing. Discard the jar if mold is extensive. If it only slightly covers the top, remove the mold and 1/2-inch of the product underneath.
Canning
Your neighbor just brought over a bushel of corn and some of the prettiest tomatoes you've ever seen. If you're like many Southerners, you'll want to preserve what you can't use right away by canning.Update your favorite recipes to the canning procedures listed below to ensure safety.
EQUIPMENT: Before you start canning, be sure you have the proper equipment. For canning high-acid foods, such as fruits and tomatoes, you'll need a water-bath canner with a rack. For low-acid foods, such as meat, fish, poultry, and vegetables, you'll need a pressure canner with a rack. A jar filler or funnel, jar lifter, narrow rubber spatula, and timer are other essentials.
Use only standard canning jars and lids; leftover mayonnaise and peanut butter jars aren't safe for home canning. Use jars without any scratches, cracks, or chips.
Jars should be as clean as possible. Wash them in warm, soapy water, rinse, and keep hot. A dishwasher works well for this. If the required processing time in a water-bath canner is under 15 minutes, the jars need to be sterilized by boiling in water 15 minutes. Do not use a dishwasher for sterilizing jars.
You can reuse metal bands as long as they aren't rusted or dented, but be sure to buy new jar lids each time since the sealing compound only works once. Follow manufacturer's directions for heating them prior to use. Some types of jar lids need to be brought to a boil then left in hot water; others need boiling for a certain period of time.
PREPARING FRUITS AND VEGETABLES: Produce selected for canning should be perfect-firm, ripe, with no bruisesor bad places. Wash the produce well and prepare as directed in the recipe. Meanwhile, heat water in the canner. The water-bath canner needs enough water to come 1 to 2 inches above jar tops; a pressure canner needs 2 to 3
inches in the bottom.Place fruits or vegetables in hot jars following recipe directions for cold- or hot-pack methods. Fruit maintains better texture when packed in a sugar syrup rather than boiling water. See chart on page 254 for sugar syrup directions.
It's important to follow recipe directions for leaving headspace when filling jars. Too little headspace may cause the liquid to bubble up under the lid and prevent it from sealing. If too much headspace is allowed, processing time may be too short to push all the air out and form a vacuum seal. Run a rubber spatula around the inside edge of jars to remove air bubbles. Don't use a metal utensil, since it may scratch the glass and cause the jar to break.
Wipe jar rims clean before putting the metal lids in place. Then screw on metal bands. Tightening the band onto the jar is an important step. If too loose, excess liquid will be lost during processing, and the seal will be weak. Bands screwed on too firmly may cause the lid to collapse, leaving a weak seal. The correct tightness can be achieved with the following method: Screw the band on with your fingertips until tight; then give another turn, just until the band is snug. Using a jar opener or continuing to turn the band with all your strength is probably too tight.
PROCESSING CANNED FOOD: Safety is the first word in canning, so it's essential that canned goods be
processed in a boiling-water bath or a pressure canner. The open-kettle method (placing cooked food in jars and sealing them without processing) is NOT considered a safe practice for any home-canned food.Use the boiling-water bath method for high-acid foods, such as fruits and tomatoes. The water should be gently boiling when adding jars packed by the hot-pack method. If you use the cold-pack method, add jars while the water is warm to prevent jar breakage.
Place jars on the canner rack so water flows evenly around them. Add or remove water so that it levels 1 to 2 inches above the lids. Cover and set your timer for processing time when water returns to a boil.
Low-acid foods, such as vegetables, meat products, and vegetable-tomato combinations, must be processed in a pressure canner to make them safe. The 240°F temperature obtained in this canner is necessary to kill harmful bacteria that thrive in low-acid conditions.
When using a pressure canner, be sure to allow steam to escape from the vent at least 10 minutes after closing the lid. Close the dial gauge vent, or set the weight in place on weighted-gauge models, then regulate the heat source to maintain 10 pounds pressure. The weight on a weighted-gauge model should jiggle or rock gently about three or four times a minute. Begin to count processing time after the canner reaches 10 pounds pressure.
After processing, remove the canner from heat and allow pressure to drop to 0. This will take 30 minutes to 1 hour. (Do not rush the cooling process by removing the weight, opening the vent pipe, or setting the canner in water.) Open the lid away from you, remove the jars, and allow to cool on a wire rack.
Once the jars processed by either method have cooled 12 to 24 hours, check to see that each sealed properly. You may hear them pop as they seal and feel a downward curve to the lids.
Another method of checking is to tap each lid with the back of a spoon. If the sound is a dull thud rather than a clear ring, turn the jar on its side for a few minutes to check for leakage. Leaky jars indicate a faulty sealand should be stored in the refrigerator and used right away.
If you're making several batches of the same product, it would be wise to mark each jar as to lot number. Then if you find a problem with one jar later, you can easily trace others processed at the same time. After the jars have cooled, remove the metal bands, and store jars in a cool, dry, dark, well-ventilated place.
SERVING HOME-CANNED FOOD: Provided you've followed the recommended canning procedures and used cleanequipment and surfaces, your canned goods should maintain good quality for at least one year if properly stored. However, spoiled home-canned products do account for some deaths each year, so it pays to be extra careful whencanning. Some types of harmful spoilage, such as the one that causes botulism, show no normal signs of a bulging lid or leaking jar, mold, off-odor, cloudy liquid, or spurting liquid upon opening. Because of this, it's important to boil all home-canned food in a covered saucepan for 10 minutes, and corn, spinach, and meat for 20 minutes. Never taste the food before boiling.
If you notice any of the above mentioned signs of spoilage, throw the food away. It's a good idea to burn the food or boil it before discarding to keep from spreading food toxins in any way to other people and animals.
BASMATI RICE: Grown in parts of Pakistan and India, basmati rice is a long-grain rice that can be found in brown or white varieties. Many believe that this rice is unequaled in aroma, texture and taste. Basmati rice emits a wonderful, nutty smell, and elongates, instead of fattens, as it cooks.JASMINE RICE: Originating from Thailand, jasmine rice is long-grain rice with a delighful floral scent and texture. It is scented by the jasmine flower and is ideal for Thai and Indian cooking. Cooks can enhance jasmine rice withoven-dried red and green bell peppers, lime zest or almonds. Helpful hint: Jasmine rice will soften if over-cooked or held too long.
WILD RICE: Wild rice is not rice, but plump, dark grains harvested from an aquatic grass that grows in lakes and slow-moving streams. Wild rice adds a hearty flavor to recipes and goes well with most fish and poultry dishes.
SWEET RICE: This rice is also known as sticky rice, and is often used to make rice wine and vinegar. Sweet rice is a short-grain, high-starch, opaque Asian rice, often used in sushi and common Asian dishes.
SHORT-GRAIN RICE: A popular rice in Caribbean dishes, short-grain rice is round when cooked and it's sticky. It can be paired with a variety of tastes, from black beans to citrus fruits.
Chocolate scorches easily, so always melt it over hot - not boiling - water. It is best to use a double boiler, but you can improvise by using a c or bowl in a small saucepan over very gentle heat. The water must be kept below simmering to prevent steam from curling up and hitting the chocolate. If steam gets into the melted chocolate it will immediately thicken the mixture to a stiff mass. If this does happen, however, you can rescue the chocolate by softening it again. To do this, add 1-2 tb of vegetable shortening (never use butter as it contains moisture which will cause the chocolate stiffen even more!) to the chocolate and stir vigorously. You can also melt chocolate directly over very low heat in a heavy gauge saucepan, but you must watch the mixture carefully.HOW TO MAKE CHOCOLATE CURLS;
Use a vegetable peeler with a long narrow blade and a chunk or bar of chocolate. Warm chocolate and blade slightly. Be sure your peeler is absolutely dry. Draw the peeler along the smooth surface of the chocolate.
HOW TO GRATE CHOCOLATE:
Be sure that the block of chocolate is cool and firm. Grate on hand grater, cleaning the grater often so that the chocolate doesn't clog the surface of the blade. You can use a blender, but be sure to cut the chocolate into sm pieces first.
HOW TO STORE CHOCOLATE:
Chocolate should be stored in a cool, dry place at a temperature of about 60F. If the chocolate becomes too warm, the cocoa butter rises to the surface and forms a dusty gray film known as "bloom." This "bloom" is not harmful and, once the chocolate is melted, it returns to its natural rich brown color. If you do store chocolate in the refrigerator or freezer, take in out and let it stand until it returns to room temperature before you use it in a recipe. Chocolate is very sensitive to sudden changes of temperature and you will not get the best results if you do not treat it with respect.
ANISE: Commonly called aniseed, these small, brown oval seeds have the sweet, pungent flavor of licorice. Also available ground. Use seeds in stews and vegetable dishes, or sprinkle over loaves and rolls before baking. Try ground anise for flavoring fish dishes and pastries for fruit pies.CARAWAY: Small brown, crescent-shaped seeds with a strong liquorice flavor and especially delicious as a flavoring in braised cabbage and sauerkraut recipes, breads (particularly rye), cakes and cheeses.
CARDAMOM: Small, triangular-shaped pods containing numerous small black seeds which have a warm, highly aeromatic flavor. You can buy green or black cardamoms although the smaller green type is more widely available.
CAYENNE: Orangey-red in color, this ground pepper is extremely hot and pungent. Not to be confused with paprika which, although related, is mild flavored.
CHILI POWDER: Made from dried red chilies. This red powder varies in flavor and hotness, from mild to hot. A less fiery type is found in chili seasoning.
CINNAMON & CASSIA: Shavings of bark from the cinnamon tree are processed and curled to form cinnamon sticks. Also available in ground form. Spicy, fragrant and sweet, it is used widely in savory and sweet dishes. Cassia (from the dried bark of the cassia tree) is similar to cinnamon, but less delicate in flavor with a slight pungent 'bite'.
CLOVES: These dried, unopened flower buds give a warm aroma and pungency to foods, but should be used with care as the flavor can become overpowering. Available in ground form. Cloves are added to soups, sauces, mulled drinks, stewed fruits and apple pies.
CORIANDER: Available in seed and ground form. These tiny, pale brown seeds have a mild, spicy flavor with a slight orange peel fragrance. An essential spice in curry dishes, but also extremely good in many cake and cookie recipes.
CUMIN: Sold in seed or ground. Cumin has a warm, pungent aromatic flavor and is used extensively in flavor curries and many Middle Eastern and Mexican dishes. Popular in Germany for flavoring sauerkraut and pork dishes. Use ground or whole in meat dishes and stuffed vegetables.
FENUGREEK: These small, yellow-brown seeds have a slight bitter flavor which, when added in small quantities, is very good in curries, chutneys and pickles, soups, fish and shellfish dishes.
GINGER: Available in many forms. Invaluable for adding to many savory and sweet dishes and for baking gingerbread and brandy snaps. Fresh ginger root looks like a knobby stem. It should be peeled and finely chopped or sliced before use. Dried ginger root is very hard and light beige in color. To release flavor, "bruise" with a spoon or soak in hot water before using. This dried type is more often used in pickling, jam making and preserving. Also available in ground form, preserved stem ginger and crystallized ginger.
MACE & NUTMEG: Both are found on the same plant. The nutmeg is the inner kernel of the fruit. When ripe, the fruit splits open to reveal bright red arils which lie around the shell of the nutmeg - and once dried are known as mace blades. The flavor of both spices is very similar - warm, sweet and aromatic, although nutmeg is more delicate than mace. Both spices are also sold ground. Use with vegetables; sprinkled over egg dishes, milk puddings and custards; eggnogs and mulled drinks; or use as a flavoring in desserts.
PAPRIKA: Comes from a variety of pepper (capsicum) and although similar in color to cayenne, this bright red powder has a mild flavor.
PEPPER: White pepper comes from ripened berries with the outer husks removed. Black pepper comes from unripened berries dried until dark greenish-black in color. Black pepper is more subtle than white. Use white or black peppercorns in marinades and pickling, or freshly ground as a seasoning. Both are available ground. Green peppercorns are also unripe berries with a mild, light flavor. They are canned in brine or pickled, or freeze-dried in jars. They add a pleasant, light peppery flavor to sauces, pates and salad dressings. Drain those packed in liquid and use either whole or mash them lightly before using. Dry green peppercorns should be lightly crushed before using to help release flavor, unless otherwise stated in a recipe.
POPPY SEEDS: These tiny, slate-blue seeds add a nutty flavor to both sweet and savory dishes. Sprinkle over desserts and breads.
SAFFRON: This pice comes from the stigmas of a species of crocus. It has a distinctive flavor and gives a rich yellow coloring to dishes, however, it is also the most expensive spice to buy. Available in small packets or jars (either powdered or in strands - the strands being far superior in flavor). This spice is a must for an authentic paella or Cornish Saffron Cake. Also an extremely good flavoring for soups, fish and chicken dishes.
SESAME SEEDS: High in protein and mineral oil content, sesame seeds have a crisp texture and sweet, nutty flavor which combines well in curries and with chicken, pork and fish dishes. Use also to sprinkle over breads, cookies and pastries before baking.
STAR ANISE: This dried, star-shaped seed head has a pungent, aromatic smell, rather similar to fennel. Use very sparingly in stir-fry dishes. Also good with fish and poultry.
TURMERIC: Closely related to ginger, it is an aromatic root which is dried and ground to produce a bright, orange-yellow powder. It has a rich, warm, distinctive smell, a delicate, aromatic flavor and helps give dishes an attractive yellow coloring. Use in curries, fish and shellfish dishes, rice pilafs and lentil mixtures. It is also a necessary ingredient in mustard pickles and piccalilli.
All spices should be stored in small airtight jars in a cool, dark place, as heat, moisture and sunlight reduce their flavor.
Allspice, cinnamon, cloves, black pepper, and nutmeg are available in whole form. Whole spices are ideal for foods that cook slowly. To use whole spices, place them in a cheesecloth bag for easy removal. Grate whole nutmeg before using. A special nutmeg grater is available for this job. Use freshly grated nutmeg just as you would ground nutmeg.
And Marlaina wrote: I use a tea screen instead of a cheesecloth bag. I have a tea egg that is made out of a screen material. I do this for 2 reasons, one because I can actually affix it to the side of the pot if I'm not using a Dutch oven, thereby making it easier to remove without sight, and 2 because when I do use a Dutch oven, it's easier to feel around with a spoon to find the hard thing somewhere in the food and remove it. I think it probably works as well.
The vanilla orchid is a member of the plant family known as Orchidaceae and is the only orchid that produces edible fruit. The beans grow on a thick vine that flourishes in warm, moist climates within 25 degrees of the equator. The vanilla plant begins to bear fruit when it is three or four years old. Eight to nine months after pollination, the beans are golden yellow and ready for harvest and curing.
It takes about five to six pounds of green, freshly picked vanilla beans to make one pound of properly cured beans. There are basically two ways to cure the beans: in the sun or over a fire. Using the solar method, beans are spread in the hot sun by day and wrapped in blankets and placed in wooden boxes by night. The sweating process is repeated over and over for six months, until the beans have lost up to 80 percent of their moisture content. This method produces superior results and is used in Madascar, Mexico, the former Bourbon Islands, Tonga, and Tahiti.The wood-fire curing method, used in Indonesia and Bali, takes only two or three weeks, but produces a dry, brittle bean with a smoky flavor, generally considered inferior.
When you buy a vanilla bean at your market, the black, oily, smooth pod you're buying is a cured bean. When you purchase a bottle of pure vanilla extract, you're buying beans whose flavor components have been dissolved in a solution of water and alcohol. By law, pure vanilla extract must contain at least 35 percent alcohol by volume.
Anything less is labeled a flavor. Pure vanilla extracts come in a variety of folds, or strengths. The U.S. Food and Drug Administration has established that a fold of vanilla is the extractive matter of 13.35 ounces of vanilla beans to a gallon of liquid. Strong, pure extracts, such as four-fold, are primarily used in mass food production.
What about imitation vanilla? Not only is pure vanilla expensive, but demand also far exceeds the world's supply of the real thing. Stepping in to fill the void is the chemist, who has come up with a variety of imitations made from synthetic vanillin, the organic component that gives vanilla its distinctive flavor and fragrance. Most synthetic vanillin is a byproduct of the paper industry, made by cooking and treating wood-pulp effluent. But since vanillin is only one of more than 150 flavor and fragrance compounds found in pure vanilla, the chemist has yet to match the subtlety with which Mother Nature has endowed the real thing.
How to tell a good bean when you see one. Quality is key. To truly experience all the flavor and fragrance vanilla has to offer, you have to seek out quality beans and extracts. Generally speaking, look for beans that are supple and aromatic. Tahitian beans are moister and relatively short and plump, with thin skins and a floral aroma. Bourbon beans (so called because they originate in Madagascar, Reunion, and the Comoros, formerly known as the Bourbon Islands) are slightly dryer, contain more natural vanillin, and have thick skins (the flavor has nothing to do with bourbon whiskey.) Stay away from dry, brittle, or smoky-smelling beans. Depending upon quality and variety, single vanilla beans retail from about $1.50 to $10 apiece. Vanilla beans should be kept at room temperature in an airtight container. Don't refrigerate them or they may develop mold. Vanilla beans last up to two years. Especially if you cook with it often, it is more economical to buy pure vanilla extract by the pint, or even the quart, and share it with a friend. The best pure extracts contain no caramel and artificial color and little or no sugar. Store extract at room temperature, tightly closed. It will keep up to five years.
Although beans are high in protein, 30 percent MORE proten is released if the beans are eaten with grains. Beans are a good substitute for meat, but they do lack one of the essentail amino acids, so the protein in them must be supplemented either by eating the beans with grain or corn, or with small amounts of meat, fish, cheese or eggs.
As different as they appear to be, legumes or pulses, as they are universally known, are all very much alike. They are all pod seeds from luguminous plants, each seed being made up of two sections covered with skin. When dried, either naturally or mechanically, in the pod or out of it, they have a reasonably long shelf life. All that's needed to restore them more or less to their original state is soaking and cooking. From here on it's just a matter of the cook's creativity. Beans marry perfectly with each other and with almost every other imaginable ingredient, and their essentially bland flavor acts like a sponge for foods that are more generously endowed with flavor.From the simplest dishes to more time-consuming preparations, beans are truly a miracle food for the nineties. The first step in integrating beans into your diet is to be able to tell one from another.
Adzuki Beans: These Japanese beans (always available in Asian markets) are favored by macrobiotic-food fans. They are slightly sweet and taste vaguely like fresh peas; they are excellent in casseroles and when combined with rice and other grains.
Black Beans (Turtle Beans): Similar in flavor and texture to the more familiar kidney beans, for which they can be substituted; typically used in many Latin American and Caribbean dishes; good in casseroles and when combined with rice and other grains. They are one of the best soup beans, as in black bean soup, a hearty dish that's usually laced with sherry and served with a choice of condiments, stirred in after the soup is served.
Black-Eyed Peas: An all-time favorite in the U.S. South, where they are usually cooked with smoked pork (ham hocks, bacon, etc.), and traiditonally served on New Year's Day in a dish called Hoppin' John. Black-eyed peas (they are peas and not beans) have a mild, vegetable-like flavor and firm texture. They're good as a salad ingredient or as a salad by themselves, especially when tossed with a zippy vinaigrette while still warm.
Cranberry Beans: In their dried state, they are almost too pretty to eat. They have a delicate, nutty flavor and starchy texture. They are good in soups and casseroles, and the bean of choice for New England succotash. A large portion of American-grown cranberry beans are exported to Italy where they are used in minestrone. Pinto or pink beans can be substituted for cranberry beans.
Large and Small Fava Beans (Broad Beans): A staple in Middle Eastern cooking, but not too popular here, probably because of their slightly bitter flavor, grainy texture and the fact that both large and small favas should be popped from their leathery skins after cooking. Favas are best combined with pungent ingredients and, when mixed with plenty of garlic, lemon juice and olive oil, make a tasty spread similar to hummus.
Garbanzos (Chick-peas): By either name, one of the best loved beans (garbanzos are technically peas) in the world. They have a pleasant, nutty taste that is not overwhelmed by other flavors, and an almost crisp texture. In the Middle East they are used to make the eternally popular hummus, a smooth spread, and falafel, little deep fried balls. In Middle Eastern markets you can find garbanzos toasted and salted for snacks or tossing into a salad. Garbanzos are a good contrast in spicy soups and stews, and in combinations that include peppery sausages.
Great Northern Beans: A common white bean, with a mild flavor and somewhat mealy texture, it can be used whenever white beans are called for, most frequently in soups and stews. In Europe (by other names) they are the bean of cassoulets and other casseroles, and are often served by themselves after being simmered in an aromatic broth.
Kidney Beans: Very popular with American cooks. Kidney beans are extremely eye appealing, with a meaty flavor and mealy texture, and are an essential part of the trio in popular versions of Three-Bean Salad. Although most authentic versions of chili and chili con carne call for pink of pinto beans, it's very often kidney beans that end up in the pot.
Large and Baby Lima Beans: During the Great Depression, many families survived well, if not always happily, on a diet that included lots of dried limas, which were combined with cheese, tomatoes, salt pork, molasses and other tasty but inexpensive ingredients. Limas have a starchy flavor and a creamy texture, and hold their shape well during cooking.
Mung Beans: These are actually peas with yellow flesh and green, black or brown skins. In this country, they are most appreciated after they sprout, but their fresh, pealike flavor makes them an unusual addition to salads and soups. In Indian cooking they are frequently used in spicy and curried dishes. When mung beans are dried, skinned and split, they are known as split golden grams.
Navy Beans (Pea Beans): The bean that is as American as apple pie. Native Americans introduced these common white beans to the settlers, who eventually sent them to sea to feed the Navy, hence the name. Navy beans were used in the original recipes for Boston baked beans (with molasses) and Vermont baked beans (with maple syrup), and appear in many American recipes for fresh-bean salads. After baked beans, they are best known as the Senate Bean Soup bean.
Pink Beans: In the Old West, these wre cowboy vittles, and the chuck-wagon cook couldn't have gotten along without them. They are still popular in the West, where they are included in soups and stews, and are the classic accompaniment to the famous Santa Monica Barbecue. Pink beans can always be used in place of pintos.
Pinto Beans: These are mainstays in Mexican and South American cooking, and often find themselves in the company of fiery chili peppers. They turn solid pink when cooked, and are the beans in "refried beans," a Mexican dish in which cooked beans are mashed and cooked again with lard. Pink beans and pinto beans can always be used interchangeably.
Red Beans: Except for its brilliant color, the common red bean might as well be a common white bean, since taste and texture are nearly identical. Red beans add a special sparkle to salads and should be considered for any recipe where flavor is not all that important, but color is.
Soybeans: Because they contain so much protein, these little pellets have been dubbed "the cow of the East." Soybeans have been eaten in China for thousands of years, and are used to make bean curd (tofu), soy milk, soy sauce and soy flour. Soybeans are often overlooked by Western cooks, which is a pity, since they have good texture and a flavor that is best described as a cross between carrots and nuts.
Split Peas and Lentils: Although they are not beans, these two have most of the same properties as beans and can be used in similar ways. Their big advantage is that they don't need to be soaked and they cook faster than beans. Split peas are green or yellow, and can also be found whole. Most lentils are green or greenish-brown, but there are also pink lentils, which are very pretty but lose most of their color when cooked. Both are excellent in soups and salads, and, because they cook down naturally to a puree, they make wonderful low-fat dips and spreads.
White Beans: The most common of common white beans. They have a mild flavor and a firm texture that makes them a good choice for long-cooking casseroles and soups; may be substituted for Great Northern or any other common beans.
Dry beans, peas and lentils last a long time, but not forever. Those that are too old and dry - more than a year or so - may fall apart when cooked, so purchase beans where the turnover is fairly brisk. All beans, peas and lentils need to be sorted and rinsed. Beans and whole peas also need to be rehydrated by soaking them in water before cooking, but split peas and lentils do not need to be soaked before cooking. There are two ways to do this: either by the quick-soak method or the old-fashioned way, which takes longer but makes few demands on the cook:
Step 1: Spread the beans, peas or lentils out on a work surface and sort through them, discarding any that look discolored or deformed, as well as any bits of foreign matter. (This last is especially important if the beans are bought from a bulk source.)
Step 2: Place in a bowl and cover with cold water. Remove any beans, peas, lentils or skins that float to the surface. Drain in a colander and rinse again under running water. Return to the bowl and cover with 3 parts water to one part beans or whole peas, or by about an inch. Set aside to soak for 8 to 12 hours or overnight. (Lentils and split peas need no soaking.)
Step 3: Drain in a colander. Place beans or whole peas in a heavy saucepan and cover by about an inch with cold water. Bring to a simmer and skim off all of the froth as it rises to the surface. Increase the heat slightly and boil for 10 minutes. At this point, proceed as the recipe directs. Different beans, whole peas and lentils have different cooking times. Be sure to keep the beans covered with water during cooking. Boiling (preferably) or hot water can be added while the beans are cooking, but don't add too much or they may become waterlogged.
Preparing by the quick-soak method:
Step 1: Sort and rinse dry beans or whole peas as directed in Step 1 above.
Step 2: Cover beans or whole peas by about an inch with fresh cold water in a heavy saucepan and bring to a boil. Boil for 2 minutes; remove from heat and set aside, covered, for 1 hour.
Step 3: Drain and rinse before using, as recipe directs.
Freeze Until Needed: To have beans on hand when needed, they may be cooked, drained, cooled and frozen in small containers. Thaw at room temperature for about 1 hour.
There are about 2 cups in 1 pound of dried beans, peas or lentils. As a rule, 1 cup dried yields about 2 cups cooked. Cooking times for each variety will vary depending on age and dryness. Beans are done when they feel tender and break open when gently squeezed.
Lentils, split - 20 to 30 minutes for a pureeLentils, whole - 20 to 30 minutes, 30 to 45 minutes for a puree
Split or whole peas - 30 to 45 minutes
Mung beans - 30 to 45 minutes
Large & small lima beans - 45 minutes to 1 hour
Adzuki, black-eyed peas, great northern, pink, pinto, red and white beans - 1 to 1 1/2 hours
Black beans, cranberry, kidney and navy beans - 1 1/2 hours
Large and small favas and garbanzo beans - 1 1/2 to 2 hours
Soybeans - 2 to 3 hours
Flavoured wine vinegar has been an important ingredient in French cooking since medieval times when vinegar was essential in order to keep meat edible in warm weather. In the 13th century, street vendors were granted the right to cry their wares in the thoroughfares of Paris. These cries soon became famous, and the vinegar sellers even rolled their casks through the narrow streets crying 'Garlic and mustard vinegars, herb vinegar... 'Vinaigres, bons et biaux.' They also sold verjus, the sieved juice of unripe grapes which serves to sharpen the flavour of many cooked dishes in the same way that vinegar does. It is still used in some country places and provides a means of using up green grapes unfit for any other purpose. All farm kitchens have an earthenware vinegar barrel. It constitutes another of the many country economies. After the grape harvest, a certain quantity of either red or white wine is reserved and poured into the barrel over a liquid fungus or mere de vinaigre which turns it into vinegar. The quantity drawn off each day is replaced by emptying the remains of the wine bottles into the barrel.When herbs are most pungent, just before flowering, they are cut and used to aromatize some of the vinegar drawn off. It is then bottled and used for flavouring. Owning a vinegar barrel is a privilege of which few English kitchens can boast but plain wine vinegar sold in the multiple chemists' shops can be used effectively with home-grown herbs to produce fine vinegar at much less cost than that prepared commercially.
FLAVOURED VINEGAR: Collect the number of bottles necessary, with sound corks to fit. Wash the bottles in hot soapy water, rinse first in very hot water then in cold, drain, dry and heat in a slow oven. Scald the corks in boiling water. Pour the vinegar into an enamel-lined or stainless steel pan and over a low temperature bring slowly to blood heat. It should be quite warm to the touch of a knuckle joint, no more. Add shallots, garlic, mustard seed or tarragon to the warm bottles. (If using tarragon, this should be bent double and pushed down the neck of the bottle.) Fill up with warm vinegar, cork down tightly, and place on a sunny window sill to mature for 6 weeks before use.
Most people have never tasted the true balsamic vinegar, made in the Modena district of Italy for at least the last 1,000 years, just north of Bologna! Balsamic vinegar has been thought to have soothing and healing properties, hence the name balsamic, which does not indicate what type of trees are used in the casks for aging, but rather as an adjective, describing its attributed properties. One definition of the word balsam is "healing and soothing" as in the word balm. The true balsamic vinegar is made only from the must of Trebbiano grapes, as opposed to wine vinegar which is made from grape wine. There are only about 5,000 bottles of balsamic vinegar produced each year, and each one costs well over 100 dollars.
The Trebbiano grape must, is aged in progressively smaller barrels, made from different woods, the most popular being chestnut, oak, cherry, ash, mulberry, locust and juniper. When the producer thinks the vinegar isready, he takes his 20 liter cask, and brings it to the Consorzio, where a group of experts put the vinegar through a series of 90 tests, never knowing who the producer of that particular batch was. If they approve of it, it is bottled in only one specific shape and size of barrel as dictated by the Consorzio. In fact, if it passes the tests, it never goes back to the producer, until bottled and labeled, sealed and stamped. Each bottle is numbered and entered into a large book register. The the producer can have it back, with other producers assured that what is in the bottle, is the real thing. There are two grades, the first being aged for at least 12 years, and the second grade being aged for at least 25 years. Some goes through an aging process over 100 years, and can cost as much as 200 dollars per ounce!The version we use here in the USA, is what they call the commercial or industrial version. It is not really a "balsamic vinegar" in the age old tradition, but can still be a very nice change from our standard vinegars! The Japanese make an aged vinegar from brown rice, which is also very good! Here in the USA, there is a wonderful vinegar produced in Louisiana from sugar cane. The brand name is Steen's. I've used it in the past in Creole cuisine, and it is really quite good! If I had some now, I would use it in my everyday cooking, in preference over white, or cider vinegars. Another amazing vinegar is "Jerez de la Frontera Spanish Sherry Wine Vinegar." The only place I know for sure that sells it is Balducci's in NYC at 800-225-3822. The one thing that most countries seem to have in common when it comes to vinegars, is that most people use either a low or middle quality vinegar, and have no idea of the amazing vinegars being produced in their own countries, or in other countries around the world!
All-purpose flour is a blend of hard and soft-wheat flours. The combinaton allows it to be used in all types of baked goods, as well as for thickening.
Self-rising flour is an all-purpose flour that contains added leavening and salt. It may be substituted for all-purpose flour in quick bread recipes, but the salt, baking powder, and baking soda must be omitted.Cake flour is a flour made from a softer wheat. It is used for making tender, delicate cakes.
Other types of flour include whole wheat, rye, and buckwheat flours.
All flour is presifted but it settles during shipment. A cup of flour scooped directly from the bag can weigh up to 5 ounces. It SHOULD weigh 4 ounces. To measure correctly fluff up flour in the bag or canister. Then sprinkle it lightly with a spoon into a measuring cup, scrape the excess off the top with a knife.

If you have comments or suggestions, email
us at
devriesb@vianet.ca
![]()
Webpage designed and maintained by Leilani Devries