 |
|||||||
 |
 |
 |
 |
 |
|||
 |
 |
 |
 |
||||
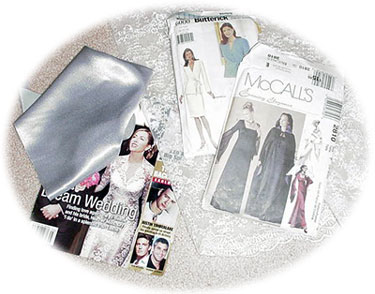
| Planning and creation of the wedding gown takes time and input from both designer and client. We start our first appointment with swatches, pictures, and drawings. At this time, we'll do some creative brainstorming, quick sketches, and take measurements. You might have the "perfect" dress in mind already and just need someone to make it a reality.
Here, my client wanted a white underdress (no pattern) with a lace overlay in a ren-style design. She had chosen her bridesmaids patterns and fabrics, her overdress pattern and some beautiful lace for her own gown. There was a slight problem.... she had two bridesmaids who were plus-size, and couldn't find appropriate patterns. As a custom clothier, I'm able to help you create clothing that will fit anyone, from petites to plus sizes. |
||||||||||||||||||||
 |
||||||||||||||||||||
| After the first meeting, we had a good idea of what she wanted and I prepared a quick sketch of my ideas for her second appointment. At this time, the bridesmaids came along and we did more measurements, finalized her gown plans and discussed what other items she would need to pick up. | ||||||||||||||||||||
| Another appointment later, the muslin dresses were ready for the bridesmaids dresses (usually necessary for plus-sized fittings) and the bride. Things fit well and I made a few more adjustments to the patterns.
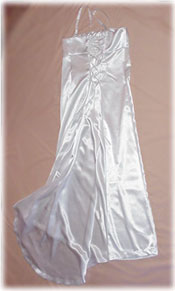
During the next few fitting appointments, we refined the gowns and marked hems. It took a minimum of 5 appointments to get the gowns done, but the bride enjoyed every minute of it. Having a wedding gown custom made will be a fond memory as anniversaries pass. I hope to have more pictures of the process later. Meanwhile, scroll down for the finished wedding gown. |
||||||||||||||||||||
 |
||||||||||||||||||||
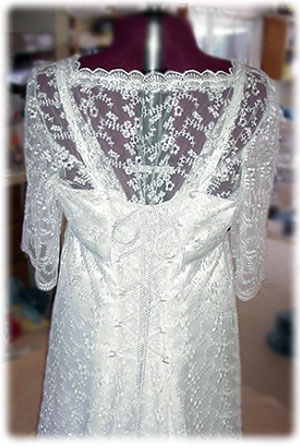
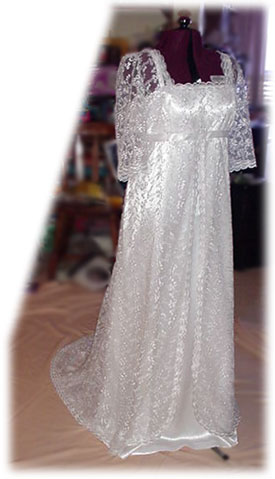
| The gown consists of two layers. The underdress is a simple empire-waist gown with ruching and lacing in the back. The overdress is made in a beautiful allover lace with scalloped edges around the train, front opening, neckline and sleeve hems. | ||||||||||||||||||||
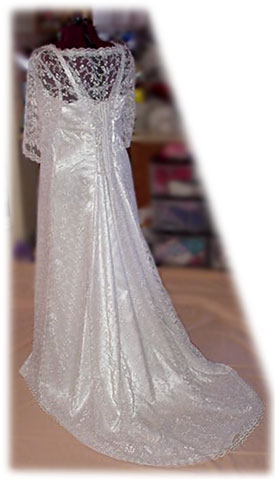
| Underdress and back view: I drafted a simple princessline empire waist dress, cut on the lengthwise grain for her underdress. In the back, there are loops and ruching to give a ren-style effect. These loops are slipped through small openings I left in the lace overdress seams. The underdress was lined only in the bodice.
The train will be removed and the dress dyed after the wedding. |
||||||||||||||||||||
 |
||||||||||||||||||||
 |
||||||||||||||||||||
 |
Finger Loop: We brainstormed ideas on how to deal with that train. It wouldn't look good bustled, and a big wrist loop in the middle would spoil the effect. There was no center back seam to hide any loops either. Our solution was to create a little finger loop in the back hem of the train. I formed a small loop using the lace border. | |||||||||||||||||||
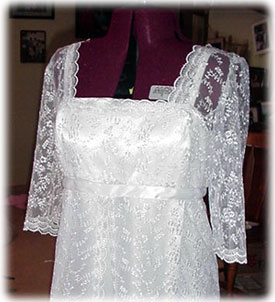
| Bodice: Lace Border was cut and sewn around the neckline using clear thread. We wanted to match the lines of the underdress straps to be parallel to the neckline | ||||||||||||||||||||
| Many hours and many fittings later, the gown is done. Of course, the housekeeping didn't get much attention that last week... so guess what I'm tending to this week! ;) | ||||||||||||||||||||
 |
 |
|||||||||||||||||||
 |
||||||||||||||||||||
| Click here | ||||||||||||||||||||
 |
 |
|||||||||||||||||||
 |
||||||||||||||||||||