|
~Birdhouse~
This tutorial assumes that
you have a working knowledge of Paintshop Pro 6.02. You can download a
30 day trial at www.jasc.com.
Open up a new transparent
image, 300X300, 16.7 million colors. This gives you enough room to
work with. You'll crop it down at the end.
Set your foreground color to
blue/teal #016695, and your background color to brown #49211F. 
Click on your preset shapes
tool  and in
the Tool Options box, select the Rectangle, Style= filled, Line width=
1, and leave the Antialias and Create as vector "unchecked." and in
the Tool Options box, select the Rectangle, Style= filled, Line width=
1, and leave the Antialias and Create as vector "unchecked."
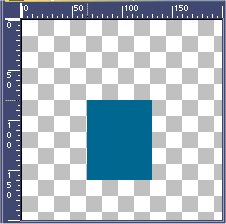
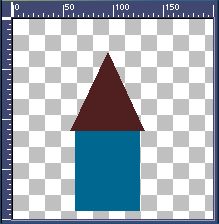
On your transparent image
make a rectangle that is 65 wide and 80 tall  .
So you should end up with this: .
So you should end up with this:
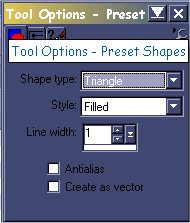
Go to your Tool Options for
the Preset Shapes again and this time choose the Triangle.
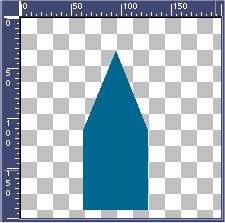
Add a new layer to your image
by going up to Layers/New Raster Layer. Then on your new layer, make a
triangle that is also 65 wide and 80 tall. .
Being that it's on a separate layer, you can use the mover tool  and move the triangle over so that it sits exactly on top of the
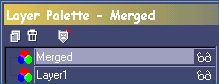
rectangle. Now you can merge the layers by going to Layers/Merge/Merge
Visible. You should now have this:
and move the triangle over so that it sits exactly on top of the
rectangle. Now you can merge the layers by going to Layers/Merge/Merge
Visible. You should now have this:
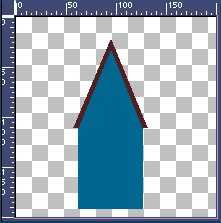
Click on the Toggle arrows on
your color palette to switch the foreground and background colors. 
Add a new Raster Layer. Click
on the Preset Shapes tool again and on the new layer draw another
triangle that is 75 wide by 90 tall. Use the mover tool to place the
triangle on top of the first triangle that you made. You should now
have this:
Now you need to switch the
layers so that the merged layer is on top of the layer that has the
brown triangle (Layer 1). So, go to your Layer Palette and click on
Layer 1 and hold your mouse button down and drag Layer 1 down over the
Merged Layer.
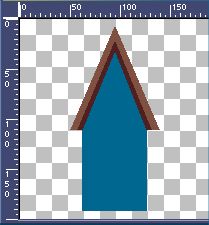
After you switch the layers,
your image should look like this:
Add another Raster Layer and
change your Foreground color to a lighter brown #825245. Select your
Preset Shapes Tool again, and on this new layer (Layer 2) draw another
triangle that is 90 wide by 105 tall. Use the mover tool again to
align this new triangle so that it sits on top of the other triangles
and the tops all line up. Now you need to drag this Layer 2 to the
bottom.
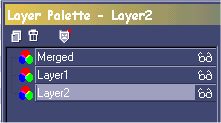
After your Layer 2 is on the
bottom, your image should now look like this:
Now you need to merge all of
these layers, so go to Layers/Merge/Merge Visible.
Now, select your zoom tool  and click on your image once. Now select your Retouch Tool
  and change the tool options to look like the image below:
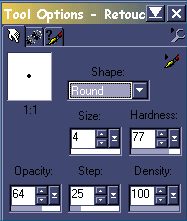
On the second tab of the tool
options select "Soften" for the retouch mode, and
"None" for the paper texture, and Sample merged is
unchecked, and Build up Brush is checked.
With the retouch tool, you
are going to blend the two brown colors together on the roof. You have
to use your eye for this. I don't know how to explain it, but when
you're done your image should look like this:

Now change your foreground to
black, and select the "Circle" in the Preset Shapes. Put a
check in the Antialias box. Leave everything else the same as above.
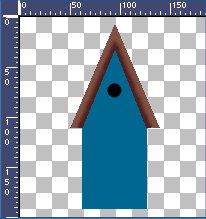
Add a new Raster Layer, and
draw a circle that is 15X15. You can use the mover tool once again to
place to black circle at the top part of the birdhouse. Mine looks
like this:
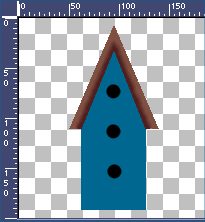
Go to Edit/Copy then to
Edit/Paste as new layer. Another circle should appear on your
birdhouse. Use the mover tool to position the second circle under the
first one. Go to Edit/Paste as New Layer again, and the third circle
should now be on your birdhouse. Move the third circle just under the
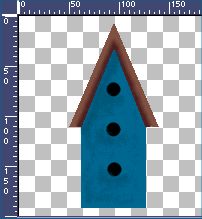
second one, so your image looks like this:
You can merge the layers
visible now. The rest of it is just decorating it how you would like.
I'll explain how I did mine.
I changed my foreground to
this color #054E6C, which is a darker blue. I then used the Air Brush
tool  and
set the tool options to the settings below: and
set the tool options to the settings below:

Then I used it to shade the
left, under side of the roof and under the black circles. The idea is
to make it look used or lived in. :o)
Then I change the foreground
color to a light gray #909292, and used the air brush with the same
setting, only change the size to 4, and I painted inside of the black
circles.

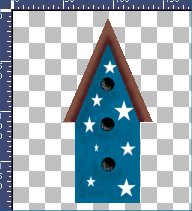
Then to add the stars, I
changed the foreground color to white and then selected the Preset
Shapes and set it to Star1. You can crop it down, and then save it as
a transparent gif or a jpeg file.
The end.
Have fun!!!
|