Bargello Design in EQ4
E-mail me for the .PJ4 file for this bargello project.(58K) More information in the Notecards.
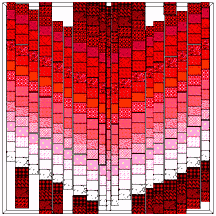
In the second image, the block is repeated in a 4 x 4 grid and partially recolored.


A plain grid, however, limits design possibility...and you would have to match all those corners....
An off-set grid is much more flexible. Note the angular quality of the first "flow" line pattern. The lower flow line uses a double set of blocks for each color, so that the amount of rise and fall can be varied. See the .PJ4 file for the construction of the grid.

This is the file JoAnn Korzenko sent me. She used 4-segment blocks in several color patterns and "stacked" them to get her color run.

So I took her idea and created a 20-segment vertical block which could be re-sized as desired and stacked as needed. The variations in both block width and vertical off-set placement give maximum flexibility for design. Fill-in can be done with the original block, clipping them to the border, or by setting single small blocks to fit (blue segments), creating a "background river" effect.
Use the Same Size tools when you need a group of identical blocks--easier than sizing them as you first draw them.
The original block was colored all white, and then the top, middle and bottom blocks were colored to make off-set placement easier. Placing and stacking individual blocks in this fashion takes a bit of time, but means that you can color a whole set of identical segments across the quilt with CTRL click...a real convenience. You could, of course, have done all the coloring first on the original block--but I was looking for versatility, here...
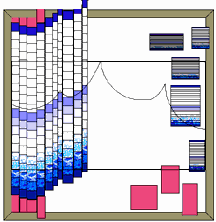
The second image is a detail, showing how the stacked blocks are allowed to overlap the border before clipping.


Planning the flow of the bargello "flame" in advance is another approach. Create an overlay block using the bezier tools to make a smooth line flow.
In layer 3, pull the block across the quilt space. In layer 1, use this line pattern as a guide for block placement.
One approach is to position one corner of chosen guide segment in the vertical block so that one corner touches or almost touches the flow line. Your eye will tell you the best vertical positioning and width of each block.
