KING'S INEXPENSIVE HALLOWEEN IDEAS
Site updated: 25 October 2024
This site has been online and updated with ideas for 24 years!!!
Find your project here.

This page has been visited  times.
 Welcome to
Kings Haunting
These ideas work and look great with dozens and dozens of photos! I will show you how to make quality Halloween, or haunted house, decorations, props, (large or small)
or throw parties that work, or cook up neat things in the kitchen, all in the most inexpensive way.
Ideal for anyone on a budget.
Prop or Decoration Help

We ran a Haunted House for six years, using many of the projects and ideas discussed and shown here.
If you want to see our props and decorations that were used then
visit us at Grand View Cabins and RV Park Haunted House;
It was located in Altamont, TN.
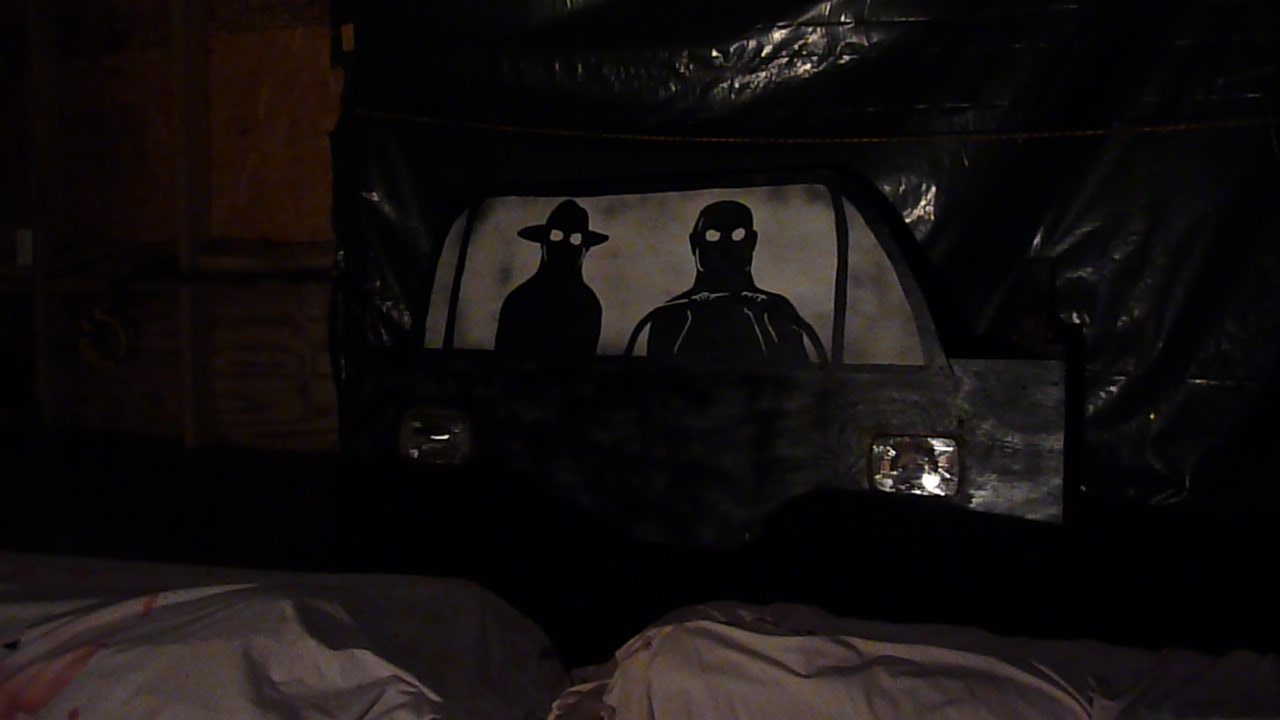
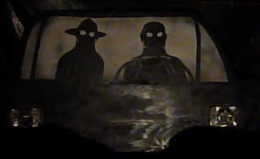 Haunted Car
This car both lights up and sounds off. It is a flat "car" used behind a set of chairs. We use this prop in a haunted house setting.
Instructions on this project, and a video showing how this prop works,
can be found at this web address on YouTube: Haunted Car
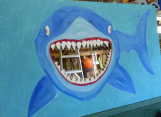 Jaws Mirror
I took plywood and painted the picture shown of the shark. I had a cheap mirror I got from Walmart and mounted this behind the teeth once the mouth was cut out with a jig saw.
To mount the mirror, we used Duct Tape along the edges, the used a staple gun to hold the tape into place.
Click here for a full sized photo.
This project was made for kids so they can see their reflected face in the Jaws mouth. Looks great, and was fun to make.
Click on the words "Jaws Mirror" above for a full sized photo of this project.
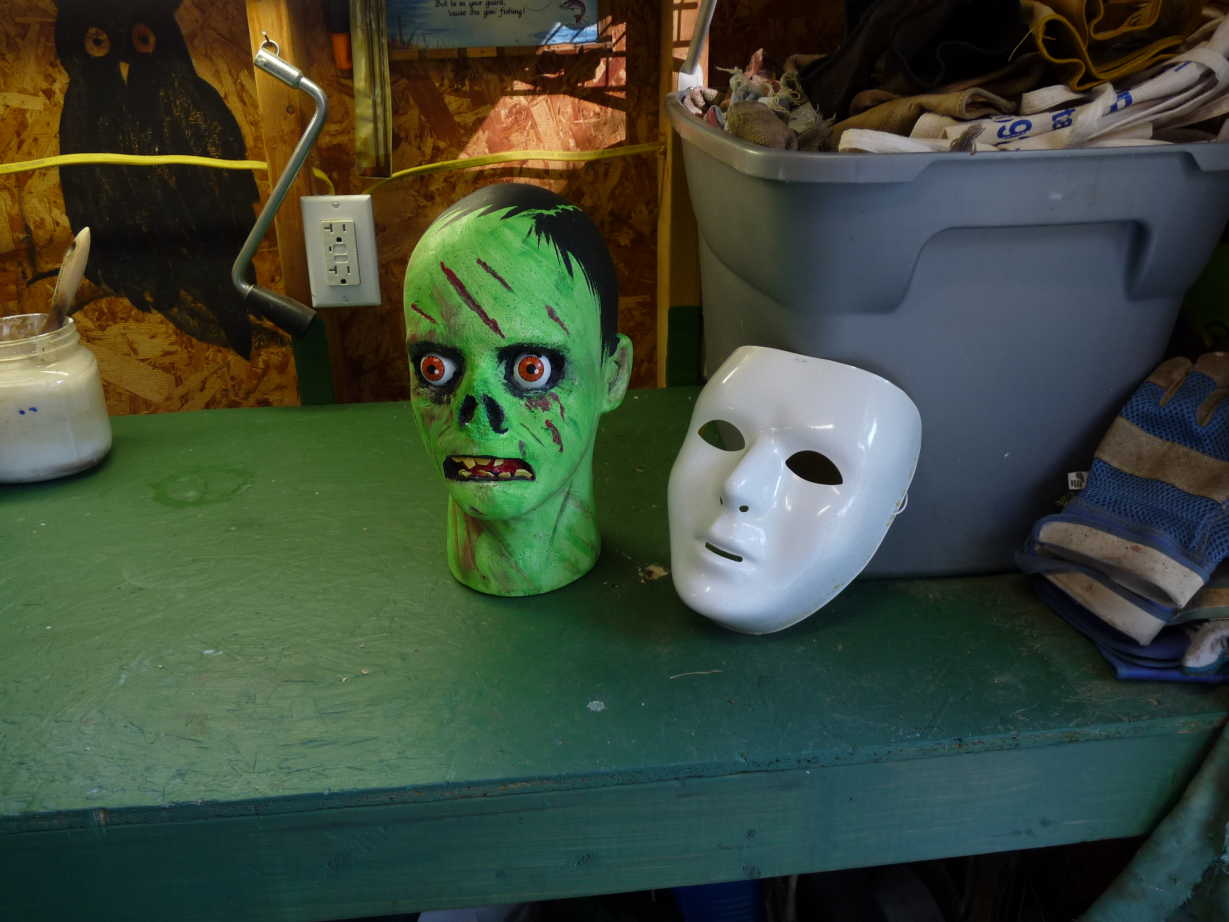
 Phantom or Zombie Head
Using the instructions below, make a Phantom of the Opera prop or Zombie out of a styrofoam male wig head.
Click on the title "Phantom or Zombie Head" for a full sized photo of the paint scheme.
Be sure to use a good primer paint (not spray primer) but brush on paint first. Cut out the eyes and insert eyes from Party City or other retailer.
For the teeth, I used an old Easter Egg. Plastic Easter Eggs are made from hard plastic. Just cut any shape teeth you want, being sure to cut a point at the base of the tooth. This way you can insert the teeth into the styrofoam mouth easily.
If you cut the teeth big enough, they will stay inserted into the styrofoam without glue.
Please refer to instructions below on making a styrofoam head.
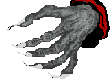
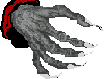
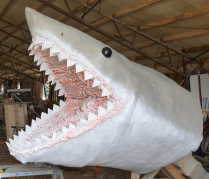 Large "Jaws" Prop
This idea is more detailed and if you want to attempt it, please email me. I will send you photos of how the frame was build. The skin is made of sheet rock tape and painted.
The photos of this prop are before final painting. The mouth is lined with "Great Stuff". A window crack foam available from Walmart, Home Depot or Lowes stores.
This prop is being used in a Haunted House.
He measures 7 foot, 2 inches tall, by 8 feet long.
Check back soon for final photo on this big fella!
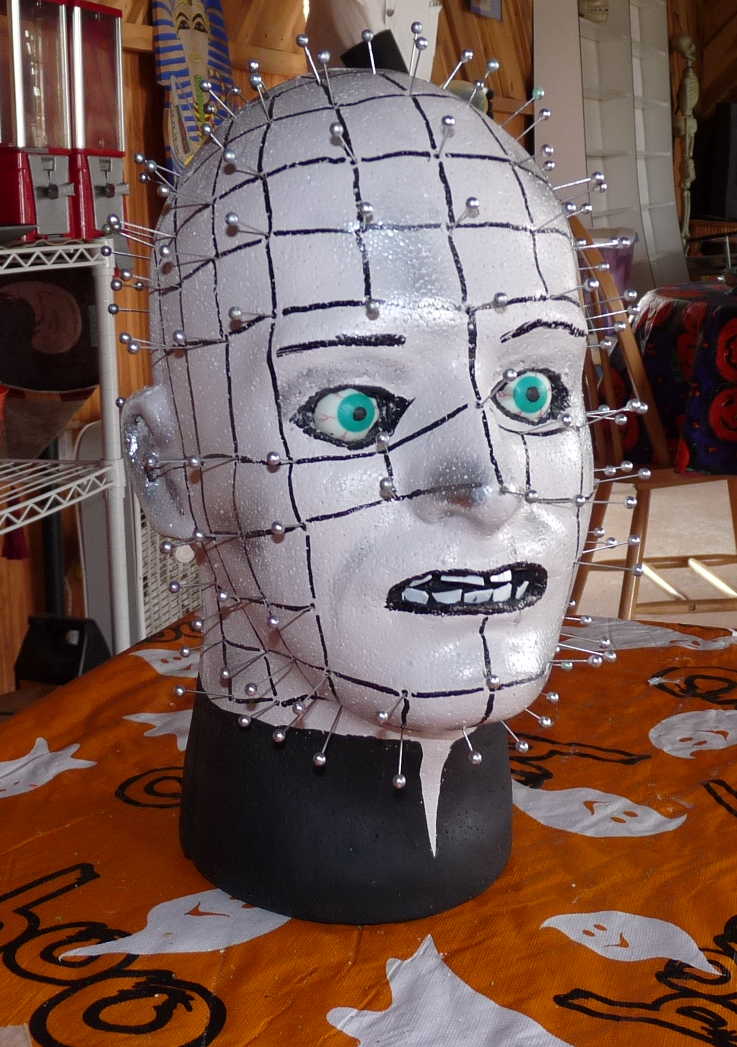
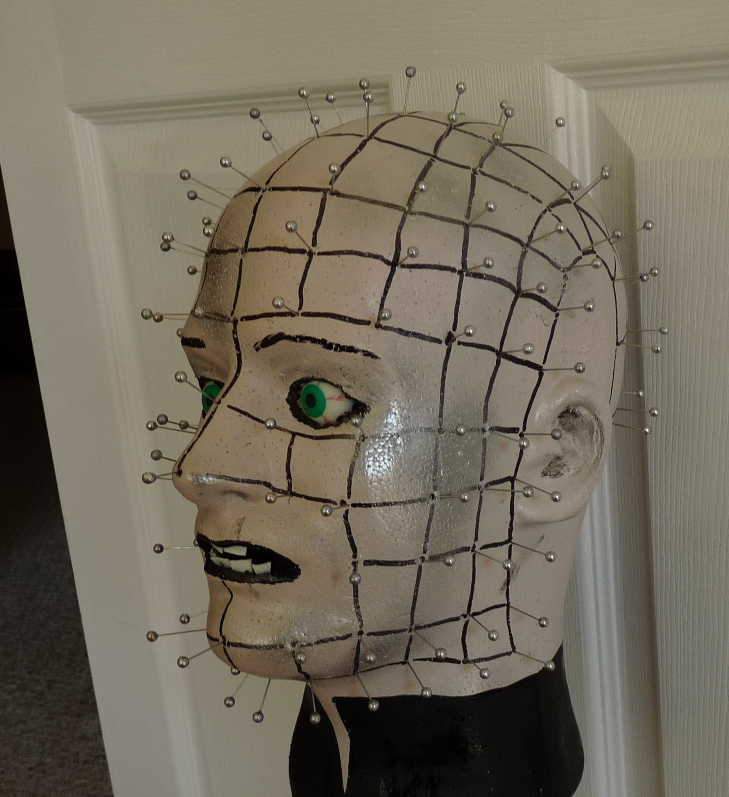
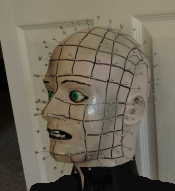 Pinhead
First paint your styrofoam head with a primer paint using a brush. Do NOT spray paint the styrofoam as it will melt. Next, using a male styrofoam head, cut out the foam on the mouth area and eyes. Insert the small rubber eyes into the areas cut into the styrofoam. I used small eye "rings" or rings with an eye on them found at party supply stores.
Paint black into the mouth area, using a water based paint. When dry, take several triangle shaped pieces of plastic and insert them into the mouth. A flat side should show so they look like teeth. I used the top of a spray paint can. I cut the teeth into triangle shapes then inserted them into the mouth.
Next, paint the head a flesh or white flesh color.
Draw a grid using photos on the head in pencil. Make sure that all lines are even and evenly spaced. Once completed use a black permanent marker to make the grid more defined, then begin inserting pins.
The pins should all be silver in color. You can paint on a collar or use fabric. I personally did both.
Click here
and here and here to see photos of the completed head.
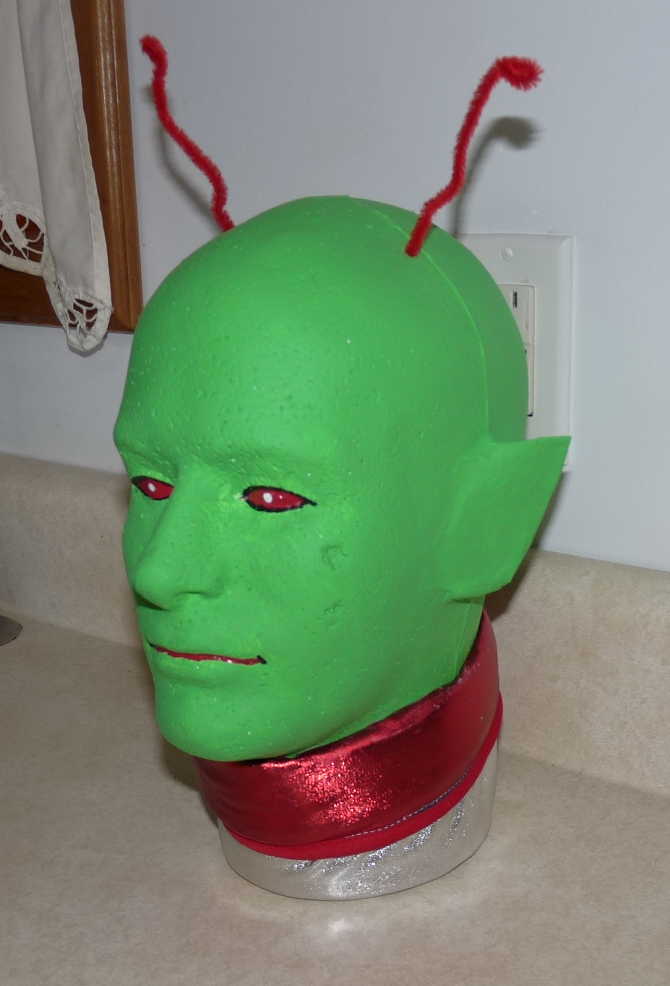
 Green Alien
This project is simple and fun for small children. Simply obtain a male styrofoam head. Use paper mache, (recipe below), to form the ears. Let the ears sit until they are dry. Next paint the entire head a light shade of green. Then add red "Fuzzy Stick" to form the antenna's. First use a nail or ice pick to form the hole in the top of the styrofoam in which to insert the Fuzzy Stick. Please note that Fuzzy Sticks are pipe cleaners. You can find them for 77 cents at Walmart stores. Use one for each alien, by cutting one stick in half.
Now you will want to add his red eyes and mouth. The easiest way to do this is to use a red paint pen, also available from hobby stores or Walmart. Or paint them on yourself. Paint some black around his eyes, and add a touch of white for the eye pupils. Click here to see another photo of the alien.
His clothing was made from an old costume, but you can find fabric of any kind to suit your needs. I simply took some fabric and added some bunting to give it some bulk around the neck. This is a fun project and comes out great due to the great contrast of colors. Use in a window or in a prop of your choice.
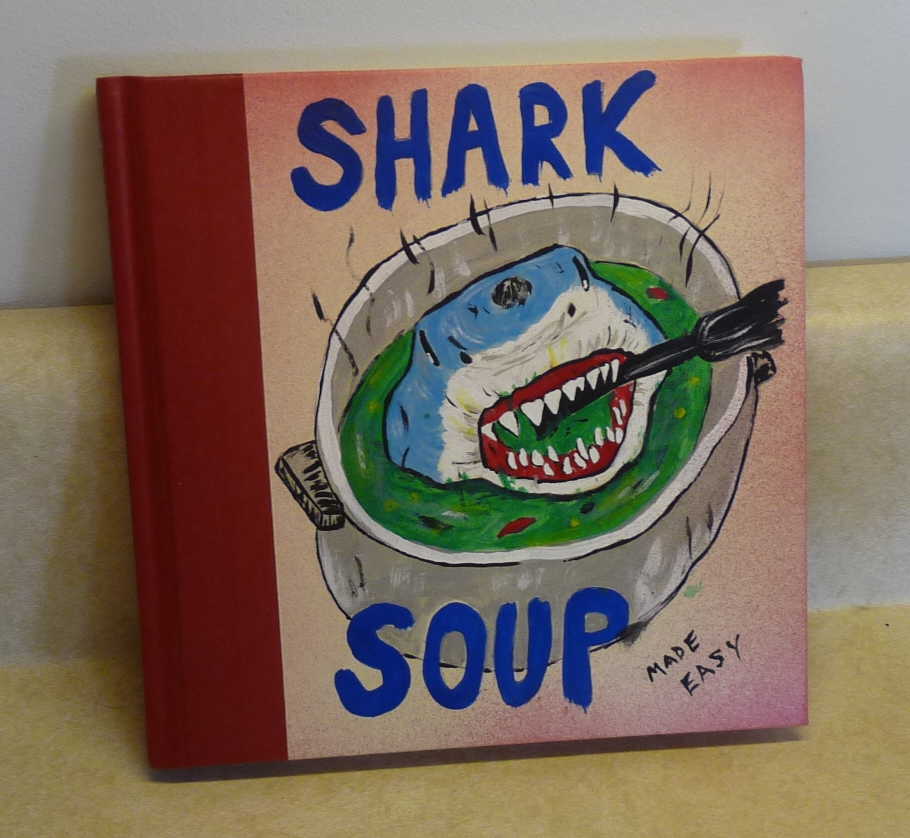
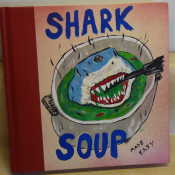 Shark Soup Book
If you have a Spooky kitchen setting, why not make books of fun things or ideas? Click here to see a photo of the front of a book that appears to be a receipt of how to make Shark Soup. But any idea will do. What you do is to find a book and remove the paper cover. Draw out your design first, in pencil. Then use acrylic or water based paints to paint the design on the book. I have done this to make my "Handbook For The Recently Deceased" books which are also shown below. You can make other books too. Other ideas I have had were for our Mad Lab. One was "Heart Surgery Made Simple" and "Brain Surgery Made Easy". Let your imagination run with this one.
To compliment the book, I bought some plastic sharks, and put them into a bowl. I added red Gatorade or Kool Aid for color. If you can get really creative, some veggies added will look really good, like cut carrots, or celery. Enjoy this fun decoration idea. Great for Mom's and kids.
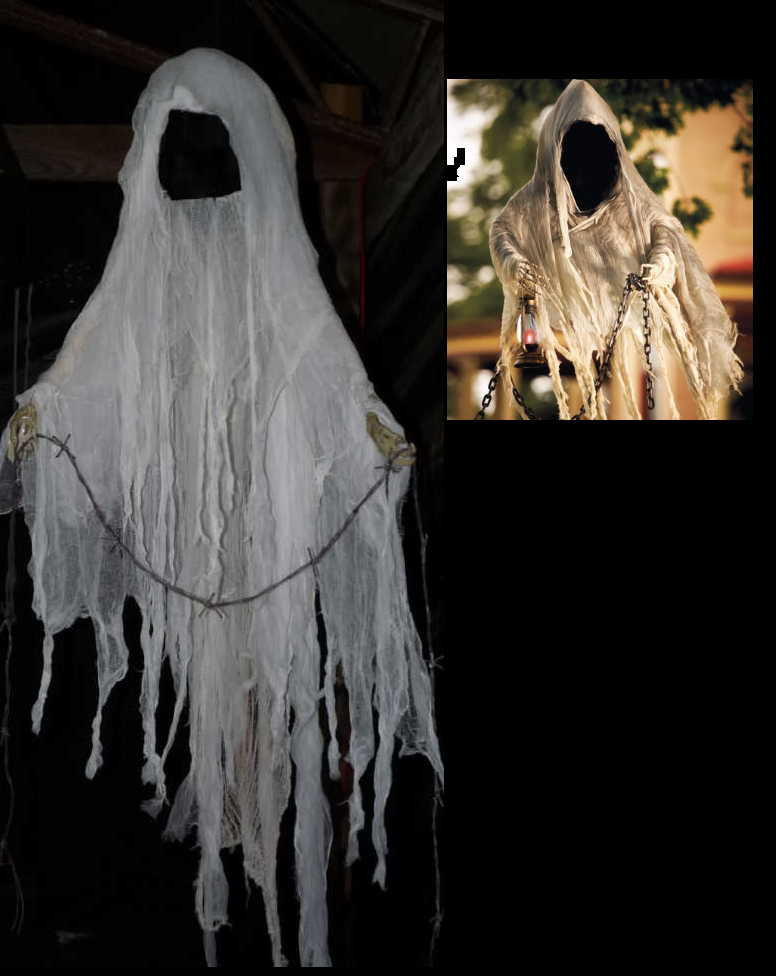
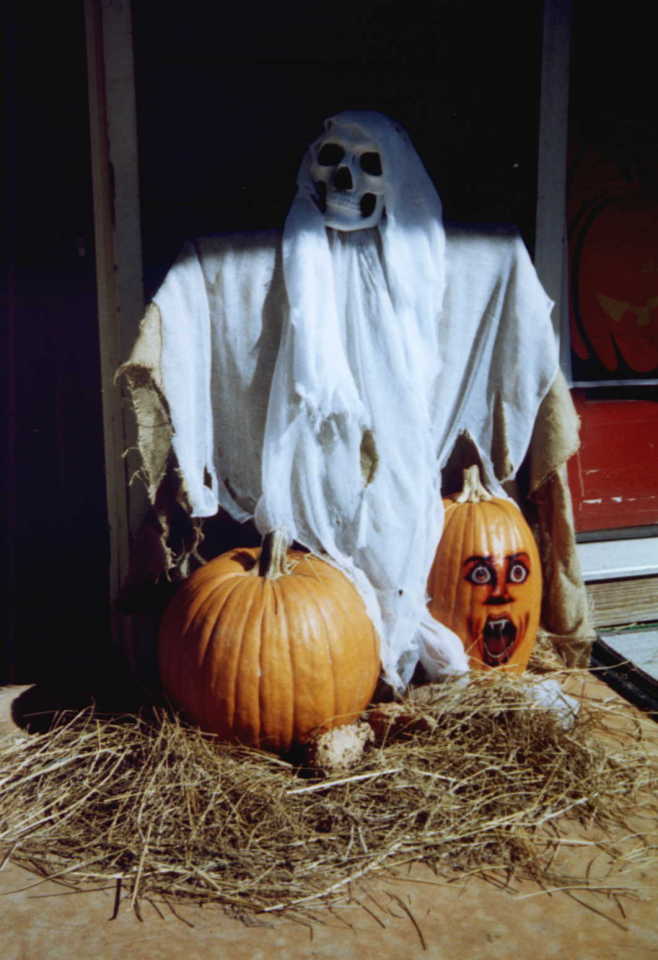
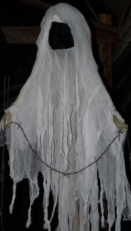 Faceless Ghost
I saw this ghost in a catalog called GrandInRoad. They called their, for purchase decoration, the faceless specter. It runs for $80. We made ours for about $7.
The photo is of both ghosts. The one we made is to the left, and the other is the catalog photo.
Take a milk jug and cut out part of one side. With the jug's spout up, add a large nut tied to a string, so the ghost will hang. Get some padding and cheesecloth and dip the cheesecloth in liquid starch. Now surround the jug with the cheesecloth, being sure to leave the hole in the milk jug showing. This will later be his face.
Use some PVC pipe, and joints to form the arms. We cut holes in the milk jugs and glued the PVC into place. We used 2 small skeleton hands we got off some Halloween glasses. Andrea Moon, a friend, wrote that she used salad tongs that were shaped like Skeleton hands and arms which she purchased from Target. Glue these into the PVC. Once the starch has dried and made the fabric solid, you can cover the opening of the milk jug, that forms the face, with paper and spray paint the inside of the milk jug black. You can do this before you add the cheesecloth too if you prefer. Now you have saved $73 and made a very neat prop.
Click here to see the faceless ghost made by Andrea Moon. Click here to see another photo of Andrea's faceless ghost.
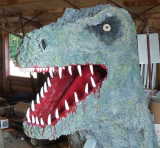 T-Rex Prop From Jurassic Park
This very large prop is made from a wood frame. We studied a small model of T-Rex and drew out the basic shapes. We then added chicken wire, 24 cans of Great Stuff, spray and hand paint. The eyes are made from small plastic cups, with the eye painted on the inside to allow for the glossy eye effect. The teeth are actually plastic jalapeno peppers, I purchased from a hobby shop. This prop is one of the more complex props. I have only seen one other prop like this, and it is an ambitious project, but well worth the time and effort.
Much more simple and less expensive ideas are listed below. Click Here to see another photo of T-Rex.
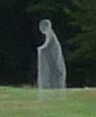 Chicken Wire Ghost
I recently saw this project on HauntProject.com. You form a person's face and folded arms then put it far from where you will be viewing it. It is amazing how well it works and how it will last. NO weather issues here.
To form the body we actually wrapped my neighbor in the wire, slowly got her out and then formed the nose, chin, head and arms. Note: We experimented using a 6 foot tall man and a 5 foot 3 inch woman. The smaller ladies form works much better. The taller the wire form, the harder it is to stand and be seen. Be sure you take small wire to hold the parts together and more wire or fasteners to stake the form to the ground.
For this project to work best, you need to place or stake it down against a dark background. As shown in the photo.
Clich here for another, closer and better, view.
Small Alien
Great small project. This smaller version of the Alien from the movie, "Alien" and "Aliens", took me a few days to complete.
You will need a small plastic skeleton. Put paper mache on the skeleton to give it some bulk, and the head is made with 2 liter bottles. I spray painted the entire thing black. Write for details. Click here to see another photo of the finished alien.
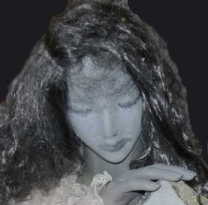 Lonely Bride
Made from a styrofoam head, this easy prop was made by painting the head gray. I used a darker gray for the mouth and eyebrows. I got the hands for $10/pair at Party City, and the gravestone is made from a large styrofoam block. I used gray primer paint, brushed on. Note: Do not use spray paint on styrofoam. It will melt the styrofoam.
Witches Caldron
The details for the witch can be found below. Her caldron is made from a plastic caldron, easily found at Walmart for around $1 for a small caldron. Use "Great Stuff" for the material in the caldron. Just spray it in, as it will expand to the sides of the caldron. Spray paint the top of the Great Stuff material a flourescent orange, to give it the glow. When dry, glue in fingers, spiders, or whatever you like.
Gort With LED Lights
Making a "Gort" (from the movie, "Day the Earth Stood Still" - 1951) is explained below. We used the duct tape method for the body. He is supported by PVC pipe and hung with wires. The PVC pipe is in a "T" shape on the back and duct taped into place. We used some old rubber boots, spray painted silver. An old motorcycle helmet finished off the head. We then used a LCD light inside the helmet for the glowing "laser".
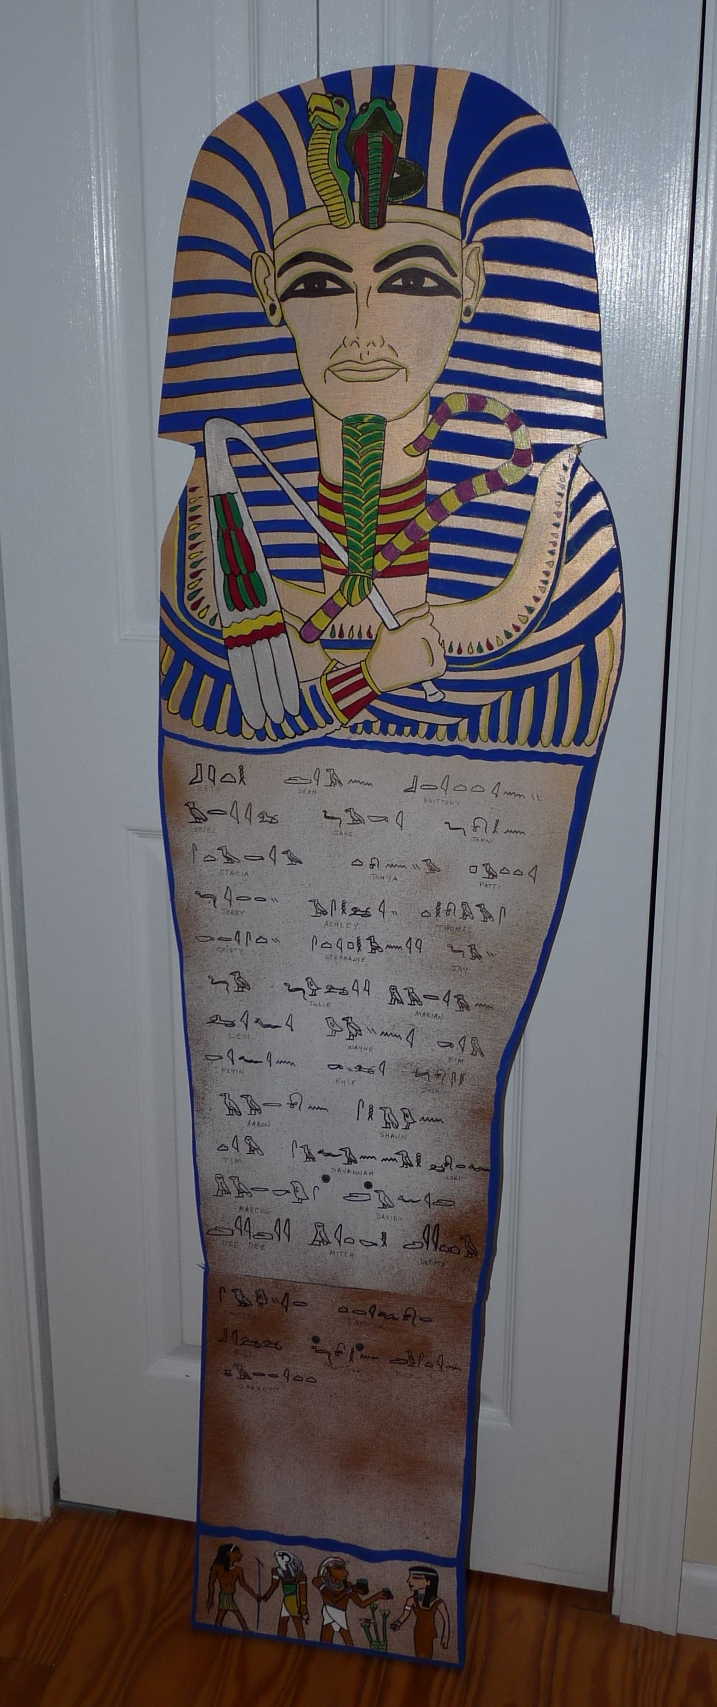
 Mummy Mould
We made this mummy of our son, Chris, using the duct tape method as well. See details below. After stuffing the shell, we spray painted him white with some gray spray paint lightly sprayed on top. Add some light green or tan for added effect. Makes a great mummy prop!
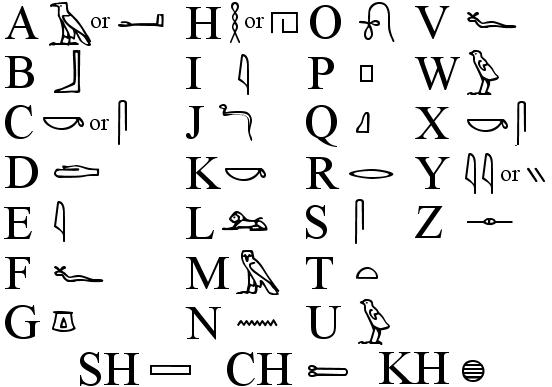
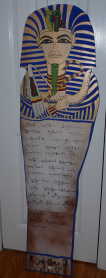 You can build a Sarcophagus for this prop. I used a nice sheet of plywood, and cut the shape with a jigsaw. I then wrote all the names of the kids who help us in our Haunted House on the Sarcophagus in Egyptian Hieroglyphics. Click here for an illustration of each English letter and it's Egyptian Hieroglyphic letter.
Click here to see how the Sarcophus came out. It was super fun to paint.
Alien Abduction Lamp
Executioner
This photo is of an executioner prop. The photo at right is from an ad for a prop on sale at Spirit Halloween stores. It retails for $150.00. We made ours for around $4.00.
The prop is made with a wood 't' shaped frame. Explained below in more detail. The mask is draped over an old oil jug. The clothes were all purchased at Goodwill, and the leggings were made from an old brown blanket which is pinned behind the legs.
The Spirit prop does talk. Ours does not, but it's still a great prop and easy to make. Click here for another view of the executioner prop. Many, many details below on making props of all kinds.
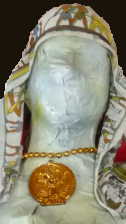
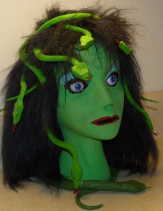 Medusa or Gorgon
I made this Medusa, or Gorgon head, from a styrofoam wig head. I painted her using acrylic paints. You can get these in large bottles, for around a dollar a bottle, at Walmart. Below on this website I have a link for styrofoam heads. A female head runs about $4.00. Then I used an old black wig and toy snakes I purchased at Walmart. The snakes were about a dollar each. I used pins attach them to her head. See below on how to make the rest of the prop's body. Click here and here to see more photos of the Medusa.
Halloween Bottles
I made these labels on the computer and printed them on matte white sticker paper, available at Staples office stores, or other office stores, for around $9 for 30 sheets. Print the labels and put them on different bottles. To make them look better, lightly use spray paint around the bottles and very lightly in the stickers. Click here to see more bottles using this method.
Click here to see labels you can use on boxes that children can touch and feel. Use corn, painted white, for teeth. Spaghetti for guts. Wood bark for skin. White rice, slightly wet, for worms. Wieners, cold or frozen, for fingers.
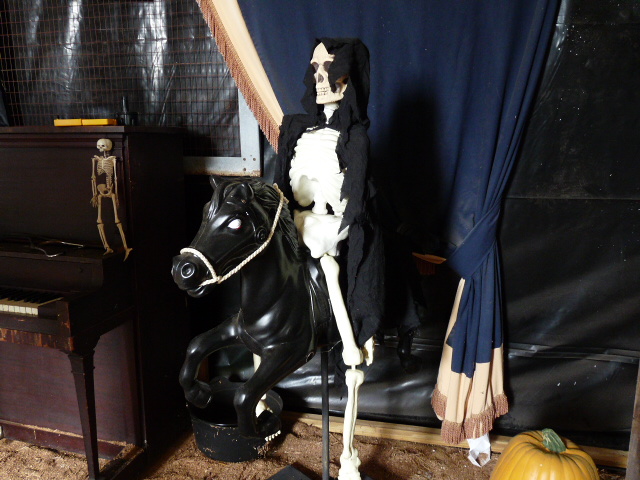
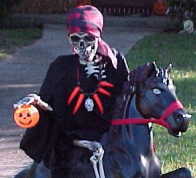 Horseman
Create this neat prop by using a child's horse. Paint it all black, eyes painted white, and stick a skeleton on the saddle. Then attach real roap to the face and use a child's size grim reaper costume. Look below for another and different horseman.
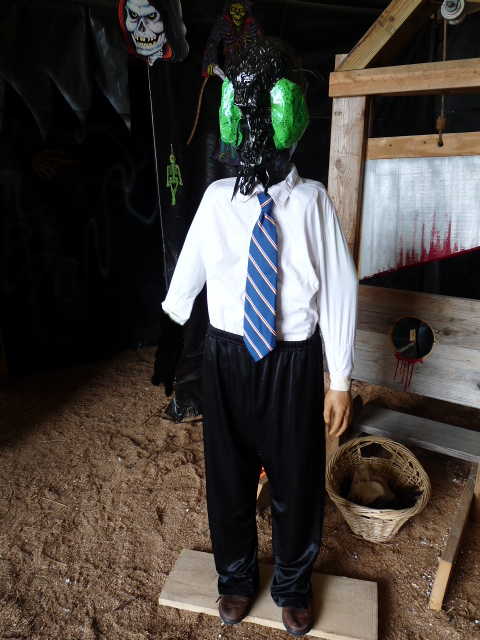
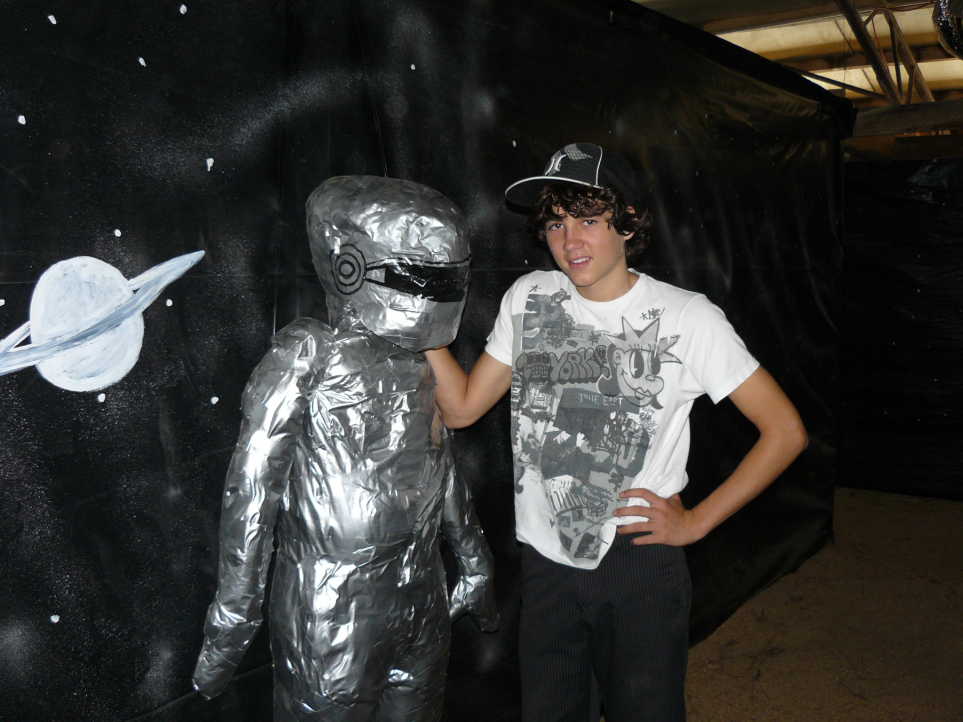
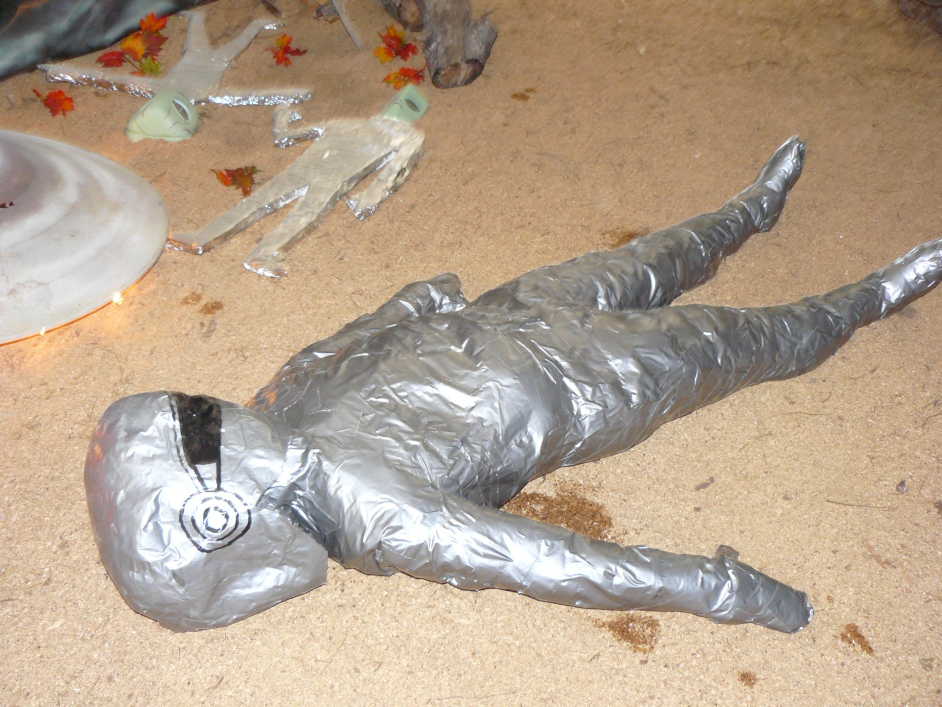
Astronaut
This prop was made from pvc pipe, an old sweatshirt, old leather gloves painted white and the head was made from styrofoam. I used red tape for the stripes. He hangs well from the ceiling because the pvc is quite strong.
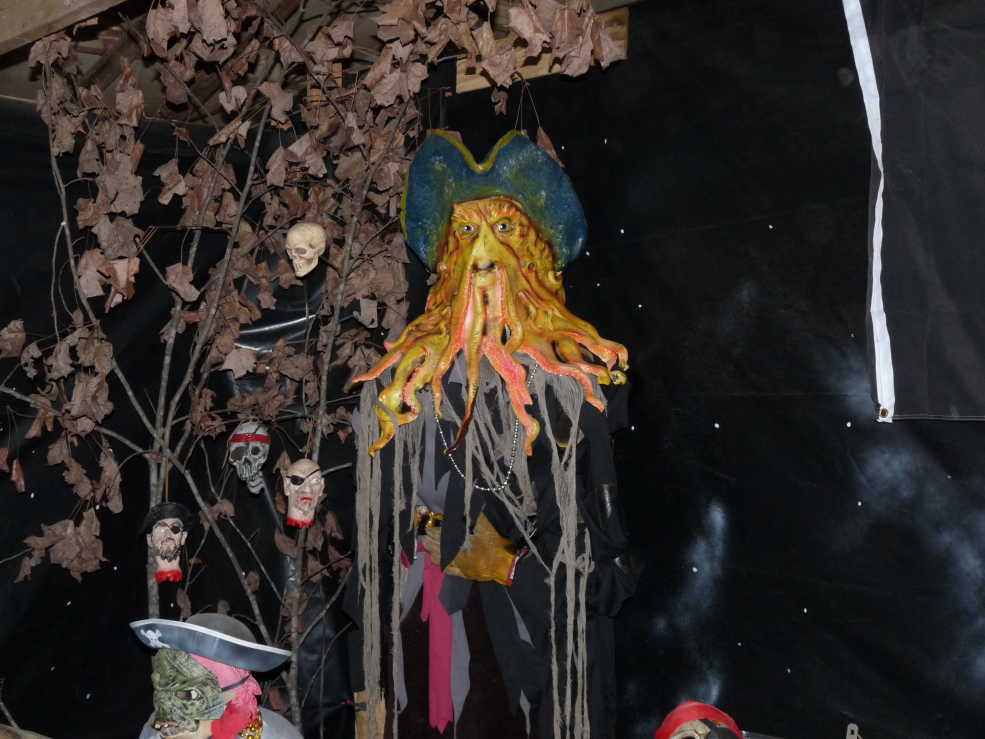
Octopus Man
From the movie, "Pirates of the Caribbean" we created this prop from an old mask and old clothes. The support underneath is simply a "T" shaped frame of boards. Add padding such as paper or stuffing to give the costume bulk.
"The Fly" from the 1958 movie.
This prop is made of paper mache over a bleach jug. The eyes are painted with glitter. The frame is made of 6 milk jugs put together with paper mache and the legs are pvc pipe. Click here for another view of the "Fly" with lab coat.
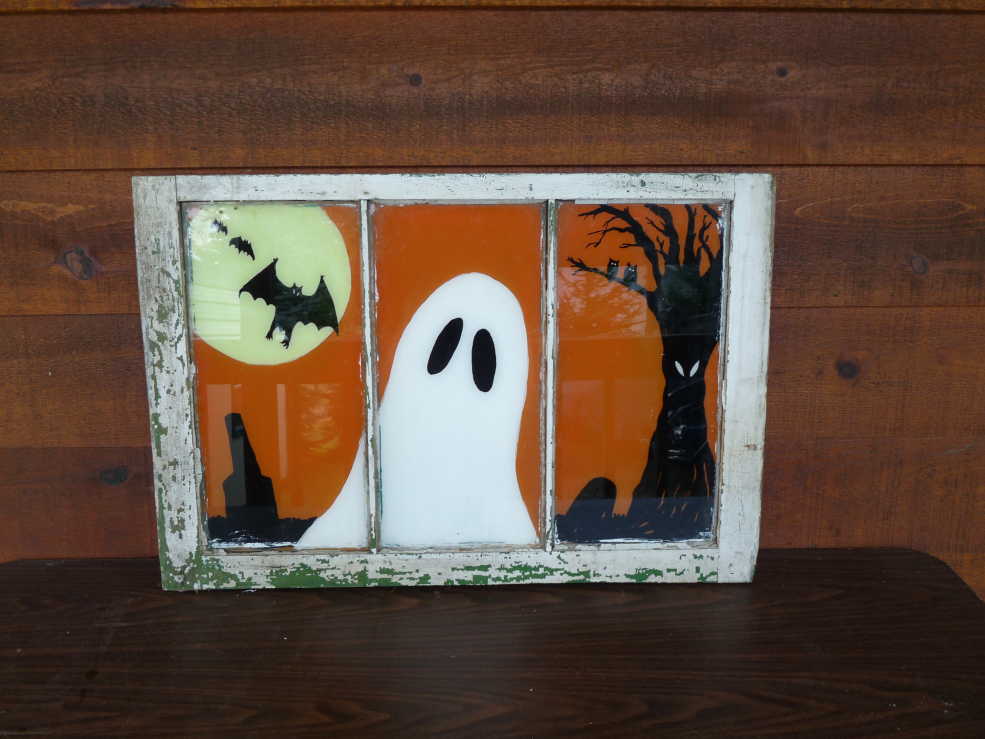
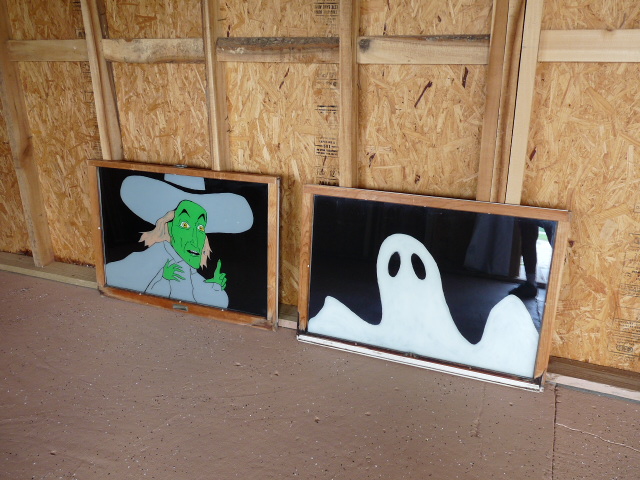
Ghost Window
Simply take an old window and paint the figures on it. Then spray paint the back orange or black depending on the picture you paint. When you hang this off a wall it looks like a real window.
Witch and Ghost Windows
Same as the Ghost window above.
Saucerman
Saucerman from the movie, "Invasion of the Saucermen". This prop is made from a milk jug covered with paper mache to form the head. Then it is painted and set to dry.
 Swamp Creature
Made with a styrofoam head covered with 'Great Stuff' window insulation spray. Click here for another view of the swamp man. Click here for another view with finished background of the swamp creature.
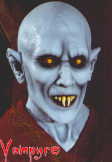
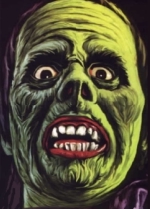
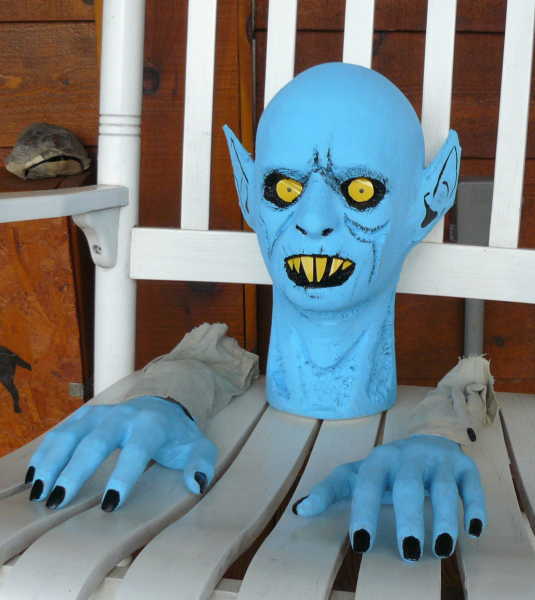
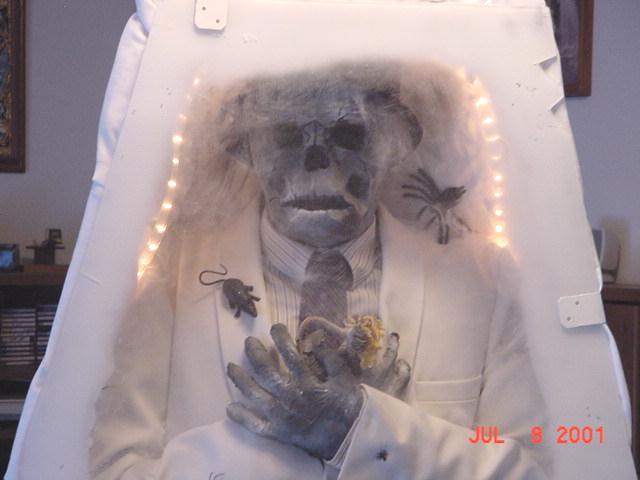
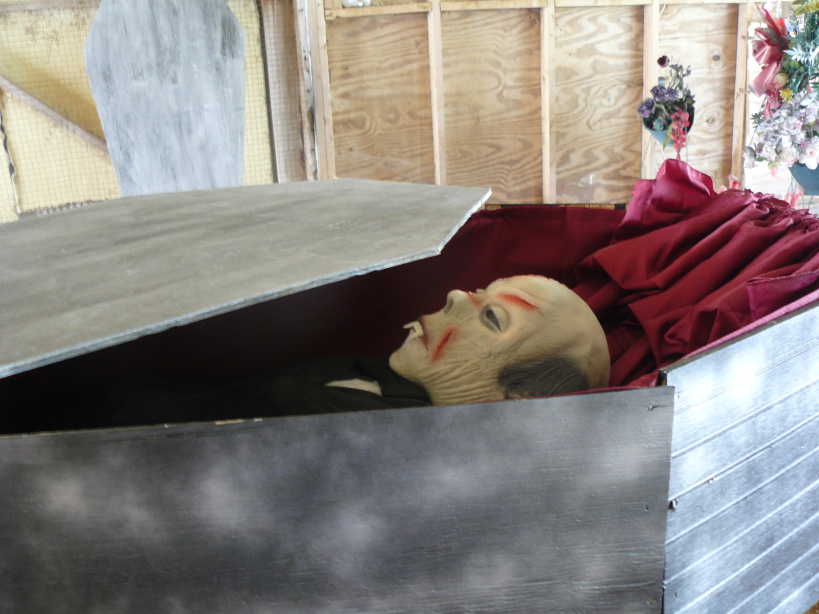
Vampire or Nosferatu
I saw a mask similar to this vampire online for sale for $70, so I decided to make it myself. My Vampire cost less than $6.00. It is made from a styrofoam head. The ears are paper mache. I then painted the entire head, and used the lid from an old yellow paint spray can for the teeth and eyes. Click here to see the vampire dressed in a make shift coffin.
Good Paper Mache Recipe:
I have used several paper mache recipes. Here is a good one:
1 cup of flour
1 1/2 cups of water
1/2 tbs salt
1 cup glue
You may also add one cup of corn starch to give the mixture some bulk. This is optional.
Further, some people heat up the ingredients on the stove in a pot. To do this mix the flour, corn starch and salt together first. Heat the water and glue separately and add the mix of dry ingredients slowly, slowly to the heated mixture. Or you can just mix all of the ingredients at room temperature.
Metaluna Mutant
Metaluna Mutant from the 1955 movie, "This Island Earth". It is simply a milk jug covered with paper mache and painted.
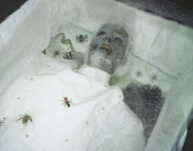
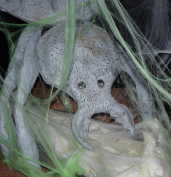 Paper Mache Spider With Victim
This spider was made from foam cut and covered with paper mache. The arms are made from PVC pipe covered with newspaper. The entire project was then spraypainted gray and black was added to the eyes. The victim is made from the body wrap method, described below.
Click here to see the spider being built.
Click here to see how we put the paper on the spider form.
Click here to see how we have added the paper to the styrofoam cut out.
Click here to see the spider's head.
Click here to see how we added the PVC legs. After you add the PVC legs, you can put paper around them to add bulk.
Click here for another view of the spider being built.
Click here to see the completed Spider prop. The figure under the spider was made from the duct tape body mound method. See instructions for that idea below.
Train Wreck
This train scene was made from some wood and metal. The lights are made using metal cans, painted black around the red lights. The train is made using a large styrofoam sheet painted to look like a train. Click here to see the train conductor in detail. He is made using a styrofoam head. The hands were purchased from Kmart for $7 a pair.
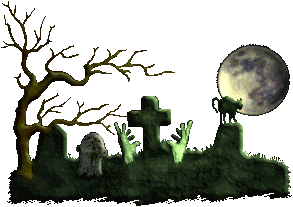
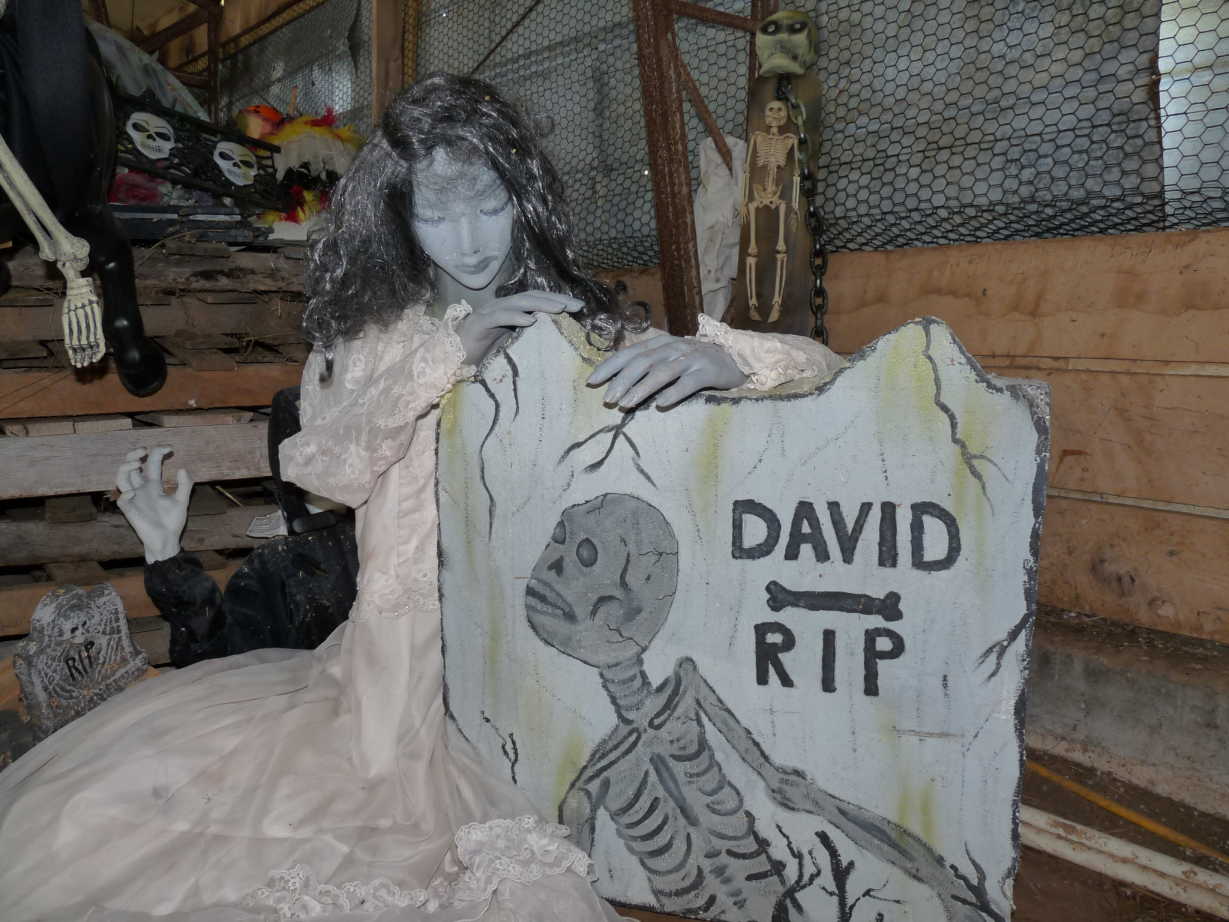
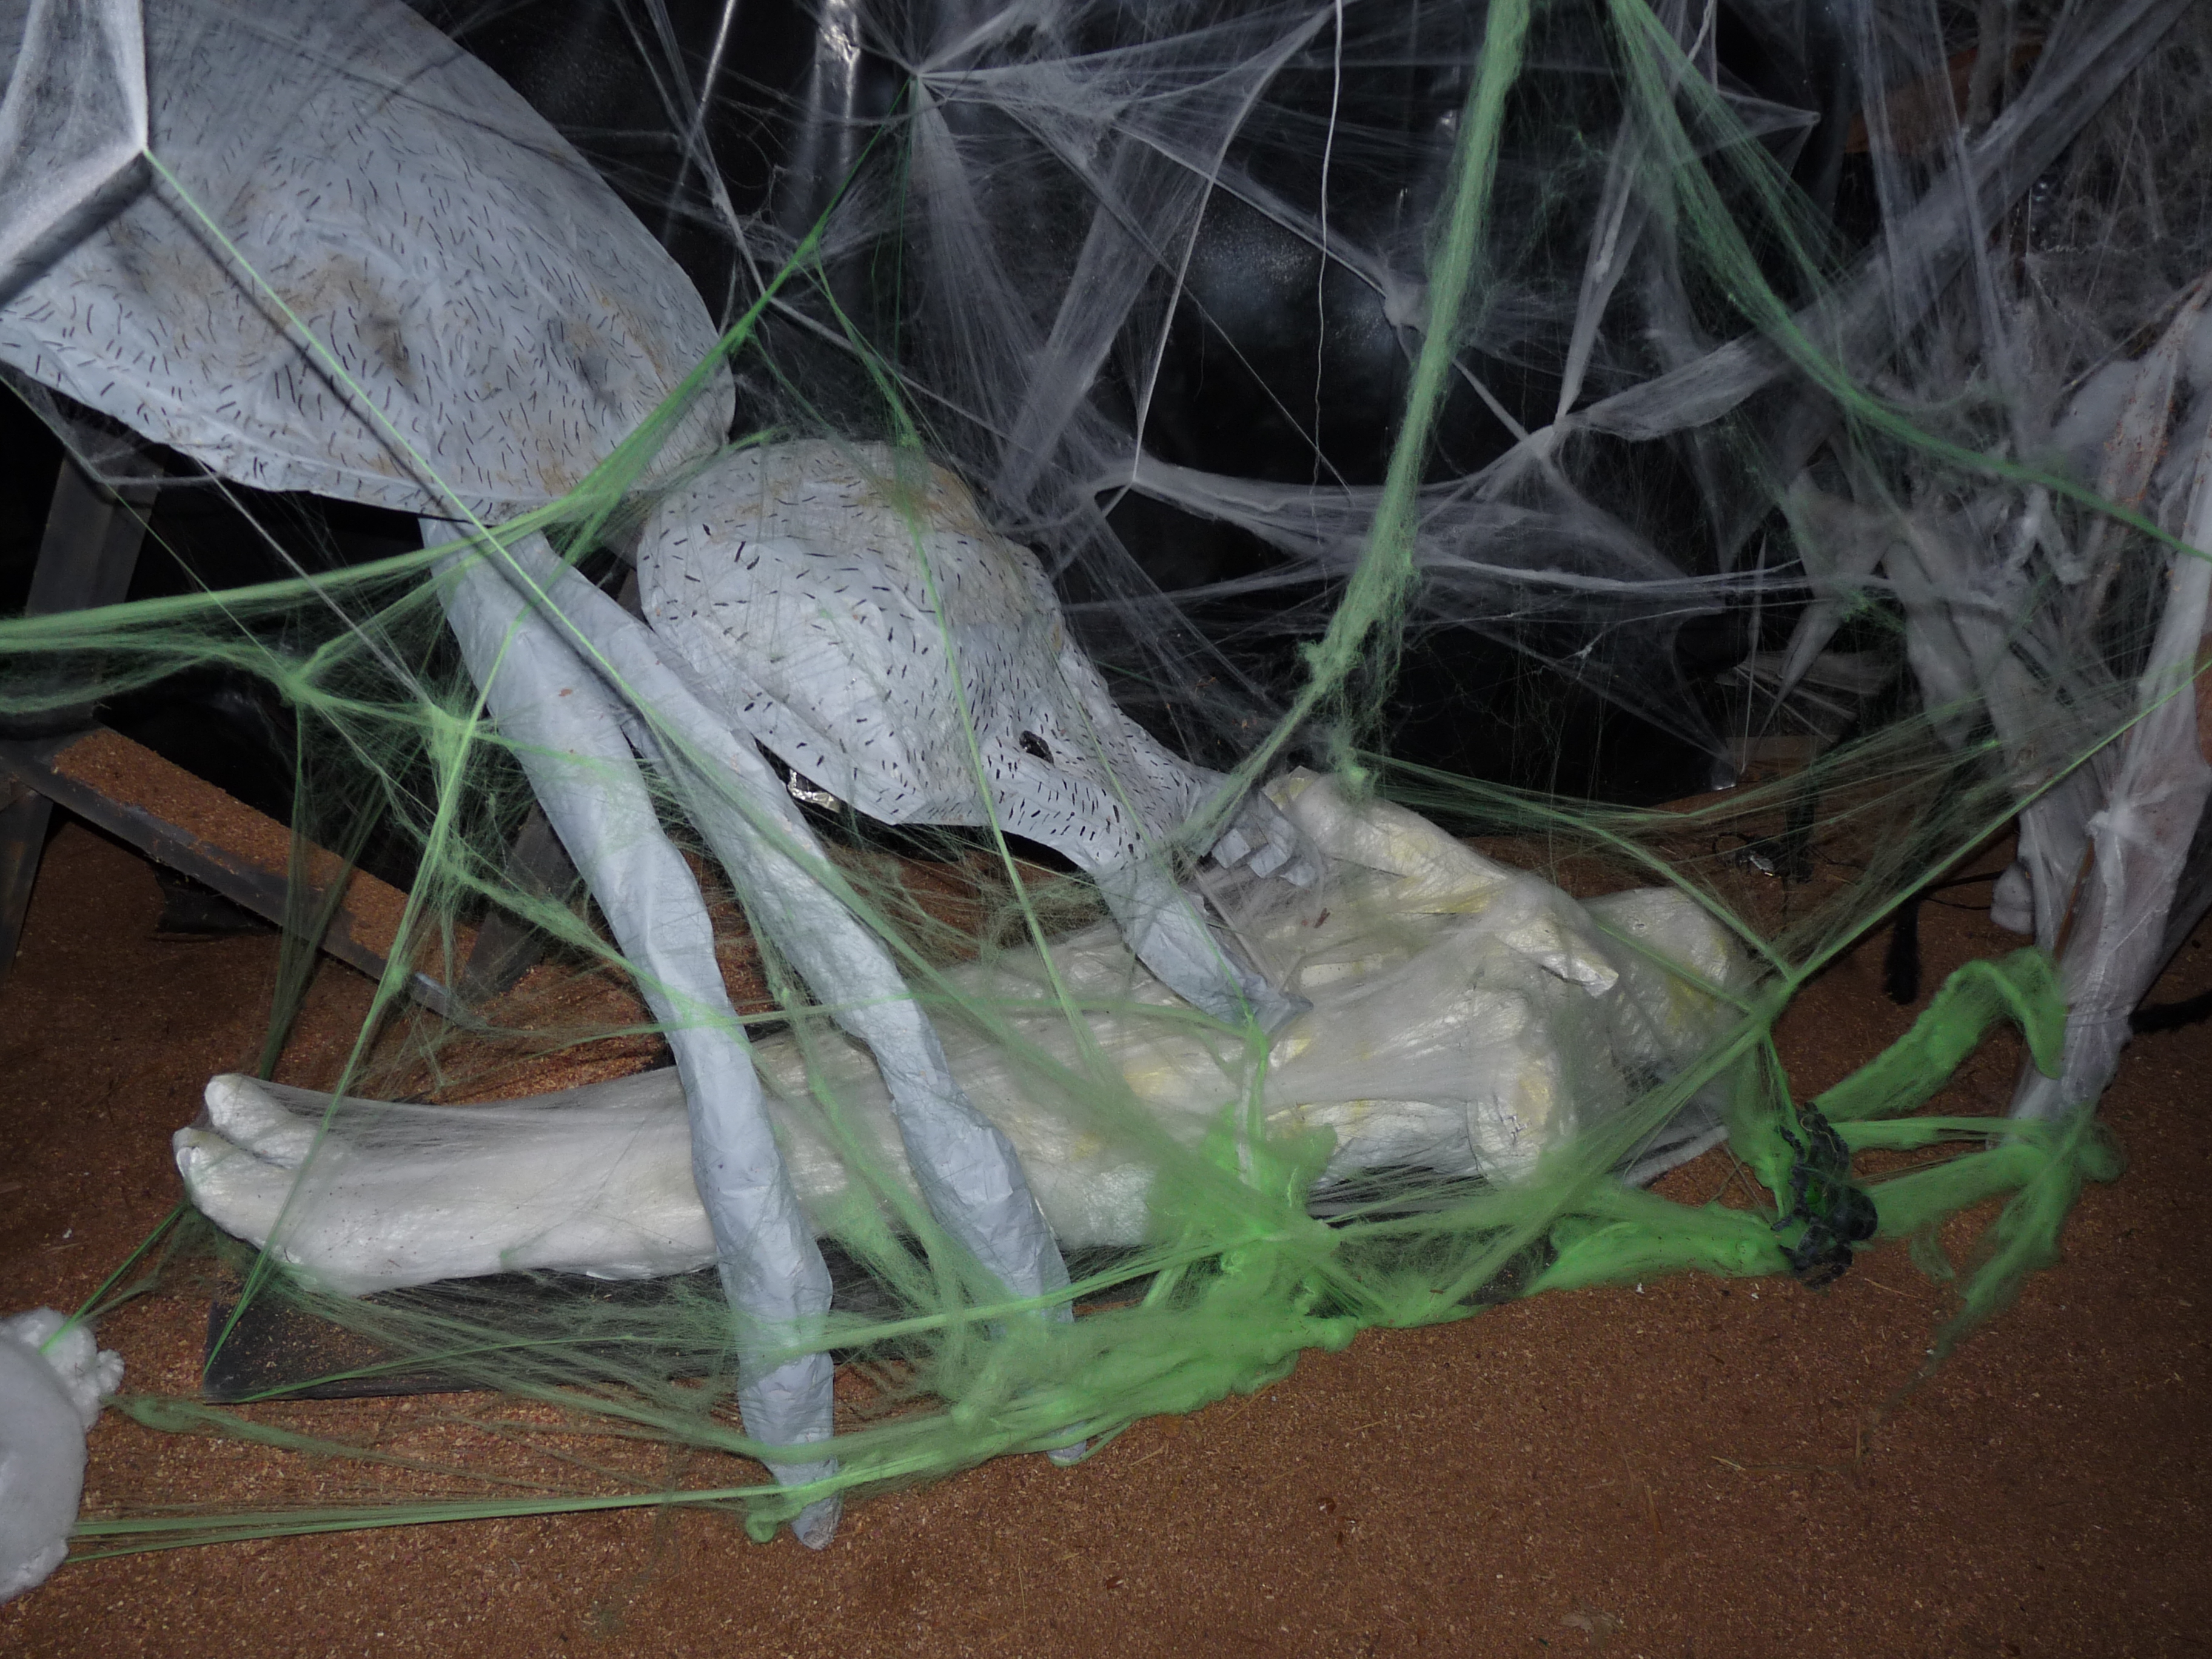
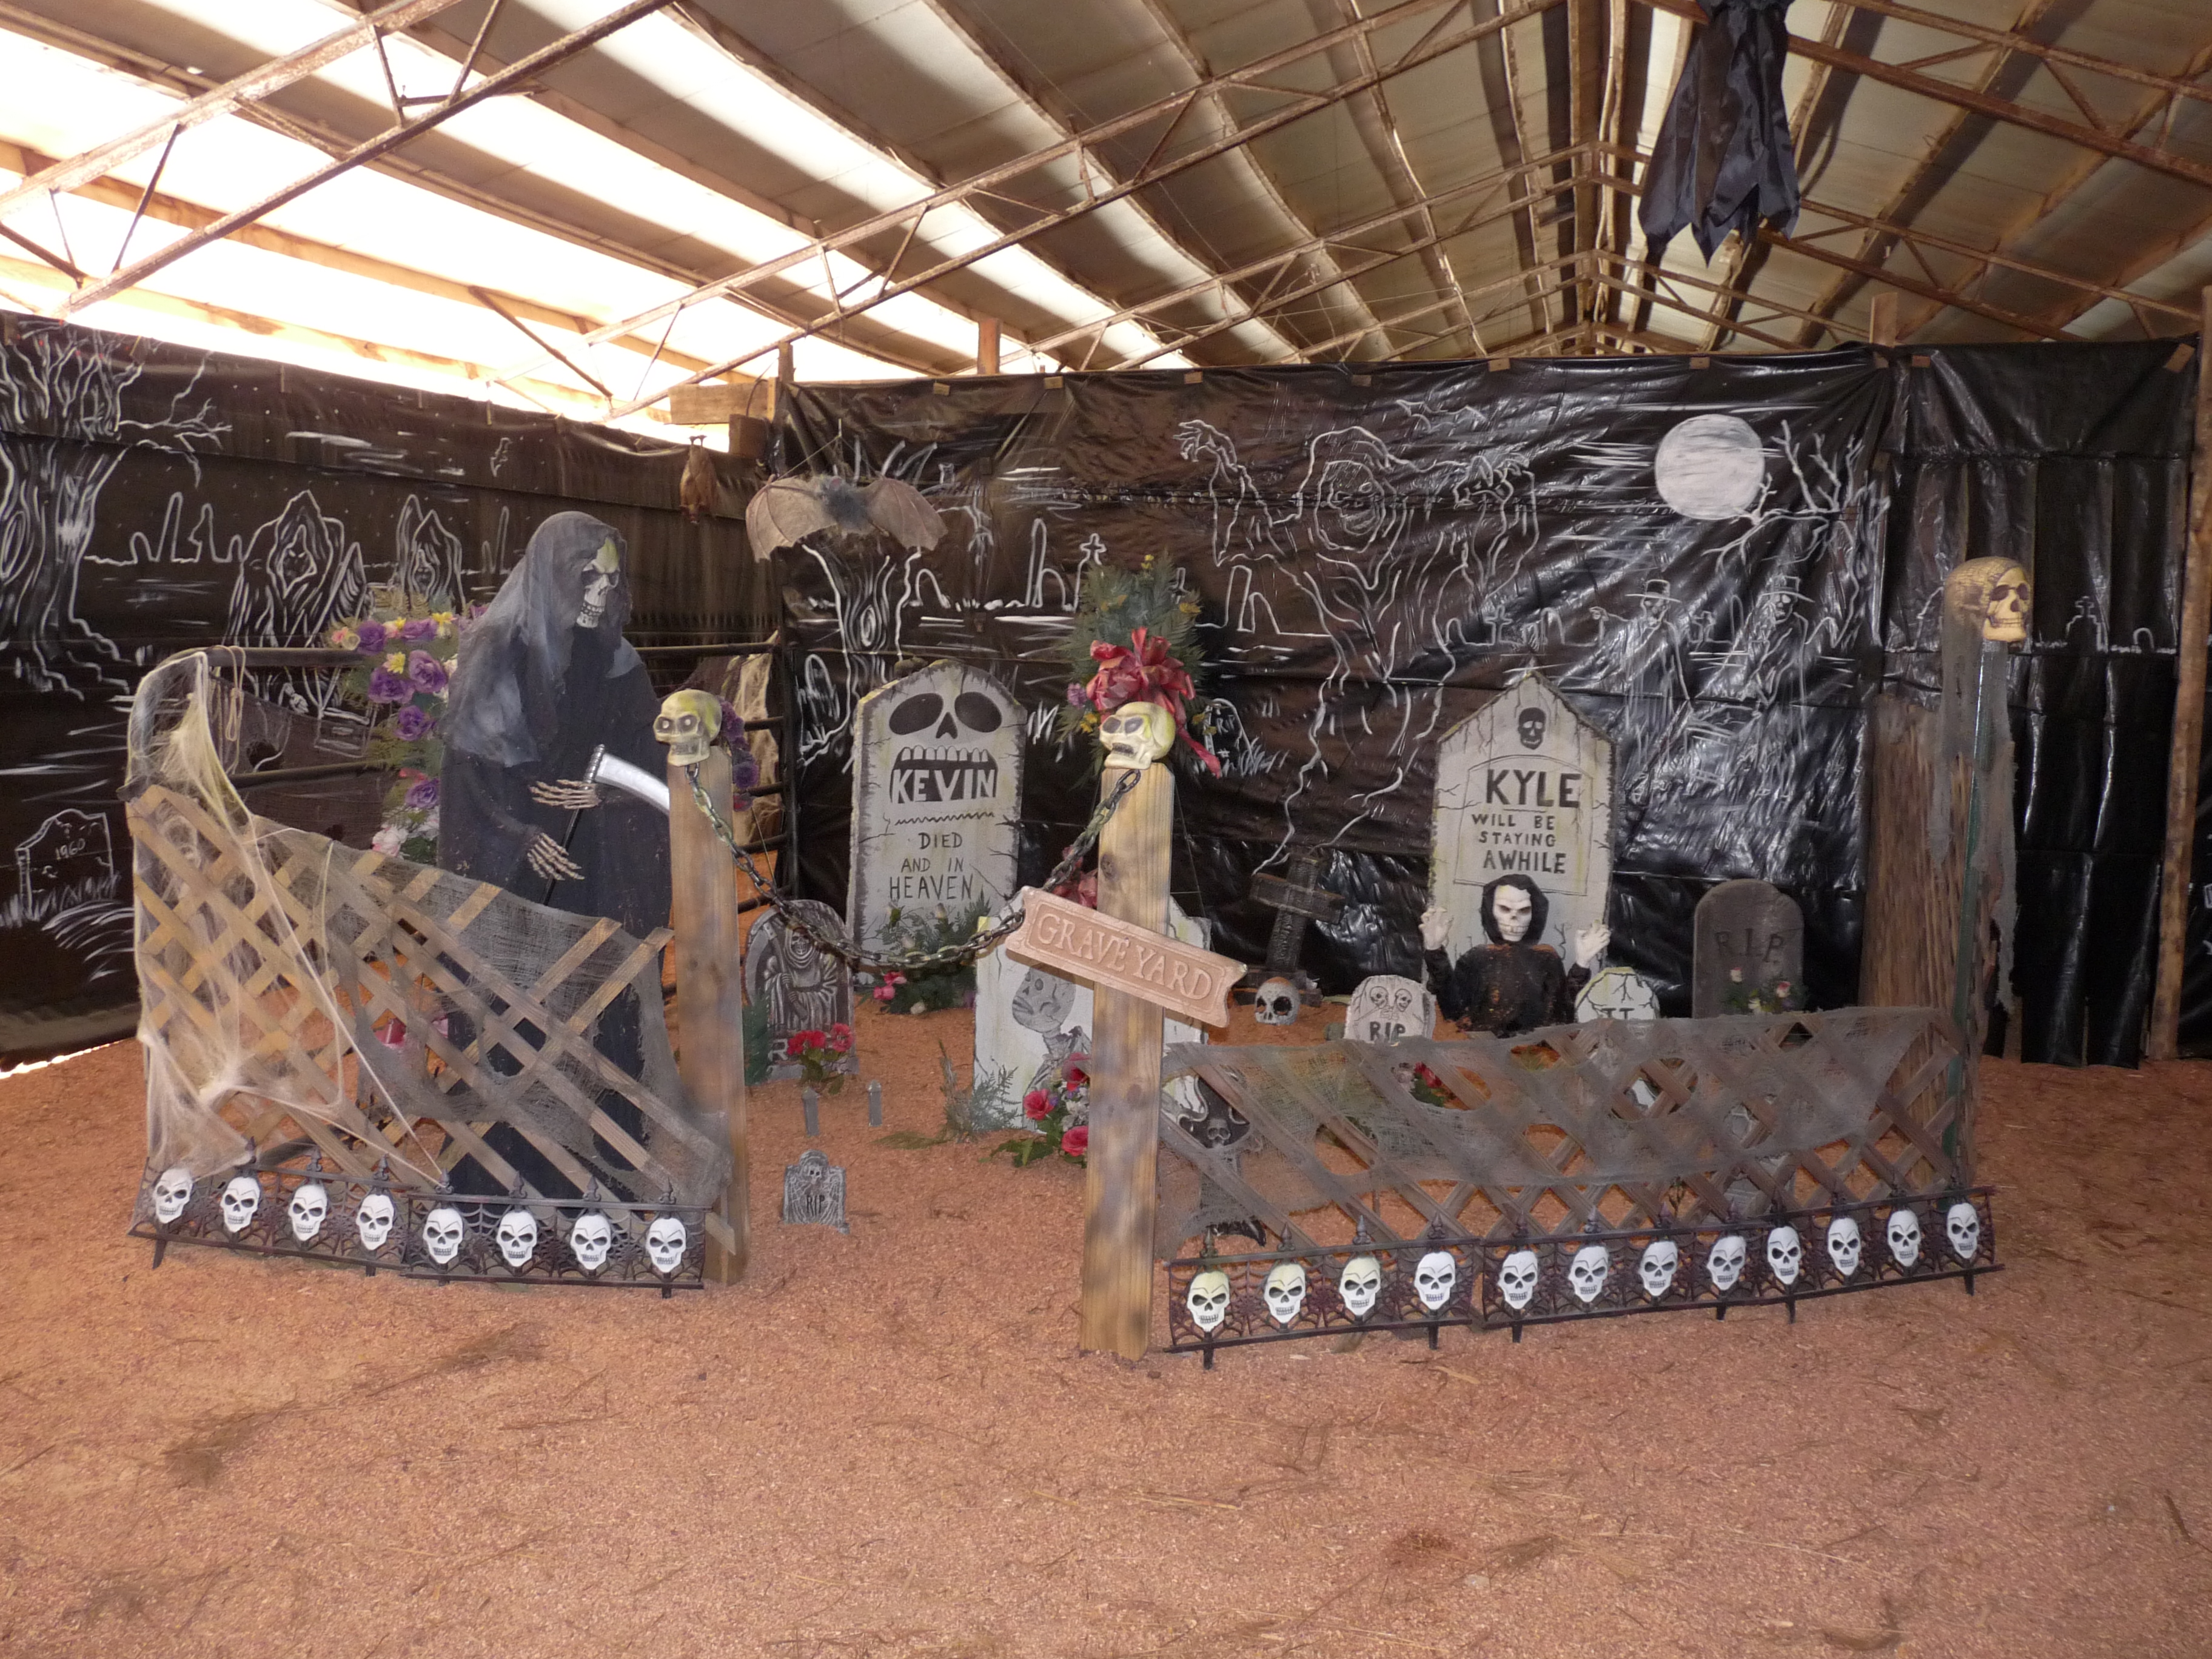
Graveyard
This graveyard is in the back of our haunted house but you can use the same ideas for an outdoor scene. The tombstones are cut from styrofoam blocks. The fence is made from parts of a lattace fencing material. We used old fabric to add the effect of an old graveyard. Spray paint the wood on the fence with gray and white to give the wood an old effect. The flowers were from an actualy cemetery dump. They had a huge pile of old artificial flowers they threw out along with the funeral pyres.
Blood Recipe
Click on the link above for a blood recipe you can drink and use for a costume, show, decoration, or as a vampire drink.
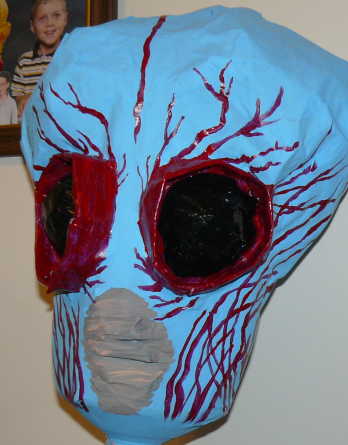
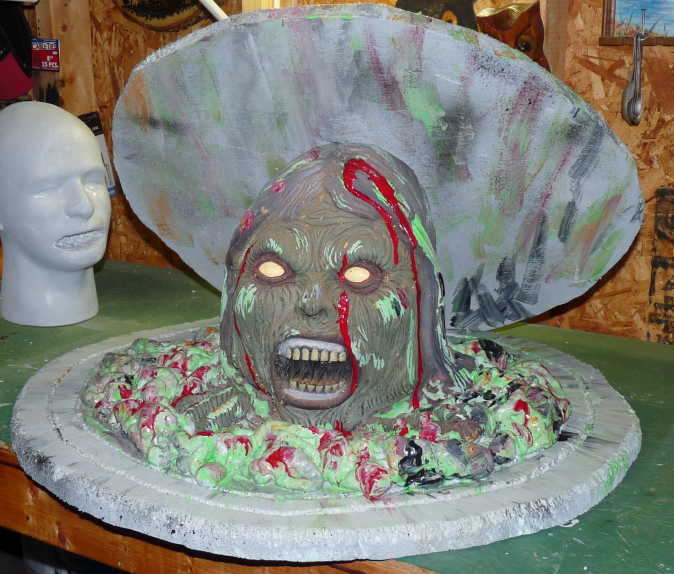
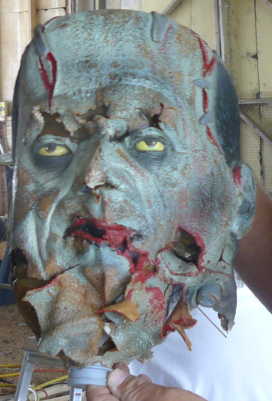
Zombie Rising From A Sewer
This prop is made from a mask, and hot-glued to a piece of styrofoam. I used "Great Stuff" to make the large blobs around his head. Use a good styrofoam cutting knife to make the shapes. The have fun painting it different colors. Here
is a photo of a similar prop that was for sale on eBay for $70.00. I made ours for around $7.00.
PLEXIGLASS DEAD GUY
Make simple plexiglass dead guy that looks really great and is one of the best decorations I have ever made.
Click here to see Plexi-guy before adding the plexiglass top.
Click here to see the finished prop.
Using these instructions, Trisha Morse made her ownPlexiglass man. She made the face of Paper Mache, and used the directions on the website. Check out her website: Trisha's Halloween Haunt
 First, make a coffin from boxes. This is easier than it sounds.
Remember that details wash out in low lighting. So any decoration does not need to be 'perfect' to work.
To make a cardboard coffin, get 3 boxes of equal size and length. Any will do depending on how big you want your coffin to be.
I will try to write how to do this without confusing anyone.
1. First cut one side off 2 of the boxes that will be used to make the ends of your coffin. This will leave you with a "U" shaped box or boxes.
2. To make the center of your coffin, cut the ends of the side off the third box.
3. Take one of the boxes that you cut one side off and use it as the top of the coffin. Spread the sides out...like a coffin has. You may need to cut the bottom of the box to let the sides fan out, but that's fine.
4. Now take the box that you want to use for the center and tape this to the top or head box. Use masking tape. Now you should have the top of the coffin and the center, ready to go. All you need now is the bottom. Simply tape the last box to the center one. Use lots of masking tape to keep all three boxes together. If you did it right, you should have a cardboard coffin, ready to paint. Note this coffin has no "lid". You can make that out of one piece of large cardboard, if desired.
5. Spray paint the entire thing black first, then lightly...lightly...spray paint white on the coffin to make it look old.
*** If I confused the heck out of anyone...please email me! I will try to provide photos of everything soon to illustrate!***
Cost of my coffin was less than $3.00. My only expense was the masking tape and paint. You can get cheap spray paint, from Walmart or Kmart for around $1.00.
Next add a styrofoam head, explained earlier, or any mask you want.
Stuff a shirt, dress, gown, whatever you want the dead person to be. Newspaper works just fine. I used a pillow for the body myself, as this lays on the floor.
Now put some Christmas snow, canned snow used to decorate a Christmas tree, on your 'creation'. This gives the effect of the corpse being cold! Add spiders, lizards, snakes, if you like for effect.
Take a sheet of plexiglass to cover the entire thing. This makes the coffin look covered with cold glass.
For the old look to the plexiglass, spray it lightly with white spray paint or use Christmas snow around the edges. Place the plexiglass over the coffin.
To cut plexiglass, I used a hacksaw. I put masking tape on either side of the plexiglass, put it on top of my cardboard coffin and cut it slowly. It need not be perfect. Indeed if the plexiglass cracks while cutting, it just adds to the effect.
Trust me, I am no carpenter, but I cut mine on my own...slowly..and it worked for me.
Sand the edges so they are smoothe.
Finally, place a string of white Christmas lights around your corpse.
In the dark this is one of the most effective decorations I have ever made.
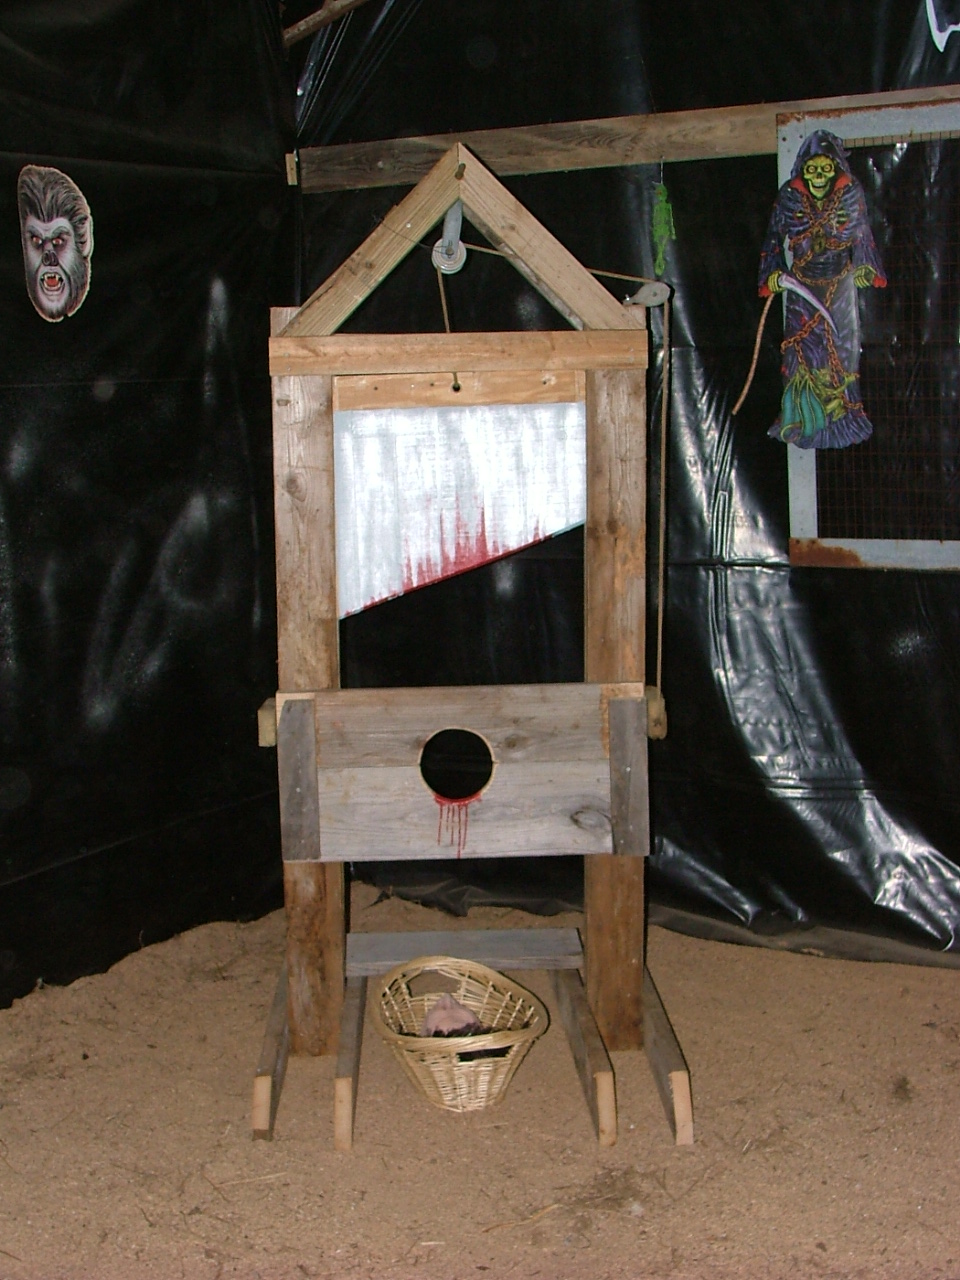
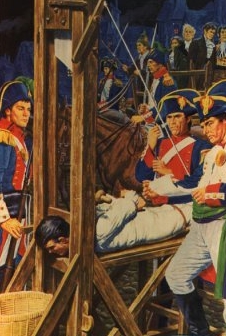 GUILLOTINE
It would be best to look at the photo of the built guillotine. I did not build the guillotine, but know how it was constructed. The finished guillotine is 12 feet high. It was used for photos. We used two 2x12x12 pieces of lumber for the main blade holder/frame. We used four 2x6 pieces of lumber, nailed at angles to support the main frame.
The blade, head brace, and blade holders are all made from 1/2 inch plywood. The blade does not go through. The head brace has a stop that covers the entire top. Many more photo links below. Cost: price of the wood.
PROPS
Props are easy to make from items found around the house. Two ways to build them.
1. Body Wrap Method (see photo). Take some old clothes and wrap the person in Masking or Duct tape as shown. Cut the clothes and tape off and mend. This leaves a perfect mould. From there you can fill the body with newspaper to help it retain its shape. Hands and feet are added later. Do the same thing. For hands use old gloves or surgical gloves. Wrap the hands and stuff. For feet use old socks and stuff. Then tape these to your body mould. We did this with my 7 year old son. Click here to see my son's mould For his head we used old cloth and did not cover his face. We took the head mould off and put masking tape over the face area to get the head effect. Then we spray painted it with grey primer and white. Duct tape was used on the mummy. The body wrap method was used on our "Gort" prop as noted in the photo links below.
2. Rigid Frame This is simple. Take 2 long pieces of rigid wood. I used 7 foot pieces and nail another 1 1/2 foot piece to the top of them to form an upsidedown "U" shape. This will be the shoulders and legs of your rigid frame. Next nail a support board about where the belly is, not too low. Now you have the torso and legs. Dress the prop now. If you want rigid arms, make them from wood and nail them in place. If you are good with wood you can make dowels from the arm boards and place them in holes drilled into the shoulders. I used coke 2-liter bottles and newspaper as filler for my arms. Use old gloves, stuffed, and sew or staple them to the end of the arms. For the feet, use old shoes or boots. At the base of the leg boards you can nail a 2 foot board, flat, to the legs, or you can cut the legs with a point which can be hammered into the ground. You will either need to hammer the legs into the ground deep or have another support if you have a large prop. Look at the Jason photos here. Notice the legs and feet. He is very rigid. We used 2 different masks. The nicer mask was purchased at Party City and cost about $30.00. The cheaper was bought at Walmart. More photos below.
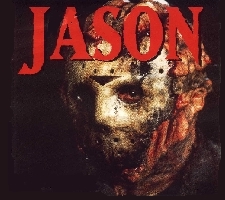
JASON PROP SPECIFICS
Jason was made with a rigid wood frame. He is so large that a normal pair of coveralls did not work. We used an old pair of work pants for his arms. We cut the legs off the pants and stapled them over the arms of the coveralls. For the legs, I had to cut another pair of old work pants that were the same color as the coveralls. I cut off the legs and sewed them to the bottom of the coveralls to make them longer. The boots are nailed to the frame with the pants legs draped over the tops of them. The gloves are simple work gloves stuffed with styrofoam peanuts. To mould the hands, I used a bent coat hanger in the shape of the fingers to be able to form the hands. The gloves were then nailed to the wooden frame arms. The arms were nailed in place. The head is a milk jug covered with black masking tape. I covered the mask with tape and spray painted it black. The wig is from a $2.00 mask from Kmart. We cut the original mask face off to use the hair.
Total cost of Jason for me was about $4.00, for the wig hair and face. The fake knife cost about $2.00 at dollar stores. If you can get the clothes from a thrift store, the cost will be minimal. Click here to see a sample of a Frankenstein prop. More prop photos listed below.
MILK JUG HALLOWEEN DECORATIONS
Empty and clean a one-gallon milk jug. Turn it up-side down, with the spout facing down. Spray paint the jug any color you want. After it is dry, paint a face on it.
Tie a strip of old fabric or a rag where the spout is. Then attach a chain or rope to the top.
For the Frankenstein Milk Jug spray paint the jug green and then spray paint the bottom of the jug, black. When dry, flip the jug over and with the spout facing down, paint on a face. Use the photo as a reference.
Screw in 2 large bolts into the jug, just below the face. Attach a chain to the top and a black rag over the spout. Tie with black thread. Cost: $3.80-the cost of a gallon of milk.
Milk jugs make excellent "frames" for masks. They act like styrofoam wig heads do for wigs. You can put a mask on a milk jug to begin to make simple props. See the photos below.
Also, see the link at the bottom of this webpage on making skeletons from milk jugs!
 HAUNTED PORTRAITS
Paintings and portraits, framed in gold, with black backgrounds, look excellent in your Haunted House. I take my regular photos and pictures down in the living room and put up several portraits and paintings. They are lightly covered with spider webs. I have included several pictures for you to download, print and make on your own. Download the pictures. Glue them to black cardboard. Put them in any old frame. If you don't have a gold frame, spray paint one gold. Gold spray paint at Walmart was $1.00. These look excellent in low light conditions. For an added effect, for storytelling, have someone tell tales involving the portraits. If you want a spookier effect, white out the eyes.

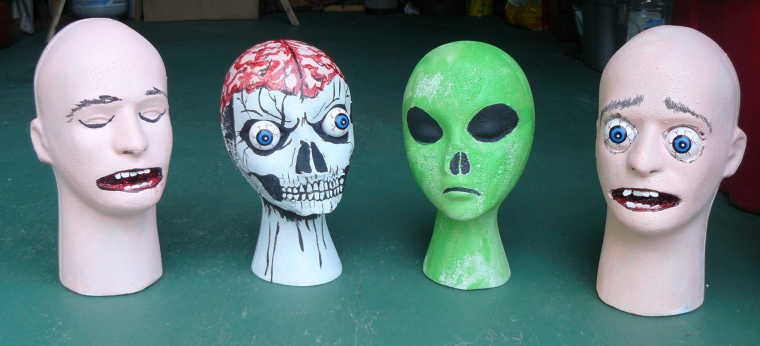
STYROFOAM HEADS
Styrofoam wig heads make great prop heads. You can purchase them from wig or beauty shops. I got mine through KC Store Fixtures via the Internet. Their phone number is 1-800-862-0899. The prices are $6.25 for male heads, $4.50 for female and $4.25 for faceless.
The order numbers are as follows: Male - 27301. Female - 27303. Faceless - 27302.
Once you have the heads, use a knife or razor CAREFULLY and cut out the eyes nose and mouth completely. Take a razor and rough up the rest of the styrofoam. Rub your fingers to loosen any hanging styrofoam. Spray paint the head with a grey primer. Do not use cheap spray paint. It tends to melt the styrofoam slightly. I used Testor's model paint. A can of primer was $1.75.
Paint the eyes, nose and mouth black. You can then insert fake costume teeth. I got one set from the dollar store, one set from Party City, and one set I made from small wood chips. If you look at the photos, the groom corpse has Party City teeth. Bride corpse has wood teeth. Mrs. Bates has Dollar Store teeth.
Use spider web for the hair, or wigs. The picture of Mrs. Alien is made with a faceless styrofoam head and wig. Total cost for Mrs. Alien was $9.00. That included the money for the head and wig. The others only cost the price for paint and heads.
The confederate soldier head is made from a male styrofoam head. I used peach colored paint for the skin and red Testor's Model paint for the blood. My son inserted a fake knife which he got from Party City for effect. See additional styrofoam prop head photos below.
SIDEWALK CAN LIGHTING
Instead of buying premade paper bag candle holders or fancy candle holders, make them yourself from cans. Clean several cans of various sizes. Put water in them and set them in the freezer. Remember the ice will expand, so don't fill them too high.
Remove them when frozen and with a chisel, cut out eyes, pumpkin faces, whatever. Remove the ice and let dry.
Spray paint the base coat, say orange, for a pumpkin. Paint whatever else you want, add sand or dirt and a votive candle. We experimented with a narrow and small can. The votive candle did not melt the paint. One can that we did was an "Eye" can. We spray painted the can green. Took a nail and punched several holes all over and painted eyes on the holes. At night it looks like eyes are glowing.
GRAVEYARDS
Tombstones are easy. You can use styrofoam or cut them from old wood. Crosses are easier. Two boards nailed together. Paint them white and put a name on them.
For one gravesite, we used 6 boards, stuck into the ground. The face is an old toy. We made the headstone from a piece of styrofoam and put a toy rat, spider web and my neighbor's stuffed animal on it. It was placed on a Haunted Trail behind the house. In the dark it looked great.
For the "haunted fence" around your graveyard, use some garden gate...available from Walmart, Kmart, or any garden shop. I got mine for just $2.00 a section. It was white, but I spray painted it black and added web. It looks great. See graveyard photo, and look near the ground. You will see the one I made.
Or click here to see a better view of what I mean.
EASY GRIM REAPERS
Make simple grim reapers for practically nothing!
First, obtain a cheap plastic skull. Big Lots has them for just 99 cents each.
Next get 2 small boards; one about 2 feet long, the other 3 feet long. Even paint stir sticks will do for this. Nail the 2 boards together so that they form a cross or "t" shape. Now place the plastic skull on top of the "t". You may have to cut the plastic to fit the skull on.
Next, take some old cloth and wrap it around or over the arms of the "t" frame. Take an old sheet, burlap, cheesecloth or a black rag and drape it over the frame. Glue a hood to your grim reaper's head with plastic cement or similar glue. You are done. You can stand the grim reaper between pumpkins, (as my photo shows), or you can attach a rope, fishing line, or twine to hang it from a tree or ceiling. I put one over my cemetery and one from the porch top.
DECORATION PHOTO GALLERY
(To read the details of how the ideas listed below are created
or made please click HERE)
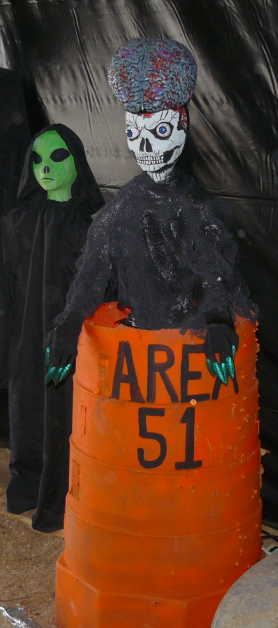
Supreme Alien
This same prop sells for hundreds of dollars online. Get an old 55 gallon drum, or smiliar. Spray paint the outside Fluorescent Orange. Place a prop, made with a styrofoam head, on top. Fog and strobe lights add to the effect.
The Robot, Gort
Gort, the robot from "Day The Earth Stood Still". Made from the body mould method, mentioned on the "How To Make" website from duct tape. Helmet was made separately from a helmet mould. Write to us for details.
Another Photo of Gort
"Gort" from "Day The Earth Stood Still", (1951 movie)
Gort Body Mould
My husband, David, was our sample body mould for "Gort". We used the body-wrap duct tape method to make this mould. Described in the "How To Make" website. See links on this page.
Flying Saucer and Alien
Made from an old Ski-Do raft covered with aluminum foil. The alien is made from 2 milk jugs, painted like the alien from the movie, "This Island Earth" from 1955.
Fuming UFO
Used an old metal lid with a fog machine under to get this effect. The metal used in this photo was a bruter, or chicken house heater cover. You can use any round metal lid for the same effect.
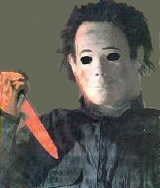
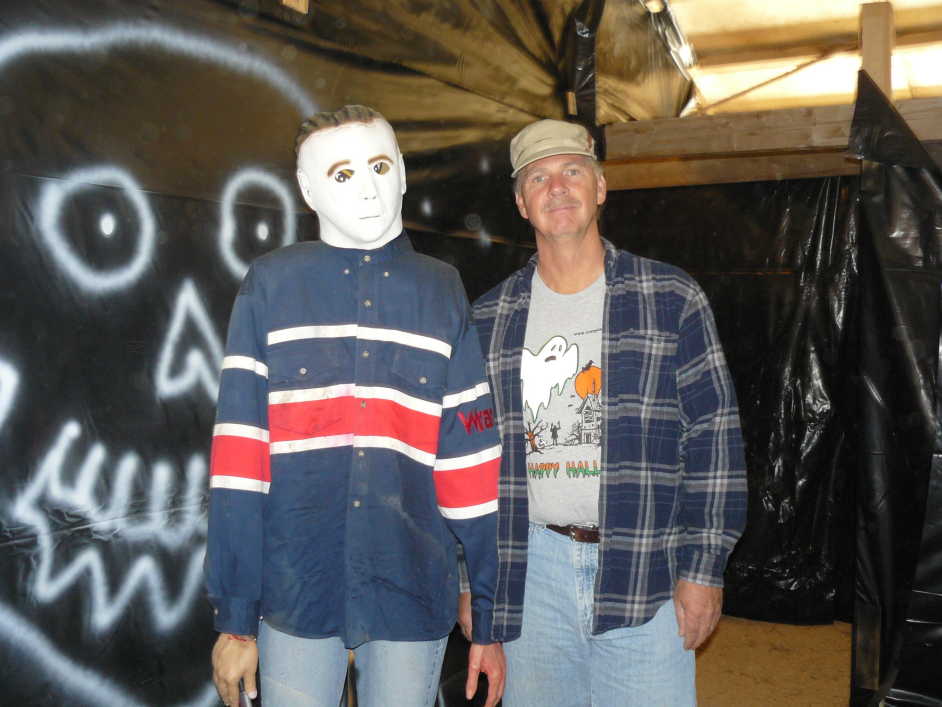
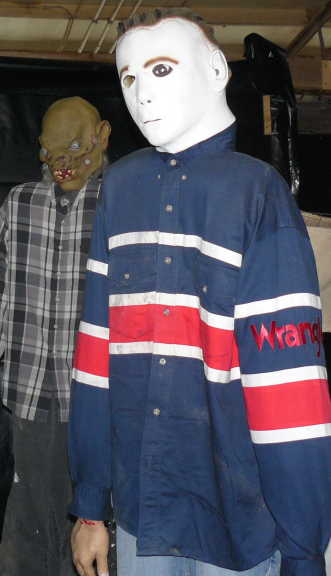
Michael Myers
Used a cheap Michael Myers mask over a milk jug. Paint eyes under the mask to look like eyes.
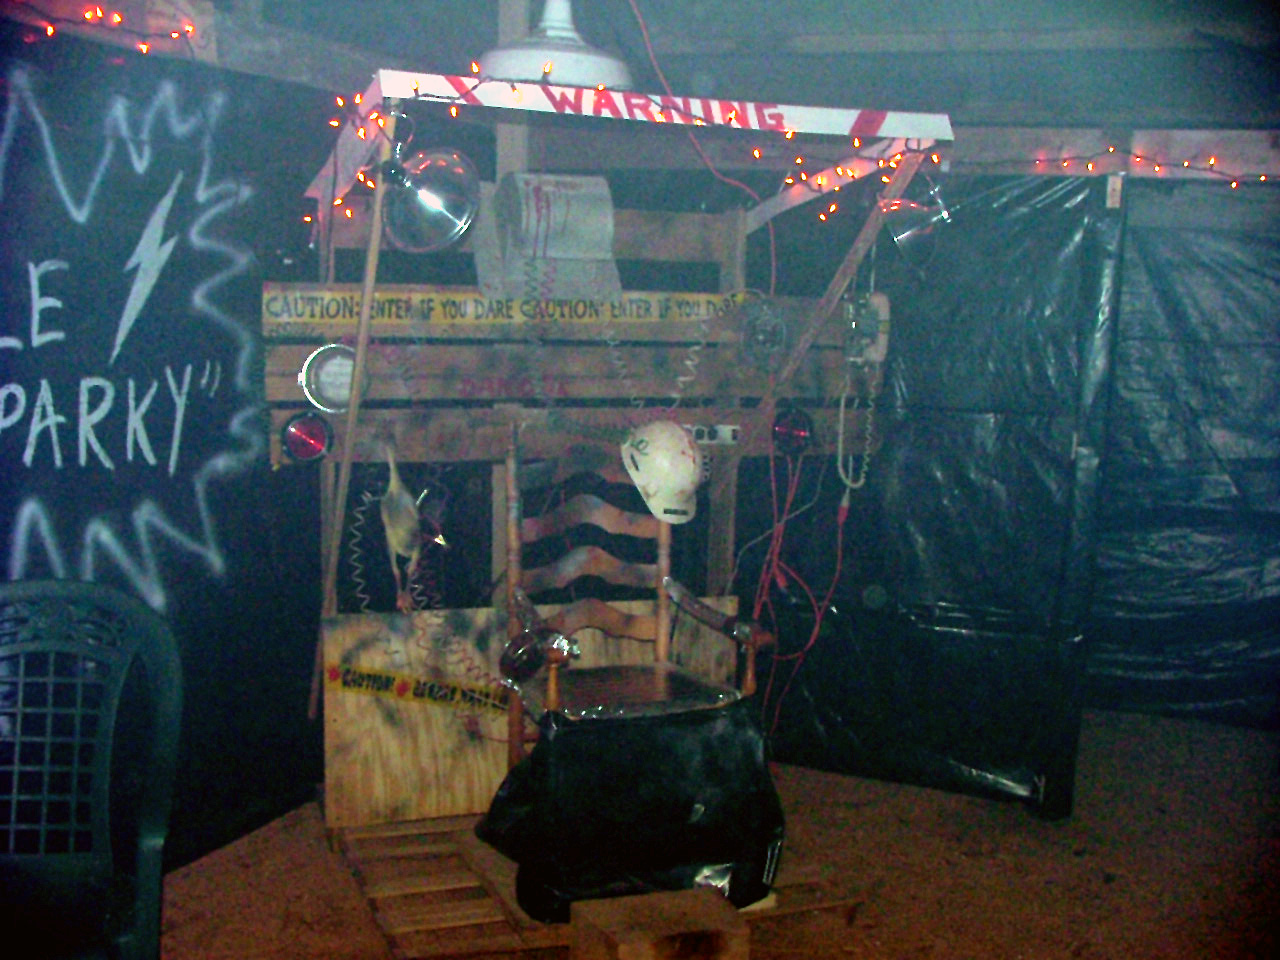
Electric Chair
Electric Chair with lights and horns.
Vampire Coffin
Made using a simple mask over a milk jug. The coffin was built from wood, painted black. But cardboard would work too. Used old red curtains bought from Goodwill, along with an old suit. Put vampire teeth in his mouth for effect.
Coffin Plans
Here are the dimensions of what a simple coffin.
Guillotine
Here is a photo of a simple guillotine used for photos.
Stocks
Here is a photo of stocks used for photos.
Electric Chair
Here is a photo of an electric chair. The chair has lights and horns which sound when a switch is thrown.
Michael Myers
Built on a simple "t" shaped wood stand, we used a Michael Myers mask over a milk jug. Paint the eyes under the mask for effect.
Psycho Lady
Built using a styrofoam head over a wood frame, stuffed with newspaper and foam. Please email me if you would like me to make you one of the heads listed on this webpage. Not expensive.
Styrofoam Head Deceased In Coffin
Coffin made from the dimensions given on this webpage. Deceased made with a styrofoam head, and thrift store clothes. Use white spray paint to lightly dust the prop.
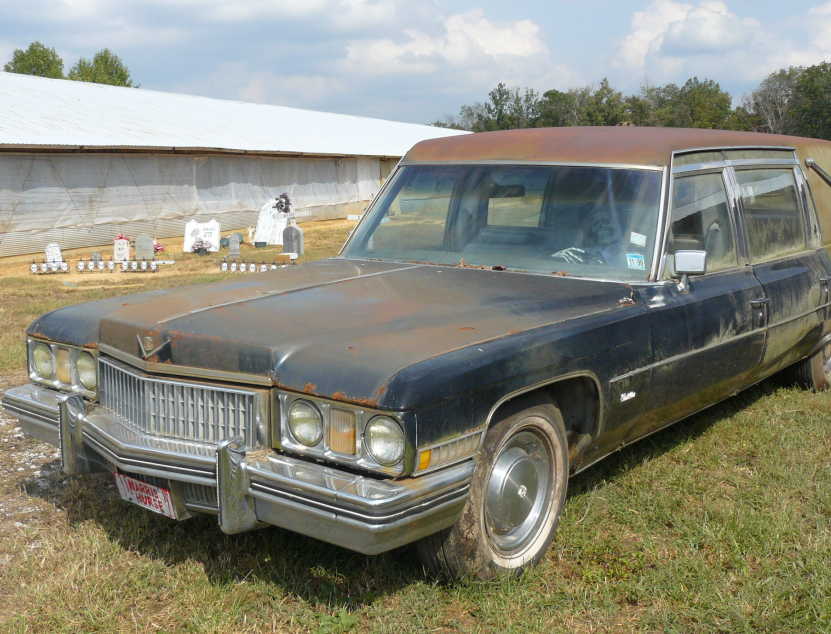
Hearse
We were actually able to get an old hearse that was in a field for years, but any car would do. Place a prop in the vehicle. Light from below the steering wheel for effect.
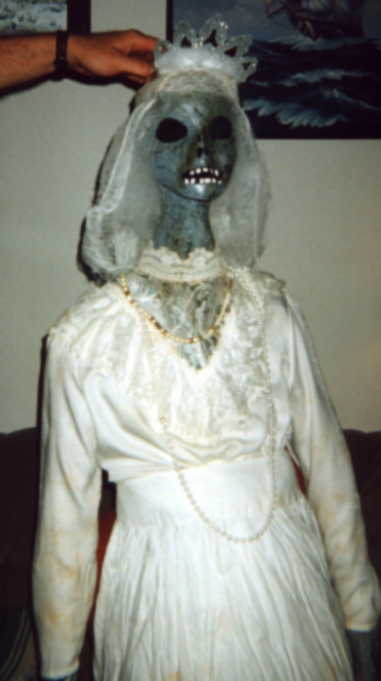
Corpse Bride
Made from a styrofoam head. Other photos and earlier tries on this webpage.
Corpse Groom
Made from a styrofoam head. Other photos and earlier tries on this webpage.
Corpse Groom
Made from a styrofoam head and wood frame.
Messed Up Old Mask
Don't worry if you have an old mask that got messed up because it melted from the heat in your attic. Simply paste the parts to an old milk jug. Use a blow dryer to melt the parts, making them soft. Use a strong glue and paint around the areas where the milk jug shows. Makes an eerie decoration or prop.
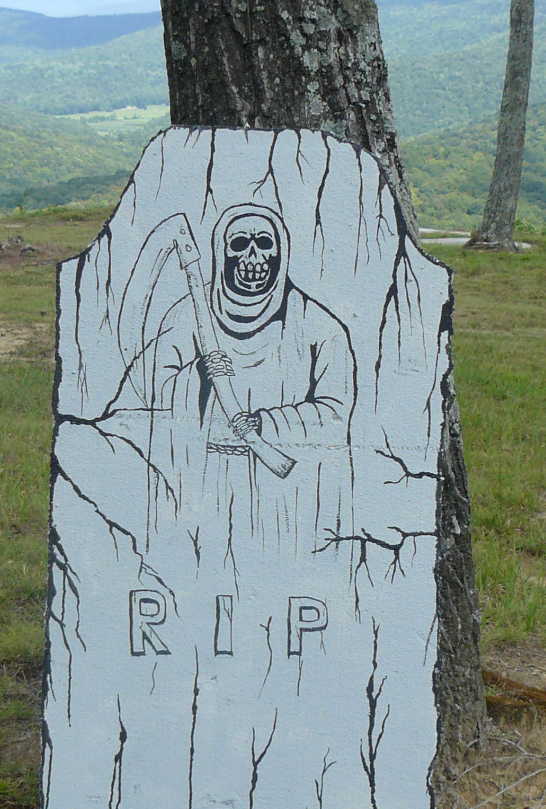
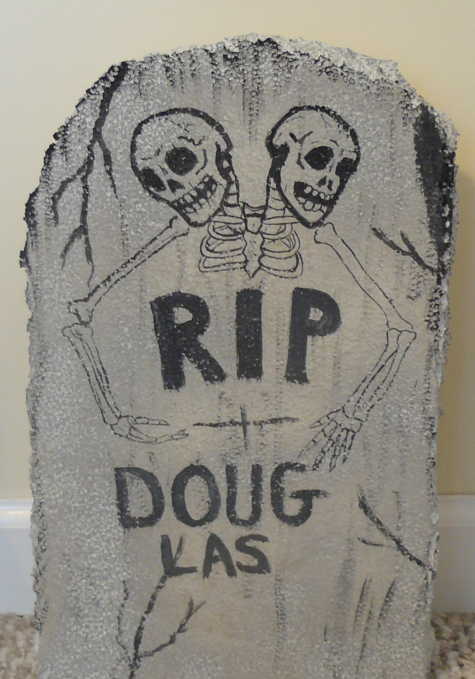
RIP Tomb Stone
Made from a styrofoam block. You can purchase large styrofoam from Lowes. Painted with acrylic paint.
Creepy Scarecrow
Made by putting a burlap cloth over a one gallon milk jug. Easy "t"-shaped wood frame beneath the clothing.
Scary Scarecrow
Another view of the scarecrow.
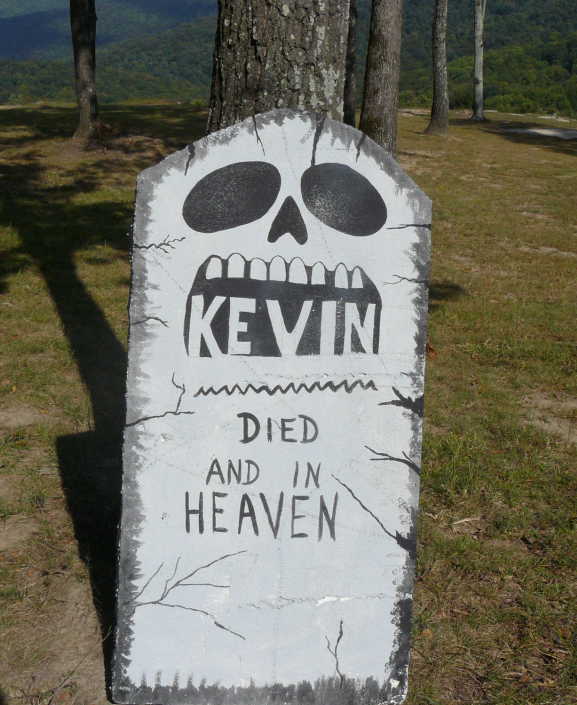
Skull Tomb Stone
Made from a styrofoam block. You can purchase large styrofoam from Lowes. Painted with acrylic paint using the skull's teeth to form the letters.
Hitchcock's "Birds" Scene
Made from a styrofoam head, painted to look like the scene from the famous Alfred Hitchcock movie, "The Birds".
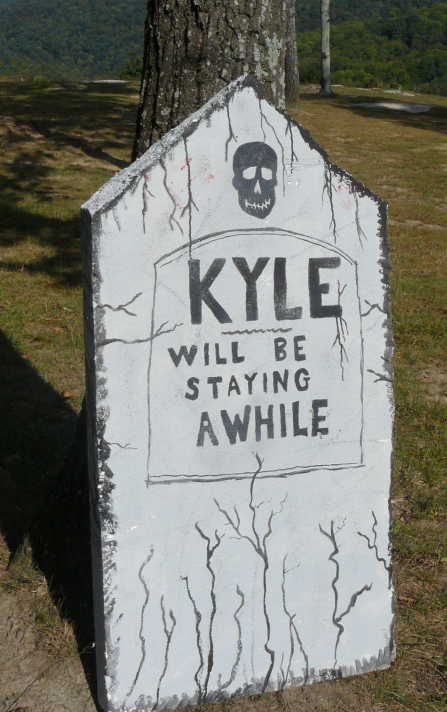
Another Tomb Stone
Made from a styrofoam block. You can purchase large styrofoam from Lowes. Painted with acrylic paint.
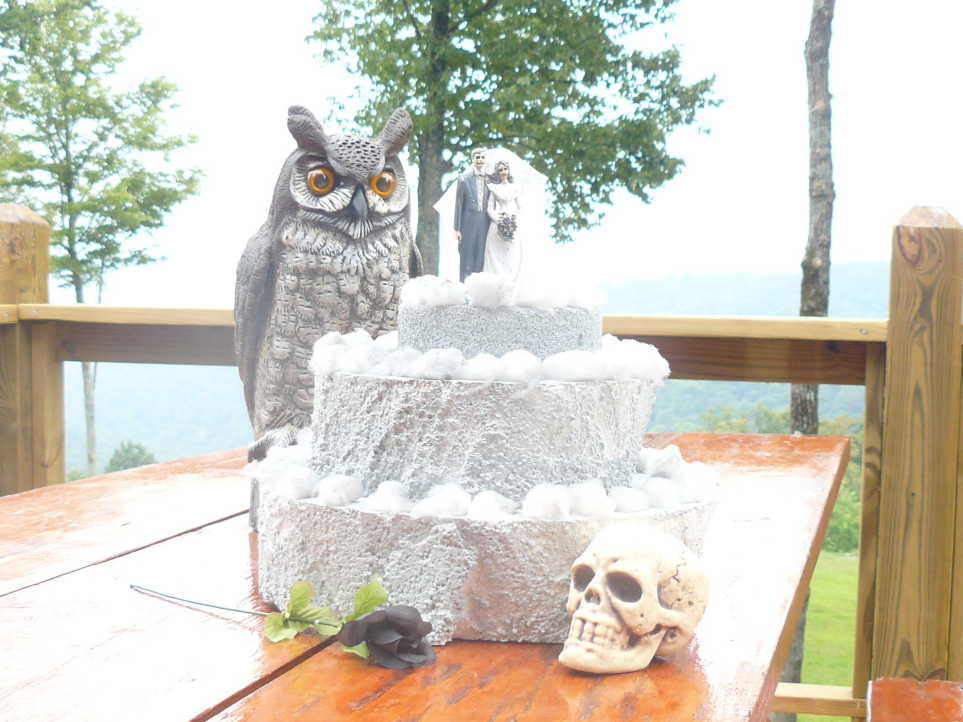
Haunted Wedding Cake
This wedding cake was made from styrofoam and cotton balls. We bought a cake topper and repainted it. Cake topper was purchased from Walmart for $6.00.
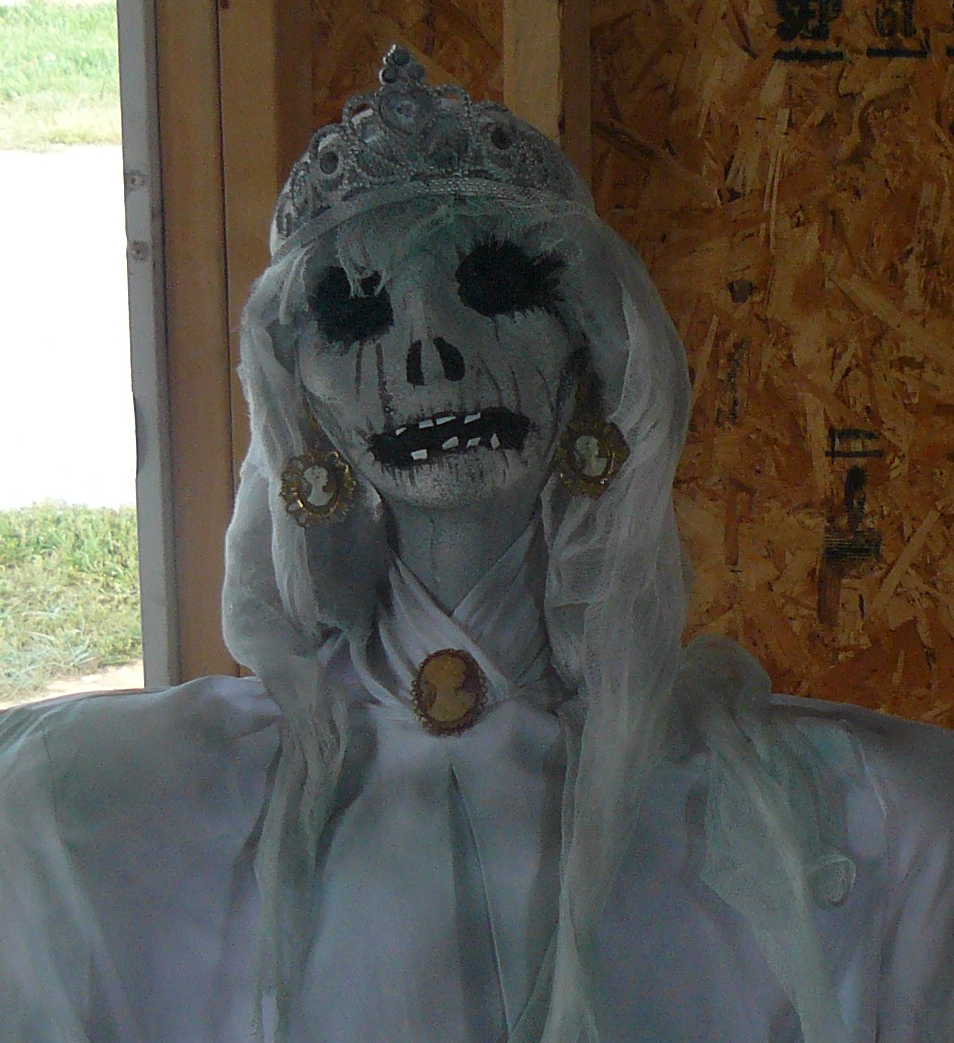
Corpse or Dead Bride
This prop was made from a styrofoam head, painted and cut. I used Cheesecloth, a tiara, and child's cameo jewelry, both from Party City, child's section.
Styrofoam Wig Heads
Made from a styrofoam wig heads, male and female. I used a paint on primer before applying any paint. Note that spray paint will melt the heads. Great for Alien faces. See below for details.
Styrofoam Tombstone
We cut the shape of the stone using a turkey knife, spray painted the foam with gray primer, then painted on the design and name.
Saucerman
The face used is that from the 1950's movie, "Invasion of the Saucermen". The face is on a milk jug with the ears cut out.
Alien with Hood
This is a one gallon milk jug painted as described in the "How To" website link.
Easy Styrofoam Head Grim Reaper
Red Head
Made from a styrofoam head. Using an old wig, this can be used as a unique prop.
Fun Sign
Porch Decorating:
How I decorated my porch Halloween, October 2000.
Simple Graveyard:
Made from wood crosses and cheap garden fencing. Details below.
Living Room Scene:
How the decorations looked collectively in my living room. Halloween 2000.
Medical Patient:
Made with a styrofoam head, plastic hands, plastic foot, and one shoe.
Pillows and old clothes were shaped in a human form under an old white sheet
to give the appearance of a man.
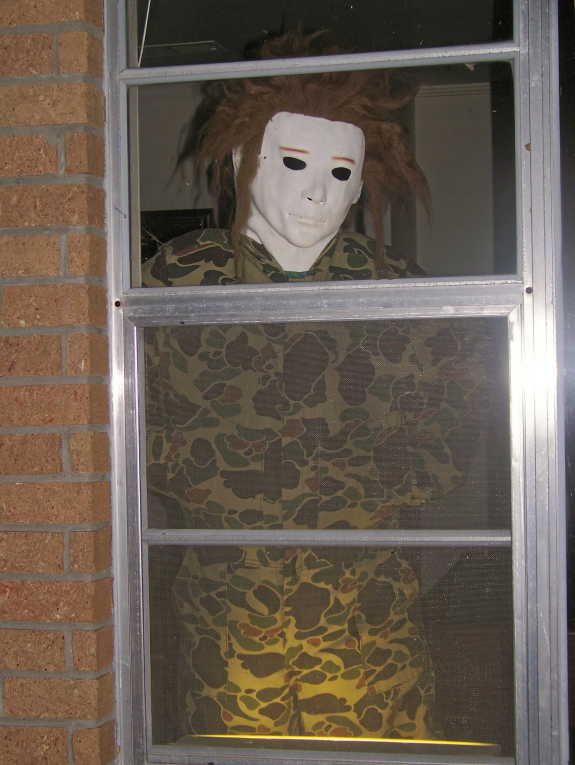
Michael Myers In The Window:
I cannot emphasize how effective this is. Michael stands in a window, lit from inside.
I used a white strand of Christmas lights all around the inside of the window to illuminate Michael!
It even scared me!
Alien:
I used cordboard to cut out the shape of an alien, used Reynold's wrap aluminum foil for his suit.
Cheap foil is just as good. For the ship I just took an old box
and covered it with aluminum foil and old bike reflectors.
Small Easy Coffin:
Spray paint an old box black. Put a cheap plastic face or skull inside.
Take some bundled up newspaper and cover it with old burlap or any old cloth. Extremely easy.
Mad Lab:
Up close picture of the lab described below.
Exorcist:
I made this prop from the movie, the Exorcist, using a styrofoam head, painted as shown.
I put a cheap wig that I got at a thrift store for a $1.00, on the head.
Get an old night gown, from a thrift store if you don't have one, and propped her in bed.
To stand her up, I used a simple wood frame, described below.
Downed Aviator Prop:
Stuffed old clothes with newspapers, set an old mask on top of an empty milk carton
to prop the head on, and set on hay.
Styrofoam Heads:
Several different styrofoam heads. Please email me if you would like for me to make you one of these heads. Not expensive.
Confederate Styrofoam Head:
Michael Myers Prop:
Made with a simple wood base
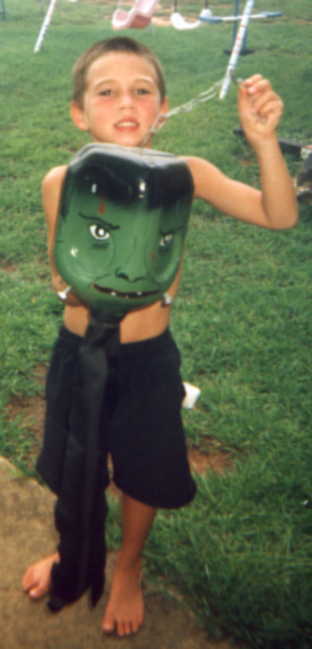
Milk Jug Frankenstein:
Great kid or adult project
Mrs. Alien and friends:
A winner with kids, made with an old styrofoam head, and "eyes" from any party store.
Homemade Mummy:
Made with my 7 year old's body. Details below.
Photo of Masking Tape Body Wrap Procedure:
Friend wrapped in masking tape over old clothes
Prop Photo:
Another downed aviator-note the plastic eyes.
Slit Throat Portrait:
Download and use in your house.
Civil War Soldier Portrait:
Use as a haunted portrait
Old Picture to use in your Haunted House:
Download and frame this one.
Wolfman Prop:
Made with a simple wood frame
Photo of some of our Haunted Paintings:
Note the black backing and gold frame.
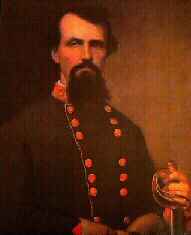
Portrait of Civil War Officer; Scary eyes:
Civil War Officer for your haunted house.
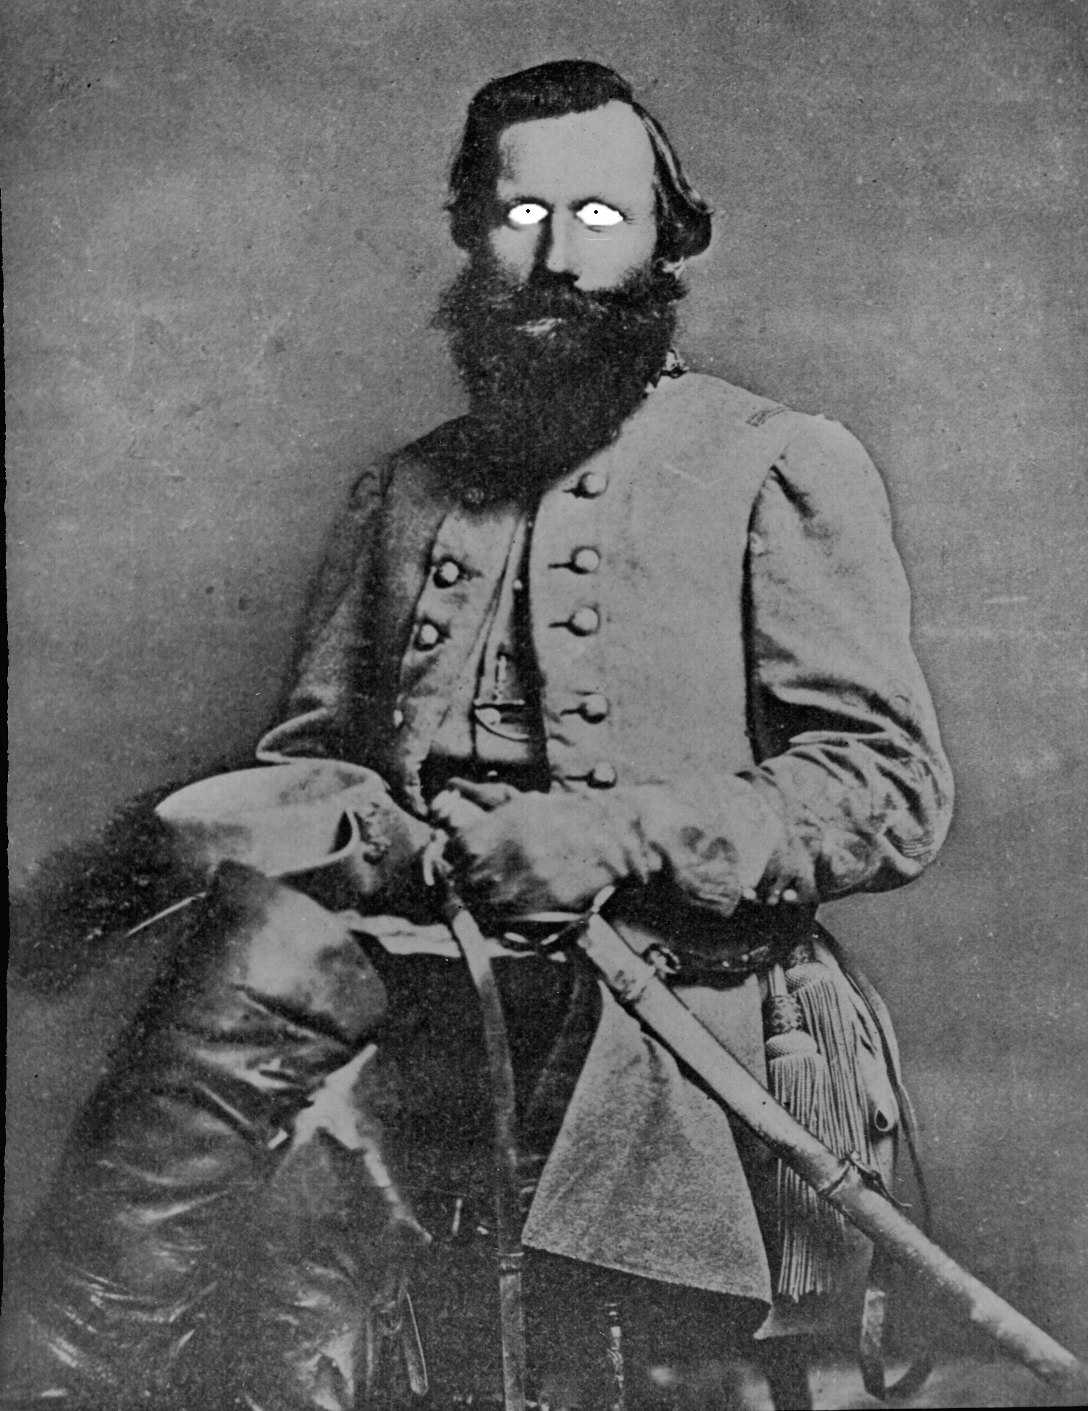
Portrait of Civil War Soldier; Scary eyes:
Civil War Soldier for your haunted house.
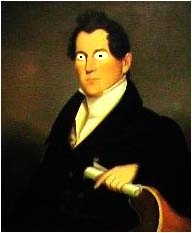
Portrait for Haunted House:
Portrait of Mr. Andrews, Titanic builder.
Another Haunted House Portrait:
Mr. H. Bride, Titanic wireless operator
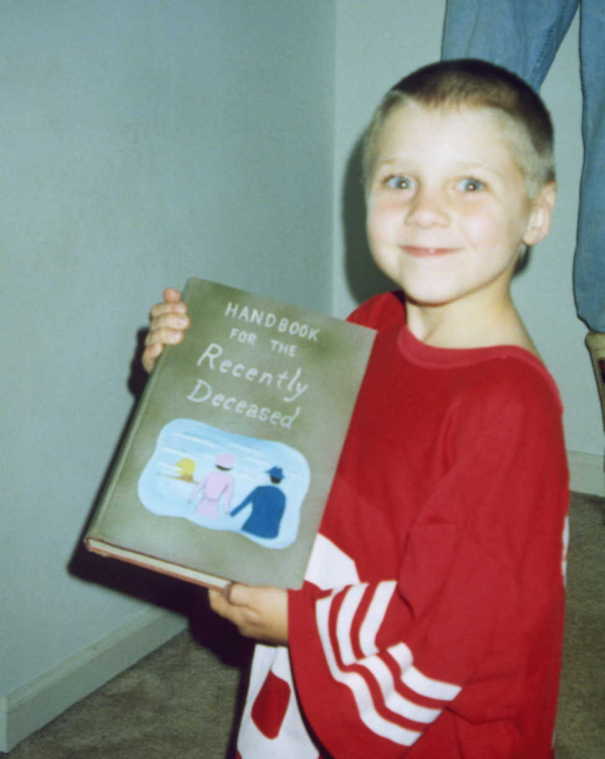
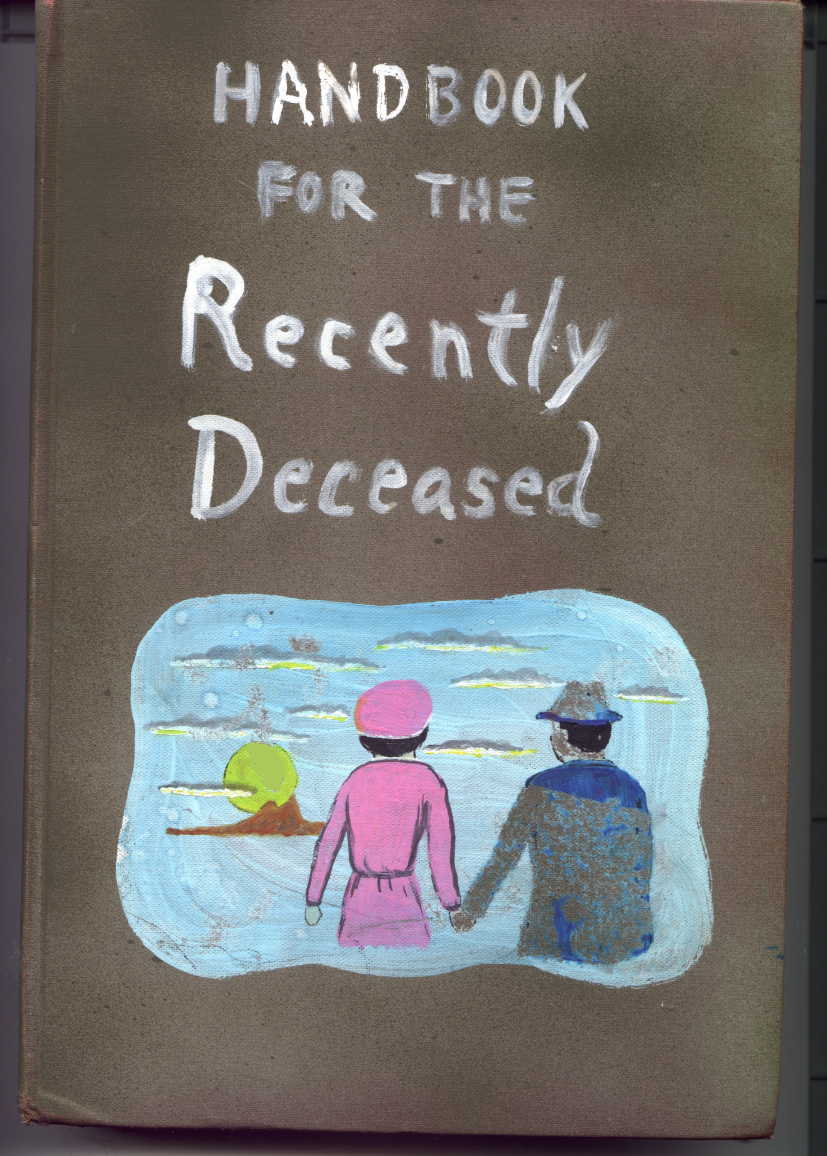
Handbook for the Recently Deceased:
Cover of the handbook from "Beetlejuice"
Creature From the Black Lagoon and Wolfman Prop:
Made from simple wood frames, old clothes, masks.
Devil Doll:
Used a $2.00 doll. Blacken in the eyes; add blood.
Michael Myers Window Prop:
Made on simple wood frame. Illuminated with white Xmas lights on the floor.
Monster Milkjug heads:
Milkjugs of Dracula, skull, Devil and Wolfman
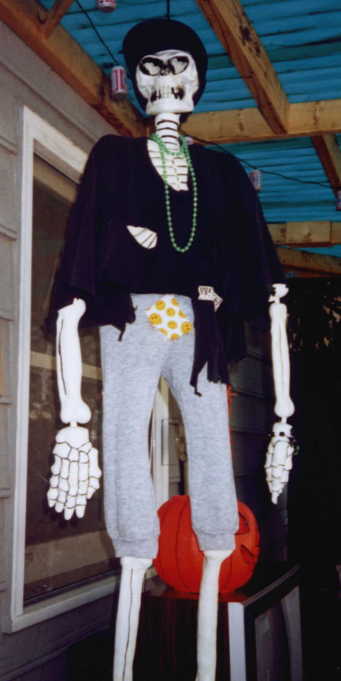
Skeleton Pirate Prop:
Made with $7.00 plastic skeleton body, beads, and $4.00 skull from Walmart.
Vampire Prop:
Simple wood frame with black $1.00 cape, $8.00 mask from Walmart, 75 cent eyes from Party City
Dead Confederate Soldier Prop:
Made with $7.00 plastic skeleton (Big Lots) and thrift store clothes.
Tasty Good:
View a fantastic "Zombie Meatloaf", and see the link below for more cool recipes THAT WORK!
Electric Chair:
Made from old chair, wires, car horn under the seat.
Bride of Frankenstein on Motorbike Prop:
Simple "H" shaped wood frame with wire hands covered with masking tape painted white.
Mrs. Bates...Shower scene:
Made with styrofoam head, simple wood frame, Kyro syrup blood, thrift store clothes.
 White Grim Reaper:
$1.00 skull, cheesecloth and burlap over a simple wood "t" shaped frame.
Exorcist Scene:
Regan made from styrofoam head and cheap wig.
Table Victim:
Styrofoam head, cheap rubber hand and feet, old shoe, wood logs covered with white sheet.
Alien Wreck Scene:
Made with old clothes, newspaper and styrofoam head.
Easy "Terminator" Face Painting:
Paint the face with silver surrounded by red and wear leather and gloves.
Mr. Cool Skeleton:
$8.00 plastic skeleton, dressed "cool".
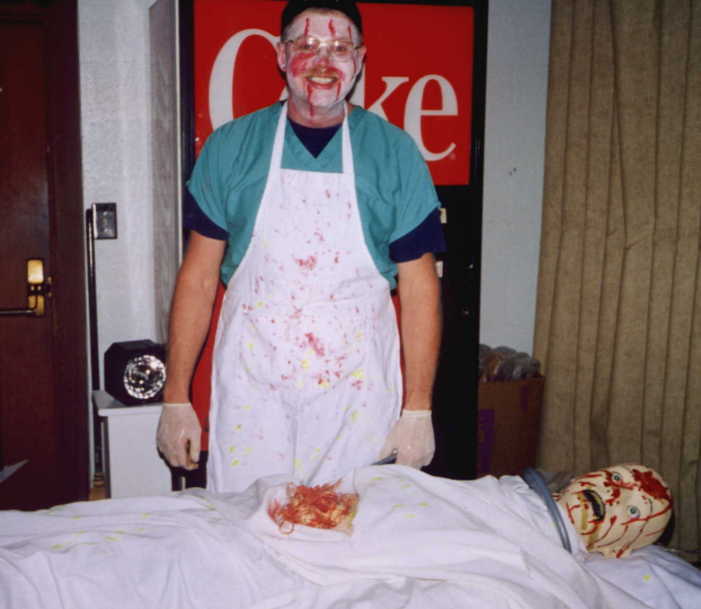
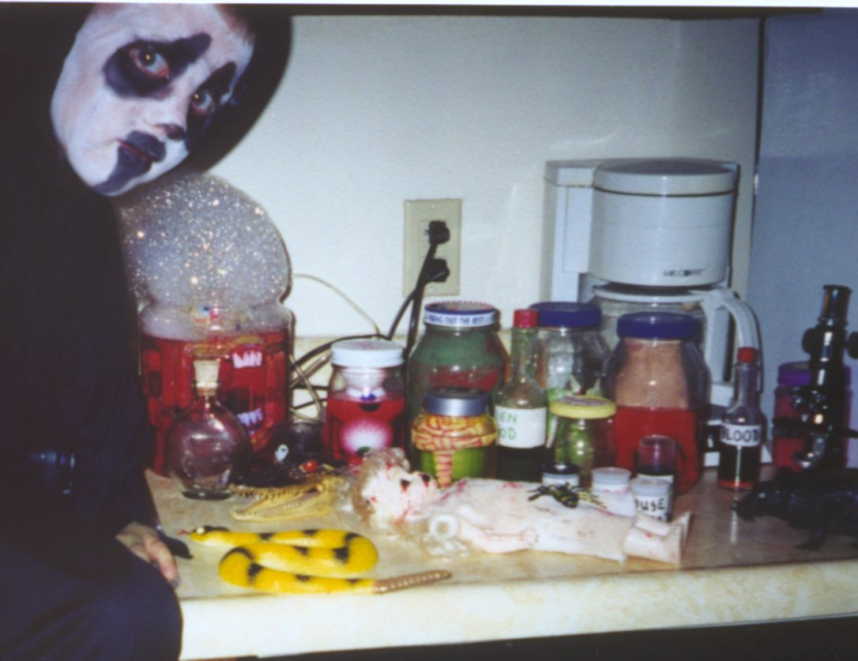
Dr. Jami and her mad lab!:
Plastic rats, head in jar, spiders, Christmas lights and various old chemistry set parts.
"Doctor's Lab"
Extremely effective. See details listed below.
My "Haunted" Graveyard
Crosses cut from old boards, spray painted white and grey. Wood gravestones.
My "Handbook of the Recently Deceased"
Hand painted from a photo from the movie over an old cloth book.
Close up of the "Handbook":
"Handbook" Stencil
Make your own
"Handbook of the Recently Deceased" using this stencil
Hand painted from a photo from the movie over an old cloth book.
"Mad" Doctor :
Old hospital gowns, white apron, corpse made with masking tape body with plastic arm, foot, and styrofoam head.
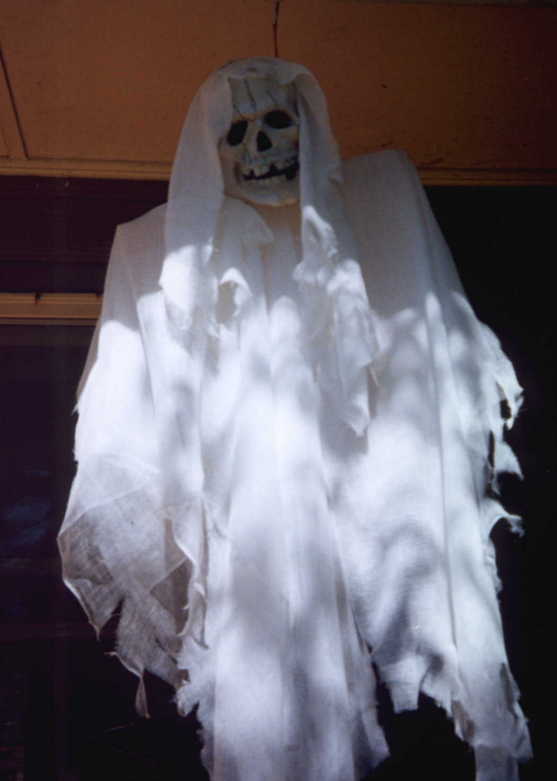
Simple Ghost Grim Reaper:
Wooden "t" shaped frame, cheap plastic skull, old white sheet. Glue sheet to skull with liquid plastic.
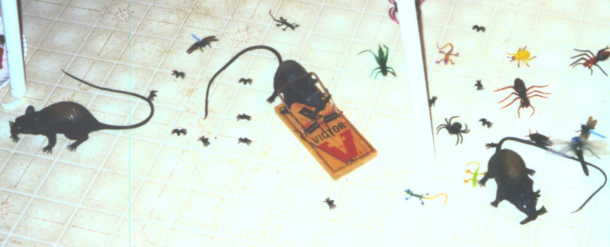
Bugs and rats!
Plastic rats, and cheap plastic bugs, laid on the floor, in non-traffic areas, work great!
Colonel Bedford:
Great haunted picture to download and place on your wall. Framed is great too!
Captain Nelson:
Makes another great "haunted portrait" for your walls.
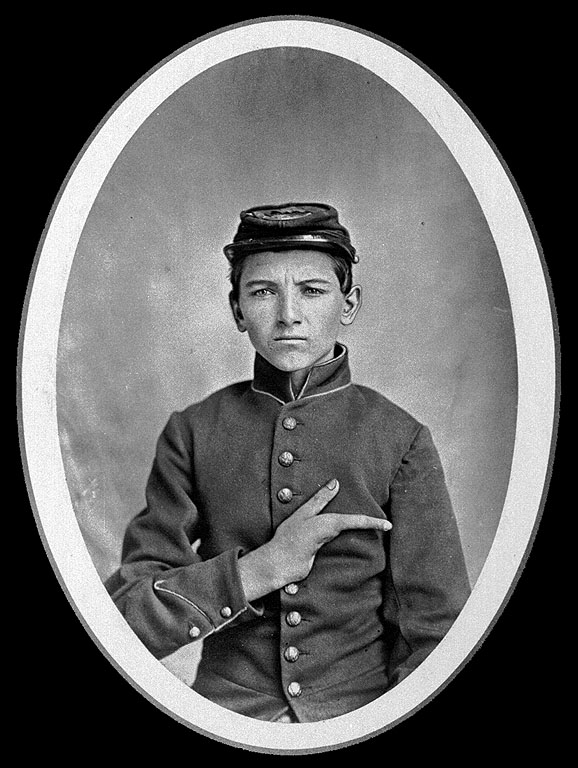
Fingerless!:
Civil war picture of a child. Makes eerie "haunted portrait" and I usually put a ghost story to it.
General Ratcliff:
Another portrait to download and use.
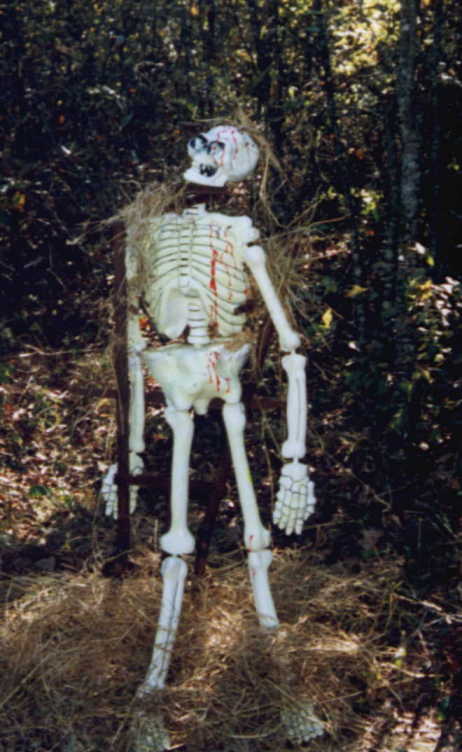
Skeleton Torture:
Cheap $8.00 skeleton with hay, blood, and old iron parts.
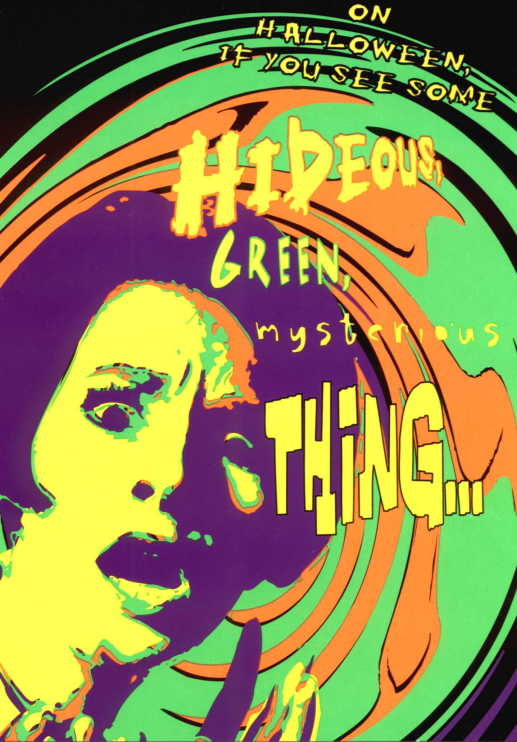
Halloween Card #1:
Cover art with "Elvis". Great wallpaper.
Halloween Card #2:
Cover art with Halloween Cat; very colorful. Great wallpaper.
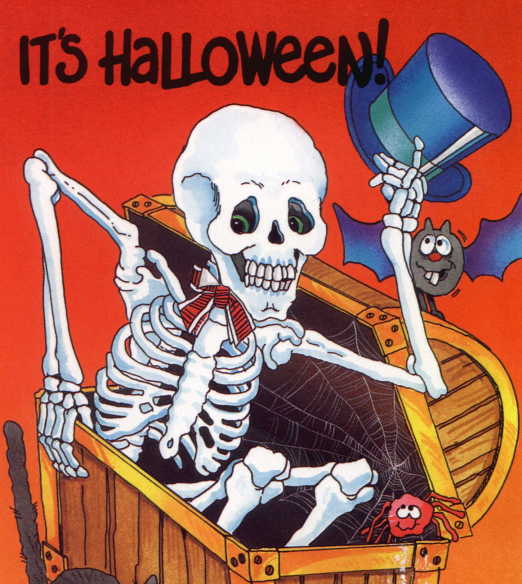
Halloween Card #3:
Cover art with skeleton. Good wallpaper.
Halloween Card #4:
Grim Reaper cover art. Great wallpaper.
Halloween Card #5:
Screaming woman cover art. Good wallpaper.
Halloween Card #6:
Good skeleton cover art. Good wallpaper.
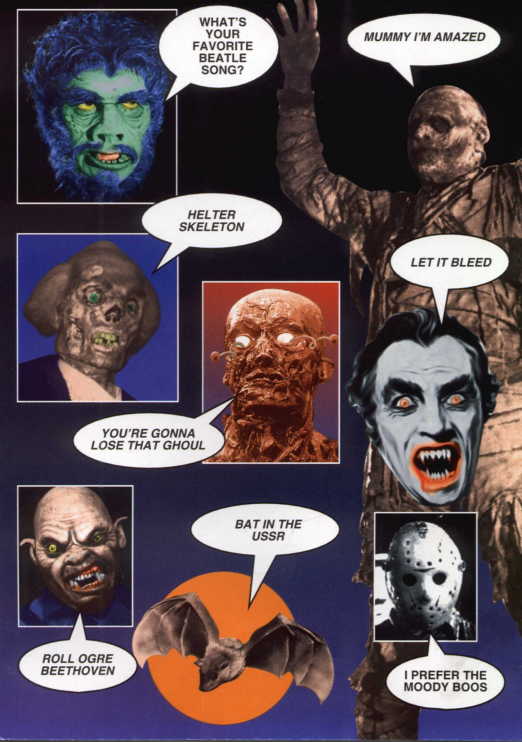
Halloween Card #7:
Various monsters photos; Funny;
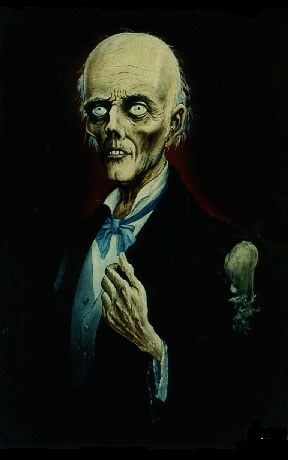
Old Man picture:
Use this picture for a haunted portrait.
Old Man picture (decaying):
Old man portrait, only getting meaner. Print out and use as haunted portrait.
HOUSE DECORATING
These suggestions just flat out work!
- White Sheets - Put sheets over the furniture in your living room. It is very effective. They don't have to be old, just white. Click here to see a picture of how it looks.
- Black Flowers - Get some cheap plastic flowers from any discount store. I got a bundle from Walmart for just $1.00. Or use some old twigs with leaves or a stiff bush clip from your yard.
Spray paint the flowers or leaves black with cheap black spray paint. Set in an old can, spray painted black or grey. Or use an old vase. Looks fantastic on a coffee table or dining room table.
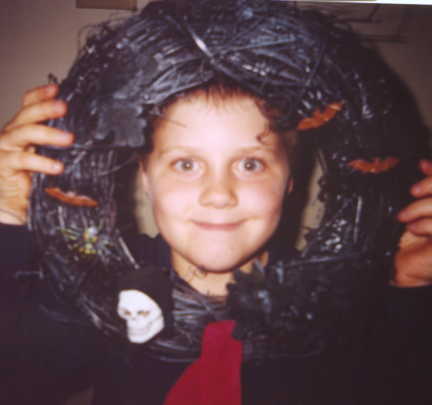
- Black Wreath - I went to a store and saw a black stick wreath for $14.99. I went back home and made the exact same thing for less than $4.00.
Click here to see a completed Halloween wreath.
Here's how:
Make a circular wreath from sticks and old pliable branches, or buy one ready made. I got mine at MJD Designs craft store for only $2.50. I also saw one at Walmart for $2.00.
Attach some old plastic flowers to the wreath too.
Spray paint the entire thing black, then LIGHTLY spray over it with white spray paint. This gives the effect of looking old.
Now add a red ribbon or bow, and plastic skull, pumpkins, bats, spiders...whatever you want.
Photo of this great looking decoration coming very soon!
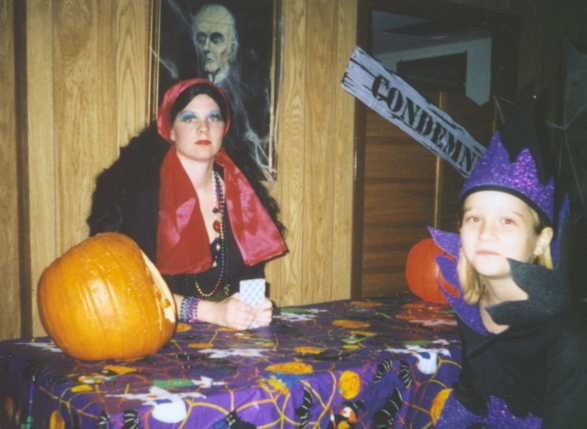
- Fortune Teller - For parties this is a real hit with smaller children ages 12 and under.
 Simply dress in bright clothes, with lots of beads, earrings, bracelets, rings. Mardi Gras beads are fantastic for this.
Put a veil on the head, and cover the table with an old table cloth.
Have the person who is fortune telling have a deck of old cards or download fun ones from this website. (Under construction)
Click Here (under construction) for details of making this a great party hit for younger children.
Simply dress in bright clothes, with lots of beads, earrings, bracelets, rings. Mardi Gras beads are fantastic for this.
Put a veil on the head, and cover the table with an old table cloth.
Have the person who is fortune telling have a deck of old cards or download fun ones from this website. (Under construction)
Click Here (under construction) for details of making this a great party hit for younger children.
Click here to view a nice Ouija board, you can print and use on your fortune telling table.
To make a Ouija Board, you need this picture set on a table, and to make a 'tear-shaped' device for moving about the board. Click here to see a sample of a "Planchette", or pointing device to your Ouija board.
Instructions for playing the Ouija Board can be found by clicking here.
EVERYTHING you ever wanted to know about a Ouija Board can be found by clicking here.
- Lighting - Lights should be low. Use candles and/or black lights or colored bulbs whenever possible. This adds effect to any project you do.
- Bug Floor! - Place plastic spiders, rats, bugs, on your floor in corners or areas that won't be walked on. They look great in low lighting. Kids think they are real! Ok...so do adults!
- Mad Laboratory - This is a real hit every year. Make a "lab" from old junk. I used some car parts, old wires, and nailed them in all sorts of ways to a board. In the middle place a fake plastic hand. Stick some of the wires into the hand. Add a plastic skull available from Big Lots for a $1.
Get an old plastic jar, or soda 2-liter bottle. Clean it out and cut the top off. Place a fake plastic face, skull, plastic bugs, nearly anything inside. Add water. Put in a drop or two of red food color to color the water a pink tinge...not too red.
Now take an old fish aquarium pump and place a plastic hose down, under the plastic skull or face, so the air bubbles pass around the head.
This gives the effect of a head in boiling water! My son put in a drop of dishwashing detergent....one drop...and it foamed like crazy!
Also, make fun things to smell for small kids. Use old bottles and jars. I used old film roll containers for mine. I also used plastic milk jars....the small ones. I painted the outside eerie colors...oranges, greens, red. Spray paint is best and fastest. Don't worry if the paint runs. It is really effective!
Place things in each container for the kids to either see or smell.
Smelly objects include Parmesan cheese....I say it is mummy dust. Burnt matches, become bats hair. Green Tabasco sauce, in its own jar, becomes alien blood! Tobasco, can be anything from Frankenstein's blood, to slug juice!
I cooked spaghetti and put it into a jar, added some red food color, and had guts in a jar! I know that sounds sick, but kids love this sort of thing!
Lastly, to light your masterpiece, I used white Christmas lights. I put a string of them behind and between the wires, and definitely behind the "head in a jar".
- Ghostly Jar - The object is to have a jar that smokes.
Simply take any glass jar, I used one that tea comes in at a convenience store, and painted it a neon color. Click here to see one used in my dining room scene.
Once dry put a stick of incense inside the jar and leave it alone. I suspended mine from the top of the jar with a simple wire wrapped on the free end of the incense.
This gives the effect of a smoking, good smelling, jar. Great for fortune tellers!
- Wizard of Oz Witch Fun - How about some fun with a famous scene from the movie "The Wizard of Oz".
Get 2 old striped socks, preferably red and white ones. Stuff them with newspaper and place them near the edge of your house...where your house and ground meet.
Place some plastic flowers around the feet...just like in the movie.
If you recall, a house fell on the witch. It was a famous scene in the movie.
Why not recreate it, in a visible place where Trick-or-Treaters can see it, or at a party.
- Florescent Light Ghosts - This effect works in you have florescent lights in your kitchen or ceiling.
Get a plastic skeleton, preferably a flat one that light can shine thru.
Remove the cover that is over your florescent fixtures.
Put the skeleton inside the cover and put it back in place.
When you use your florescent lights it will show the skeleton thru the fixture cover.
I originally saw this at a skating rink, and it was quite effective.
- Horror in a Box - This one is truly fun.
Get an old refrigerator box or similar large box and spray paint it black. Cut a hole in the front so that a child's hand will fit inside.
Staple an old cloth to the inside of the box, something that will hang down over the hole, from inside the box.
Place a bowl inside the box so Trick or Treaters have to reach inside the box to get their candy.
This can be as detailed or easy as you want.
You can also place items in some spray painted boxes that the little hands must reach into. You can use cold spaghetti for guts, unpopped popcorn for monster teeth, cold peach halves for a monster liver, grapes for eyes, jello for a decaying heart.
Place the items in each box, dim the lights, and have the children reach inside to feel the 'monster parts'. This is a real hit with younger children.
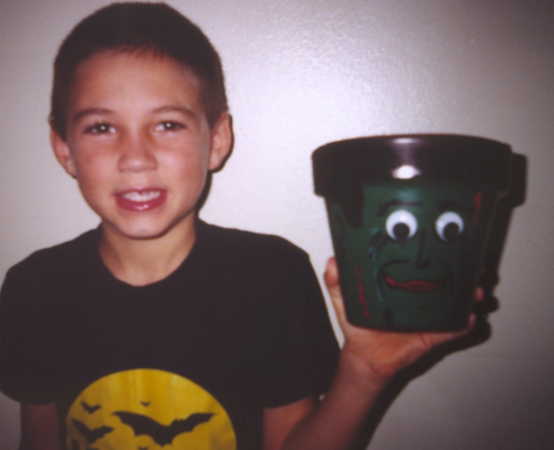
- Pottery Craft
- Simple decorations made from clay pots used for plants. You can use these to hold candy. Easy to make. Click here to see a sample of a Frankenstein clay pot.
Just paint the face and add fun eyes that can be glued right to the pot. This one is easy, cute and cheap. Cost me less than $2.50 to make.
- Stories!!
- Use the haunted pictures you can download from this site, and make up some stories from them.
Sit the kids down and make up a story about the pictures. If you can't think of what to say, get a book and read it, but use the pictures to illustrate the story.
HALLOWEEN 2003
Mrs. King:
I played the role of a "victim" this year. Photo of the site editor and author
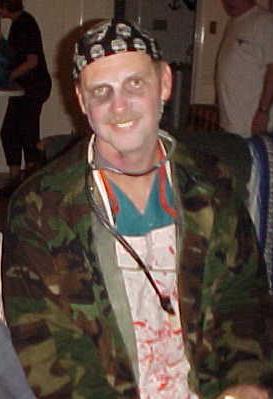
"What would you like to Eat?:
Photo of my son, Kyle, and myself, dressed up.
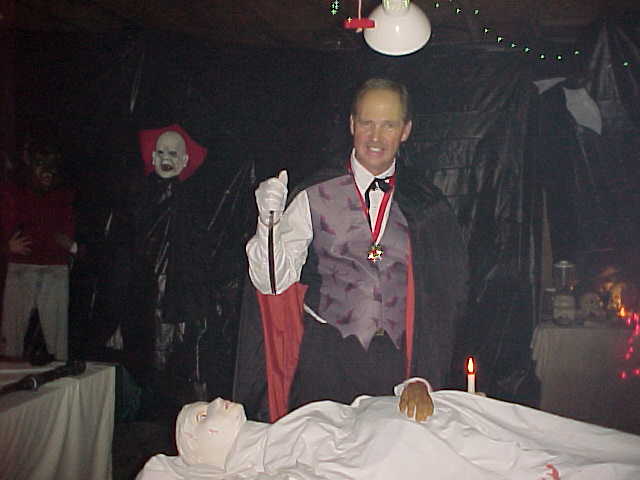
Dr. Frankensteen:
Photo of my husband in his famous role as "The Doc"
Victim Gets It!:
Photo from Halloween 2003, in a staged performance. My husband, David, as the "Count"
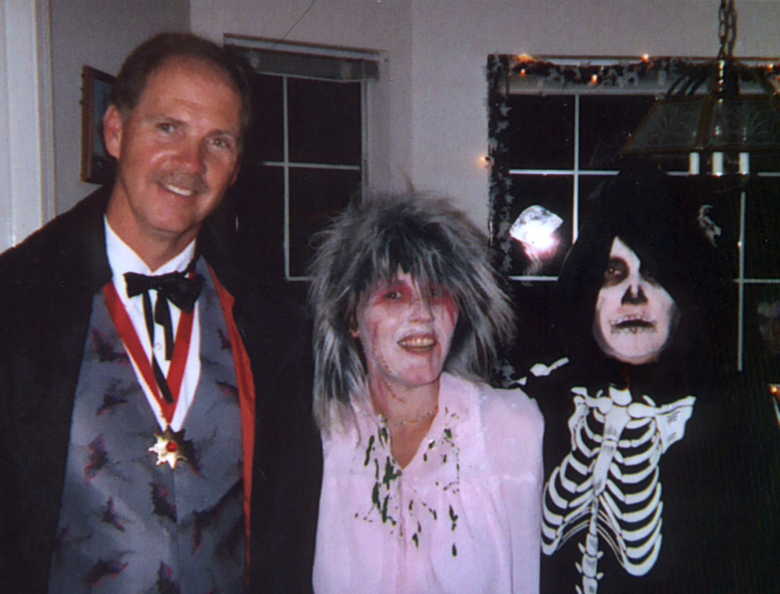
Our costumes for Halloween 2003:
We do Halloween right!
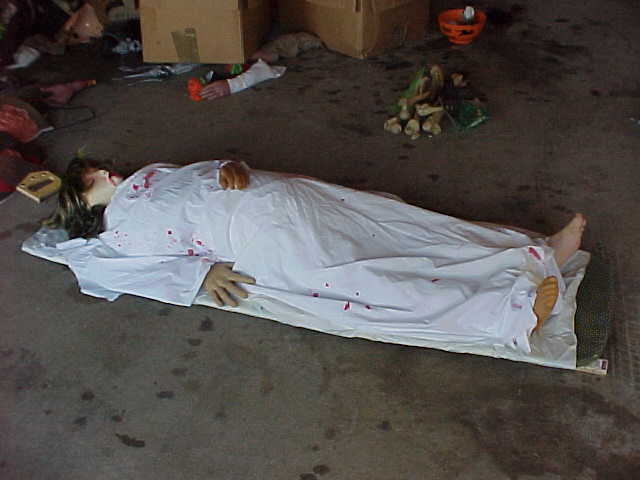
Walmart Bag Victim:
We took plastic Walmart bags, made then into long, narrow arms, legs, and big bags (of bags) for the body.
We kept it together with masking tape, and covered her with a sheet.
She is laying on an outstretched lawn chair, with boards under for support.
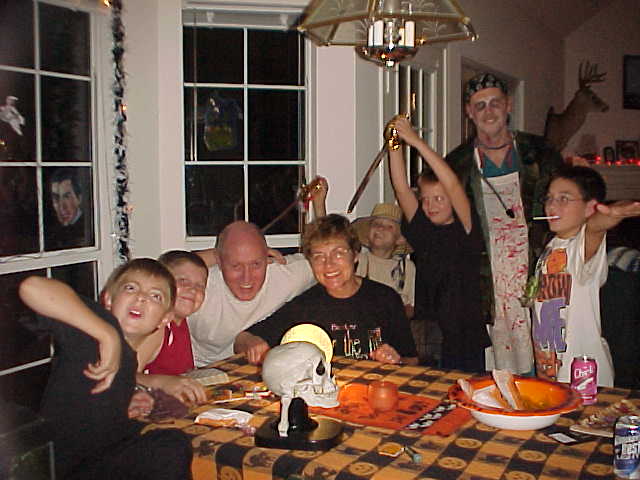
Halloween Party:
Photo of the King family in costume
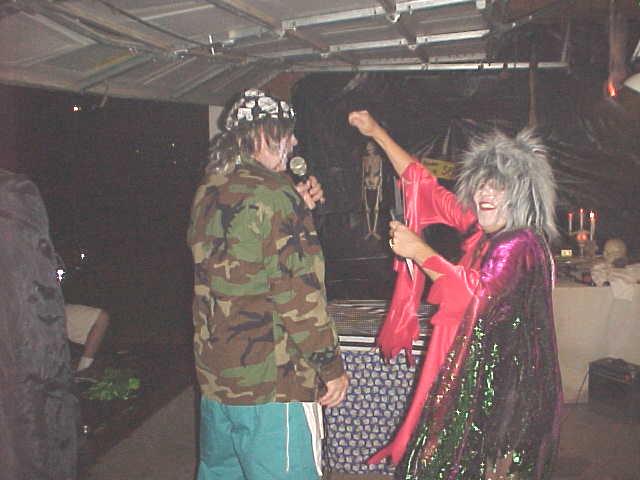
Dr. Frankensteen and Assistant:
Our party costumes
Fortune Teller:
Wonderful Fortune Telling globe light made by John Willitts, Sr.
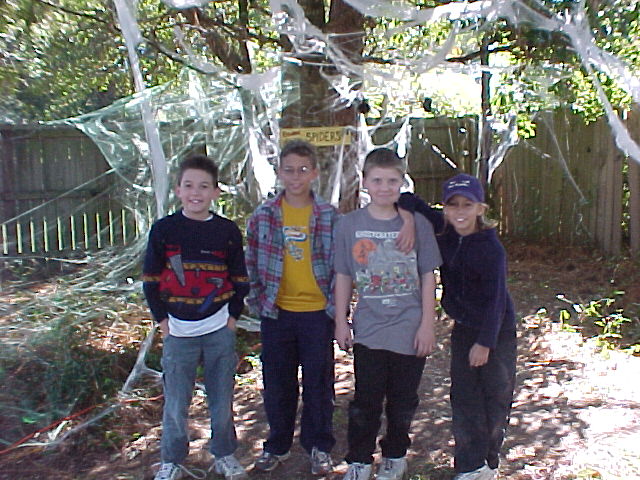
Spider Garden:
The children made this scary "Spider Garden" with web bought at BigLots for 99 cents
Kevin's Fortune Telling Stand:
This idea, as a Fortune Teller, is a solid hit with children ages 12 and younger
Halloween 2001 :
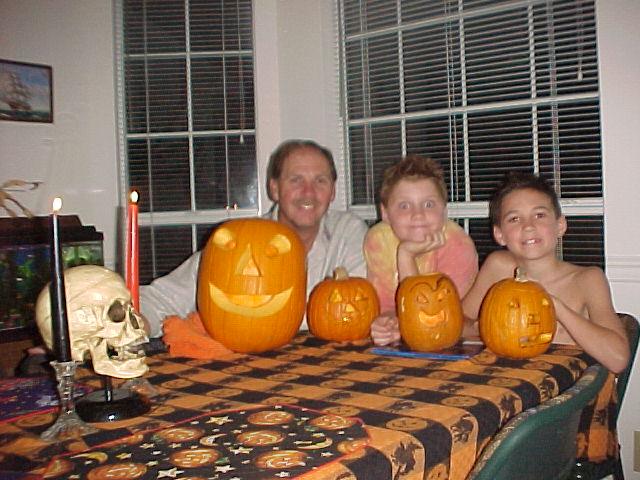
Pumpkins for a festive mood.
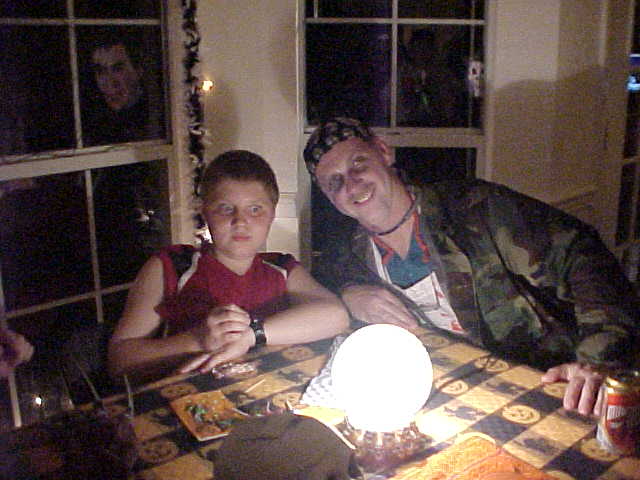
The Doc with a Victim:
Husband David and Kyle after Halloween
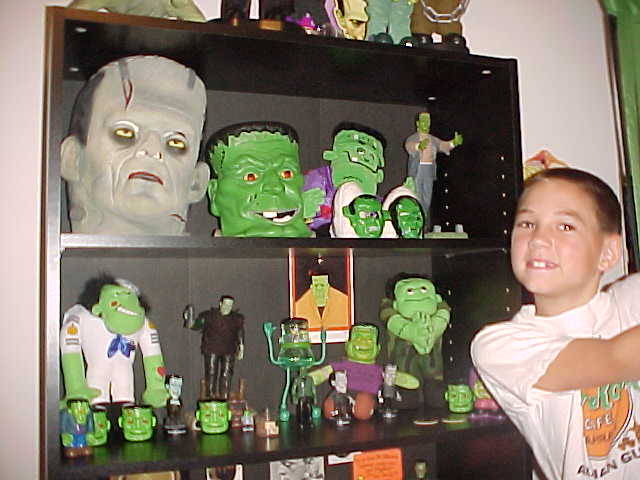
Frankenstein Collection:
My son, Kyle, and his vast Frankenstein collection
Frankenstein's Biggest Fan:
More of the collection
SUBMITTED IDEAS!!
These photos were submitted by John Willitts, Sr.
Using the instructions in this website, Ray and Christine Ramsey of North Hampton, England, submitted these photos.
To find the directions and photos of how to make the ideas listed above
and more
please go to this follow-up website:
Other King Halloween Related Websites:


This site is dedicated entirely to my two wonderful children
Kyle and KevinHerring.
They make all of this totally fun and worthwhile.

Thanks for visiting!!! Happy Haunting!!!
You can contact me, Kimberly, at
flygal46@yahoo.com
or just click on the Spook Mail Link below!

 You can contact me at:
Kimberly King
flygal46@yahoo.com

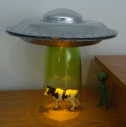 If you want a dome over your alien, like the one shown in this
photo these can be purchased off eBay in packs as well. These "domes" are called "clear acrylic plastic 3 inch domes" or spheres. I got a pack of 6 for $4.00 on eBay. Or you can use the top off a Icee cup. My friend, Patti Harris, made her flying saucer using pie pans and the Icee top. Click here to see Patti's saucer.
If you want a dome over your alien, like the one shown in this
photo these can be purchased off eBay in packs as well. These "domes" are called "clear acrylic plastic 3 inch domes" or spheres. I got a pack of 6 for $4.00 on eBay. Or you can use the top off a Icee cup. My friend, Patti Harris, made her flying saucer using pie pans and the Icee top. Click here to see Patti's saucer.