|
jardiniere...
Several years ago, I owned my own design and home accessories business. It is my dream to once again own another business. My plans are to incorporate European antiques which I will import, English china and tea paraphernalia, unique garden accoutrements such as herb topiaries, statuaries and small fountains, and garden furniture, and, of couse an array of decorative home accessories. In the middle of all this, I want a small tea room, where one can sit and enjoy the sounds of Vivaldi while enjoying a rich Earl Grey tea, an aromatic cup of gourmet Hazelnut coffee, or one of my specialty non-alcoholic "spritzers" featuring fresh fruit juice ice cubes - good ole' fashioned southern iced tea
included. The name of this business....jardiniere. Until then, I will dream and plan, and share some of the treasures I hope to feature in my shop. Enjoy!
In the first of a series...Topiaries!
I adore topiaries! Faux or real...double or single ball...round or heart shaped...ivy or herb. I love them all! Almost every room in my home is adorned with a topiary of some shape or form. One of my favorites is a topiary that sits in my bathroom. It is a single-ball topiary in an antique silver coffee server. The server's silver finish has a beautiful "patina"...aka "tarnish" which makes it even more lovely.
Anyone can make topiaries...and making them yourself saves so much money. Follow my easy directions and fill your home with these unique floral designs.
Click Here to go to Page 2 of jardiniere
Click Here to return to The Everyday Decorator Home Page
|
Double-Ball Ivy Topiary
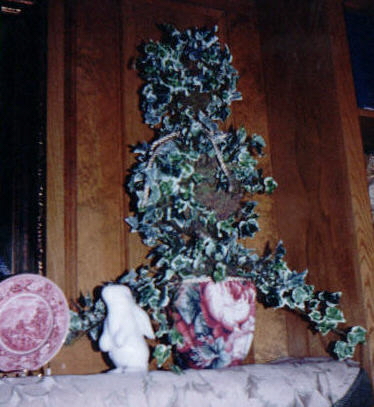
Although there are more economical ways to make a topiary form using standard styrofoam balls and a length of dowel, I opted to "splurge" on a pre-made form that includes the two foam balls as well as a foam base that easily fits into a terra cotta pot. A double-ball form costs around $5 and can be purchased at most craft and garden shops. I used a basic terra cotta pot and covered it with a piece of remnant fabric decorated with silk cording. The total cost of my topiary was less than $20.
Supplies Needed:
Topiary Form
Clay Pot that fits foam base on form
Spaghnum Moss
Ivy Garlands (I used two 9' garlands)
Floral "U" Pins
Hot glue gun
Fabric Remnant
Silk cording (opt)
Ribbon of choice (opt)
1) Using the floral "U" pins, attach sheets of spaghnum moss to both foam balls - completely covering the entire surface.
2) Cut the garlands in half for easier manageability.
3) "U" pin the garland onto the balls, wrapping and pinning as you go.
4) Cut a circle of fabric large enough so the sides will fold up inside the pot. Gather the fabric inside the pot, making pleats as needed. (see pic below) Push the base of the topiary form into the pot. This will hold the fabric into place. *Note- you can opt to glue the fabric and the base into the pot. I do not so I am left with the option of changing pots/comtainers during the holidays.
5) Glue silk cording around the upper edge of the fabric covered pot. (optional)
6) Using "U" pins, cover the styrofoam that shows above the pot with moss.
7) Add a bow if desired.

|