The starting positions of the Leander Shuffle are the same as the Deweyville Shuffle. This is the second shuffle that was originally designed to be used against a zone defense but can also be used against a man-to-man defense.
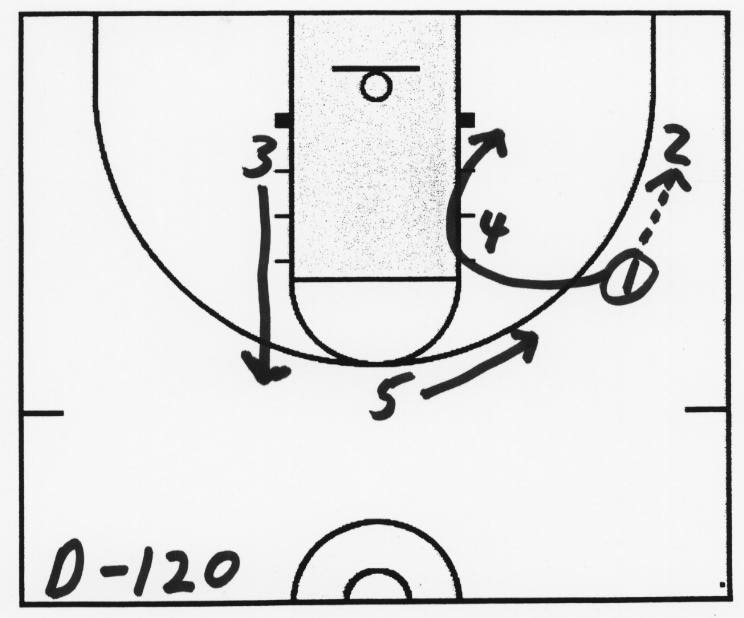
Diagram 120: The first cutter passes to the second cutter and cuts behind the post to the ballside low post position. The point moves to a spot half-way between the original point position and first cutter position. The feeder moves to the same position as the point but on the opposite side of the court and about a step closer to the sideline.
Diagram 121: The second cutter passes to the point. The point quickly swings the ball to the feeder. The post moves across the lane to the ballside post position. The player in the low post (original first cutter) runs the baseline to the second cutter position.
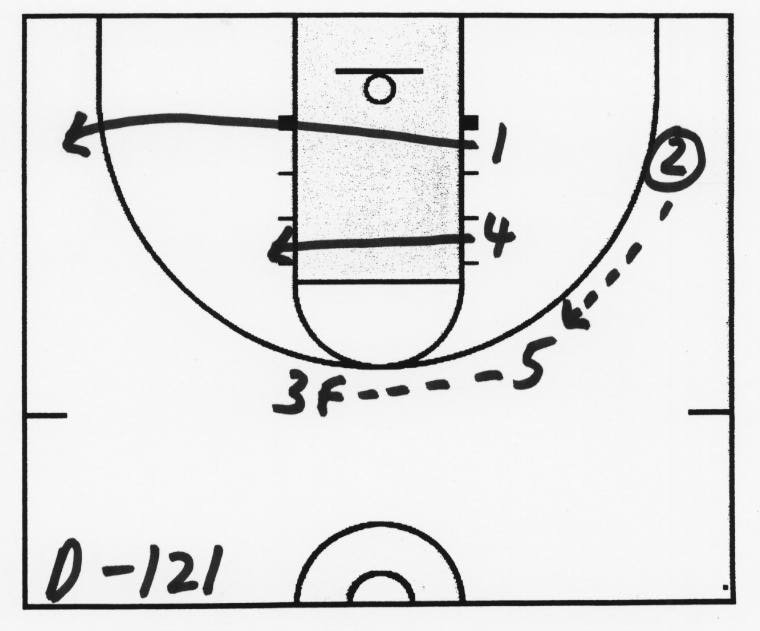
Diagram 122: The feeder passes to the second cutter and cuts behind the post to the ballside low post position. The point moves across the court to occupy the same position he was previously in, but now on the ballside. The original second cutter moves up to the feeder position. We are now ready to run the shuffle back to the other side of the court.