
WELCOME!
This is the Bryce Boolean Tutor tutorial page,
where users of Bryce 2 and Bryce 3D can come to pick up a few tips and tricks
on building Bryce objects. While we'll be focusing mainly on boolean operations
in Bryce, there will be some coverage of making objects using primitives
and terrains, without the use of booleans, as well. Anyone who wants to
contribute a boolean tutorial is welcome to do so. If you have a tip or
trick for Bryce boolean operations that has not already been used, please
send an email to Gary Rea
To get warmed up, we're going to do a simple object
that requires no booleans. This is for those who are just getting their
feet wet in Bryce. For those of you who are looking for more advanced instruction,
stick around; there will be plenty of boolean tutorials for everyone.
Lesson 1: Creating a Building with Primitives
(no booleans)
Many people have asked how I do the buildings
in some of my cityscape scenes (see GSR
Gallery), and while I use a variety of techniques,
my favorite is to use combinations of primitives, using different materials
for the various components in order to create a more realistic and interesting
structure. I then save these as object presets, which can then be used in
later scenes, either separately, or with my whole library of buidlings to
make an entire cityscape. We'll begin our lesson with a simple highrise
building:
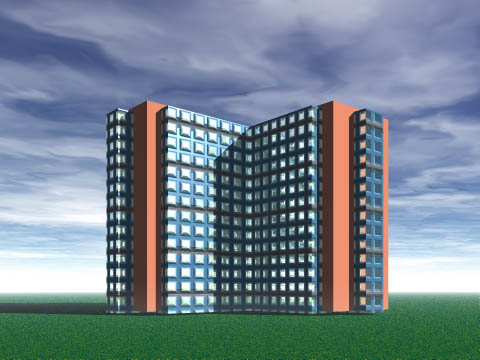
This highrise building is composed entirely of
one primitive, duplicated and resized. I have found the best way to work
on such objects is to leave them at world center as you work. This is because
that is where all Bryce primitives and terrains appear when they are generated.
Keeping everything in the center of your scene will make alignment of objects
faster and easier. If you need to rescale an object, you can hold down the
Alt (PC) key while scaling, in order to keep the object at it's present
location. We'll begin our buidling by bringing in one of the tall, rectangular
cubes (Figure 1). This is the only object you will need for this project,
as we will be duplicating it to form all six parts of the highrise.

Figure 1
Next, go to the top view and stretch the cube
so it is wider. Now, duplicate the cube and rotate it 90 degrees around
the Y axis. You should now have two cubes forming a cross shape, as in Figure
2:

Figure 2
The next step is to apply a texture to what you
have so far. Go to the cube icon at the bottom of your screen and click
it to select both cubes. Now, let's use the Bryce Terracotta texture, in
the Fast and Simple textures menu. You can use anything that strikes your
fancy, of course. Now that you've done that, deselect the cubes, then select
one of them. We are now going to create the first of our glass facades.
With the one cube selected, duplicate it, then apply the Office Building
texture to it (any of the three in Wild & Fun will do). Once you've
done this, it is time to stretch the duplicate cube so that it is wider
than the original cube, but by just enough that it emerges from the sides
of the first cube, as in Figure 3:

Figure 3
In Figure 3, I have rendered the scene only to
make it clear to the viewer; it is not yet time for you to render yours,
though. Note how I have not only made the new cube wider than the original,
so that it protrudes from the sides of the original, but I have also shortened
it's height just a little so that the roof of the building will be concrete/brick,
not glass. At this point, the ends of the building have also been left without
glass. You can leave yours that way, if you wish, or you can do what I'm
going to do here, and add a narrow vertical strip of glass to the ends,
as well.
The next step is to duplicate the cube you have
just made and then rotate it 90 degrees, so that both parts of the "cross"
shape look the same (Figure 4).

Figure 4
Now I'm going to add the end strips I mentioned
above. To do this, I'll duplicate the second of the two glass-textured cubes,
and resize it so that it is completely concealed, except for the ends, which
will be stretched outside the ends of the original cubes (Figure 5). This
is the final state of our building project, all made with only one duplicated
primitive and no booleans. It only takes a little thought and imagination
to come up with many variations on this simple technique. It is possible
to create a whole cityscape in which each building looks different, just
as it would in reality.

Figure 5
Lesson 2: Working with Booleans
Okay, we've warmed up with a simple primitive-based
project; now it's time to move on to booleans, where Bryce's real object-creation
powers come into play. For our boolean project, let's do another building,
but this time we'll doing something a bit more complex in structure, as
shown in Figure 6:

Figure 6
First, we'll begin by bringing in a sphere and
scaling it up a bit, as in Figure 7:

Figure 7
Next, go to a side view. We are now going to create
the first component of our boolean, a flattened cylinder. Bring in and scale
up a flattened cylinder so that it is wider than the sphere. Now, resize
the cylinder so that it is thinner (hold the Alt key down while doing this,
as we want to keep it at world center), and move it up to bisect the sphere,
as in Figure 8:

Figure 8
Now, while the cylinder is still selected, go
to the Attributes Dialog (click the "A" beside the cylinder),
and check "Negative" in the dialog. Get out of the Attributes
Dialog, then select the sphere and use it's Attributes Dialog to make it
"Positive". Now, we will duplicate the cylinder and move it up,
then duplicate it again and move it down, so that our cylinders are positioned
as in
figure 9:

Figure 9
Now select the sphere and duplicate it. Resize
the second sphere so that it is a bit smaller than the original, making
sure to use the Alt key to keep the sphere positioned at world center. With
the new sphere still selected, go to the Attributes Dialog and make it "Neutral".
Next, go to the "Wild & Fun" textures menu and select one
of the "Office Building" textures there. Your second sphere will
now be the glass windows in our building. Now select and texture the outer
sphere. I have used Bryce Terracotta again, which makes an excellent adobe,
stucco, or distant brick look. Next, group the whole assembly. You should
now have a sphere with banded windows in it at three levels, as in Figure
10:

Figure 10
Now that we have completed the boolean portion
of our building, it's time to add a base to complete it. Bring in a cube
and stretch it up until the top of it reaches approximately the centerline
of the sphere. Now duplicate the cube and position the duplicate at the
opposite side of the sphere, as in Figure 11:

Figure 11
Now, let's go to the top view and we'll select
the two cubes we just added. Group them and duplicate them, then rotate
them so they form the remaining two columns, as in Figure 12:
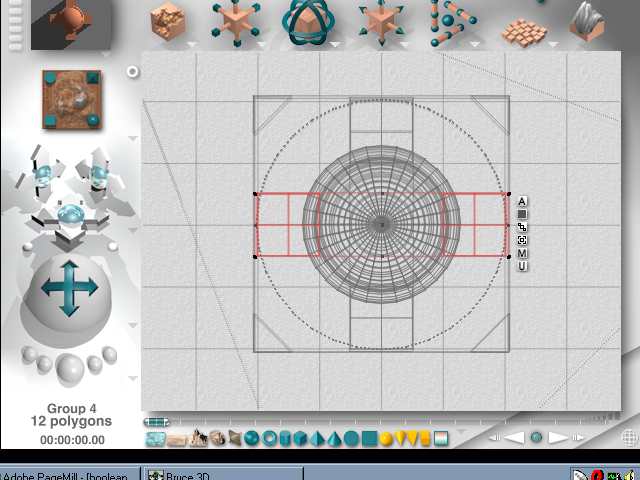
Figure 12
Now the only thing remaining is the central access
column, which is the simplest step of all: simply bring in a cylinder, as
shown in Figure 13. Now group the entire building and render. Voila! You've
just created my "Sphere Building". Feel free to save it as an
object preset and use it in your own scenes!

Stay Tuned! More to Come!