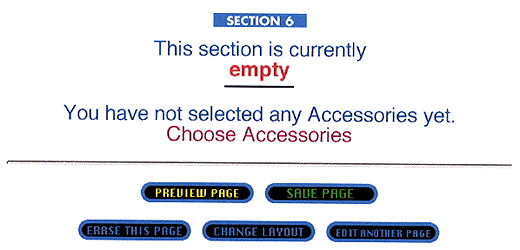
What we are going to do next is create the most basic page. You will not need to know any HTML to do any of this. You will be able to come back afterwards and add or erase anything you want using your own HTML. You will notice that there are five sections and five things you can put in each section plus a sixth section for accessories.. You can choose any of the five things to put in any of the sections. Or you can put the same type of thing in all the sections.

ADD AN IMAGE

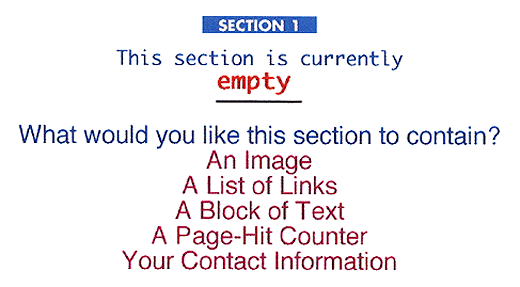
Now we should be back at the "Quick Page Editor®". Now scroll down to "Section 1" (see image). It will say "This section is currently empty". Then there will be a list of things you can do to this section. Click on "An Image" to start the process.

The next page will be the "Select an Image" page (see image). Here you make the choice to either choose an image from the "Image Library" or use one of your own that you have transloaded to your directory already. For transloader help go here. We will do this as if you had your own image to use.

First click on the "enter the URL". That will take you to the "Enter an Image URL" page (see image). Now scroll down to the box and type in the URL (address) of your image. Click on the "Use Entered URL" button.That will take you to the "Section Stored" page (see image). Here you will see the image and the HTML used to insert your image on your page. Now scroll down and click on the "OK" button.

If the "Section Stored" page shows a blank box instead of an image click on the "Edit" button which will take you back to the "Enter an Image URL" page. Retype the correct URL in the box and click on the "Use Entered URL" button again.

After clicking the "OK" button you will be back at the "Quick Page Editor®". In "Section 1" you should now see your image and under it there will be a "Modify this image", "Clear this section" and Edit the HTML of this section" (see image). We will get back to those later. Now scroll down to "Section 2" and click on "A List of Links".


ADD A LIST OF LINKS

After clicking on "A List of Links" you will come to the "Build a List of Links" page (see image). You can either change the the text in the "Name of your List..." box to something else or erase it and leave it blank. Come down and fill in the boxes for each link. Then come down and choose the format you would like the list to look like. Now at this point if you have more links you would like to add, click on the "Save these Links..." button. It will bring you back to fill in more links. Otherwise click on the "Add These Links" button.

That will take you to the "Section Stored" page. Here you will see the Links and the HTML used to insert your Links on your page. Now scroll down and click on the "OK" button.

That will bring you back to the "Quick Page Editor®". Now scroll down to "Section 3".

ADDING TEXT

Now click on "A Block of Text". This will take you to the "Text Editor" page (see image). Here you can add just plain text. You can start with a header if you like, just fill in the header box and choose from the options under it. Then come down and highlight the large box, activate the cursor by hitting the return key and then type in your text. Use just the arrow and delete keys within the box. Then come down and choose your options, then click on the "Include this text" button.

That will take you to the "Section Stored" page. Here you will see the text and the HTML used to insert your text on your page. Now scroll down and click on the "OK" button.

That will bring you back to the "Quick Page Editor®". Now scroll down to "Section 4".

ADDING A COUNTER AND CONTACT INFO

Normally the Counter and your contact (e-mail) info would be put at the bottom of the page but for now we will do it this way. Click on the "A Page-Hit Counter".

This will take you to the "Add a Counter" page (see image). Here you can add your own text to accompany the counter or erase it and leave it blank for no text and choose a color for the numbers. Check the center box if you want it in the center (left to right) of the page. Otherwise it will default to the left of the page. Then click on the "Make This Counter" button.

That will take you to the "Section Stored" page. Here you will see the counter and the HTML used to insert your counter on your page. Now scroll down and click on the "OK" button.

That will bring you back to the "Quick Page Editor®". Now scroll down to "Section 5". Now click on the "Your Contact Information".

On the next page (see image) you will see all the personal information you provided when you signed up. If you leave it all in the boxes it will show up on your page. You can also erase everything but your e-mail address. The e-mail address is required. Now click on the "Use This Info..." button.

That will take you to the "Section Stored" page. Here you will see the HTML used to insert your e-mail address on your page. Now scroll down and click on the "OK" button.

That will bring you back to the "Quick Page Editor®". Now scroll down to "Section 6" (see image).

ADDING ACCESSORIES

Click on "Choose Accessories". That will take you to the "Accessories" page. The instructions there are pretty simple, if you don't want any of those "Accessories" on your page you must uncheck each one. Then click on the "Add These Accessories" button.

That will take you to the "Section Stored" page. Here you will see the HTML used to insert your accessories on your page if you chose some. Otherwise it will be blank. Now scroll down and click on the "OK" button.

That will bring you back to the "Quick Page Editor®".

SAVING YOUR PAGE

Up till now you have always clicked on the "OK" button at the bottom of the "Section Stored" page. By doing this you keep your page from being seen until you are done with it. Now we will see how the page looks first before you put it out for the world to see. At the bottom of the page click on the "Preview Page" button (see image).

This will take you to your page as it looks now. You will see a bunch of horizontal lines that separate the things you have put on you page. They separate each section. These are permanent, you can't remove them unless you convert the page to the "Custom Editor". I have left this page as a "Quick Page" to show you the lines and what it looks like if you don't use all the sections. (see bottom of page) I converted the other pages and removed the lines. Now hit your back key to return to the "Quick Page Editor®".

Normally at this point you would, at the bottom of the page, click on the "Save Page" button. This would take you to a page that shows you the address of your now finished page that is available for the world to see. Now click on the "Next Page" below to find out how to edit and modify your page.


c149@webtv.net


SECTION 4


SECTION 5


powered by lycos Search: Tripod The Web