EL-Backlight Installation Plans
On this page we will discuss how to install an
EL-Backlight into your calculator. The model used for the
pictures is a TI-86, but this project should be
compatable with all but the TI-80. Warning: No one has
found a safe way to remove the LCD from a TI-92. Trying
to do so may crack the LCD and render your calc useless.
Before we get started lets talk about
what you're going to need for this project. You will need
at least 2 flat-headed screw-drivers, a utility knife
(the little disposalbe type is recmonded), and a good,
steady hand.
Our first step is to remove all the
batteries. If you haven't all ready, create a backup.
Then remove the two small screws at the bottom of the
calculator.
Next, take the screwdrivers and pry open
the case. I recomend that you use one on each side so
that you don't ruin the case.
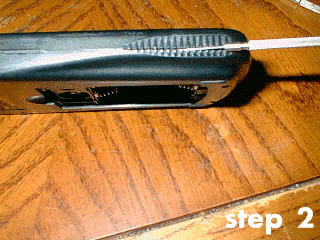
Step 3 is just basically opening up the
case the rest of the way.
Step 4 is just a picture of the case
open.
For step 5 just peel back the metalic
sheet the is covering the board. Next remove the two
screws that are holding in the LCD.
Step 6 is just illustrating the LCD
pulled away from the plastic screen.
This is what your calc should look like
when taken from the case. Be careful when removing from
the case not to dump the buttons. If you do dump the
buttons, there is a picture of there placement on the
back of the manual's cover.
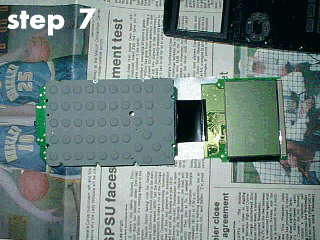
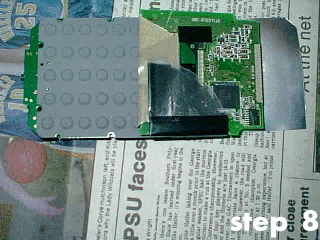
For Step 8, basically just fold the LCD
over the keypad. This prepares you for step 9.
Next you have to cut the tape that is
holding the ribbon cable together. BE CAREFUL NOT TO CUT
THE RIBBON CABLE! IT IS NEXT TO IMPOSSIBLE TO REPLACE!
Next just push the ribbon cable over to
the side.
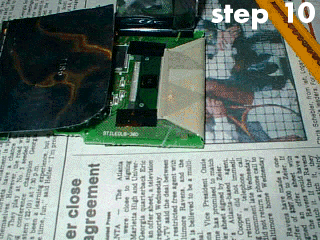
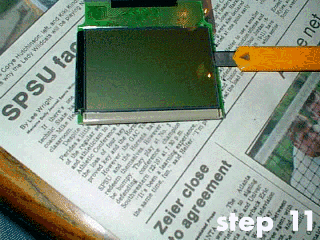
Then very carefully, cut the foam that
is holding the LCD to the board. Be careful not to cut
the ribbon cable here, either.
Next you will have to remove the
"mirror" from the back of the LCD. Keep this if
you can. If the screen is still sticky, use some
Isopropyl Rubbing Alcohol. Rubbing alcohol is ideal as it
won't hurt the electronics.
Center the EL-Panel on the back of the
LCD. If you are going to put in a switch, I would
recomend a 4 place DIP Switch, so you can hook up other
things later. You can cut a hole in the battery
compartment to the right of the Back-Up battery where is
tells what kind of battery to use.
If you saved the "mirror" then
you can place that behind the EL-Panel if you wish. If
the pannel slides around, you could used a small roll of
electrical tape with the sticky side out or just use some
2-sided tape. Make shure that there are no exppsed wires,
as the EL-Panel runs on 120v AC. Don't try passing that
through a 5v DC device :). Then just reverse the steps to
close the calculator. Good Luck!