

You can now find us fast at our main new website address:
Photos and descriptions are listed below.
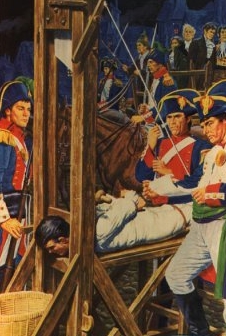 GUILLOTINE
It would be best to look at the photo of the built guillotine. I did not build the guillotine, but know how it was constructed. The finished guillotine is 12 feet high. It was used for photos. We used two 2x12x12 pieces of lumber for the main blade holder/frame. We used four 2x6 pieces of lumber, nailed at angles to support the main frame.
GUILLOTINE
It would be best to look at the photo of the built guillotine. I did not build the guillotine, but know how it was constructed. The finished guillotine is 12 feet high. It was used for photos. We used two 2x12x12 pieces of lumber for the main blade holder/frame. We used four 2x6 pieces of lumber, nailed at angles to support the main frame. PROPS
Props are easy to make from items found around the house. Two ways to build them.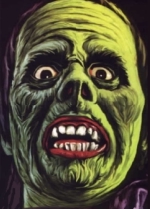
2. Rigid Frame This is simple. Take 2 long pieces of rigid wood. I used 7 foot pieces and nail another 1 1/2 foot piece to the top of them to form an upsidedown "U" shape. This will be the shoulders and legs of your rigid frame.
Next nail a support board about where the belly is, not too low. Now you have the torso and legs. Dress the prop now.
If you want rigid arms, make them from wood and nail them in place. If you are good with wood you can make dowels from the arm boards and place them in holes drilled into the shoulders. I used coke 2-liter bottles and newspaper as filler for my arms. Use old gloves, stuffed, and sew or staple them to the end of the arms.
For the feet, use old shoes or boots. At the base of the leg boards you can nail a 2 foot board, flat, to the legs, or you can cut the legs with a point which can be hammered into the ground. You will either need to hammer the legs into the ground deep or have another support if you have a large prop.
Look at the Jason photos.
Notice the legs and feet. He is very rigid.
We used 2 different masks. The nicer mask was purchased at Party City and cost about $30.00. The cheaper was bought at Walmart for $2.00.
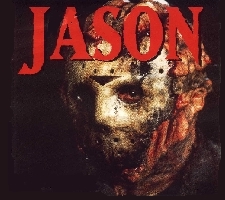
JASON PROP SPECIFICS
Jason was made with a rigid wood frame. He is so large that a normal pair of coveralls did not work. We used an old pair of work pants for his arms. We cut the legs off the pants and stapled them over the arms of the coveralls.
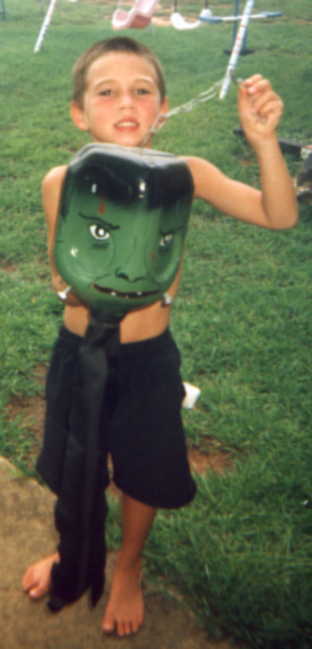
MILK JUG HALLOWEEN DECORATIONS
Empty and clean a one-gallon milk jug. Turn it up-side down, with the spout facing down. Spray paint the jug any color you want. After it is dry, paint a face on it.
Tie a strip of old fabric or a rag where the spout is. Then attach a chain or rope to the top.
For the Frankenstein Milk Jug spray paint the jug green and then spray paint the bottom of the jug, black.
When dry, flip the jug over and with the spout facing down, paint on a face. Use the photo as a reference.
Screw in 2 large bolts into the jug, just below the face. Attach a chain to the top and a black rag over the spout. Tie with black thread.
Cost: $2.80-the cost of a gallon of milk.
Also, see the link at the bottom of this webpage on making skeletons from milk jugs!
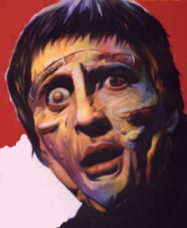
 HAUNTED PORTRAITS
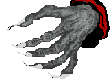
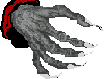
Paintings and portraits, framed in gold, with black backgrounds, look excellent in your Haunted House. I take my regular photos and pictures down in the living room and put up several portraits and paintings. They are lightly covered with spider webs. I have included several pictures for you to download, print and make on your own.
Download the pictures. Glue them to black cardboard. Put them in any old frame. If you don't have a gold frame, spray paint one gold. Gold spray paint at Walmart was $1.00.
These look excellent in low light conditions. For an added effect, for storytelling, have someone tell tales involving the portraits. If you want a spookier effect, white out the eyes.

STYROFOAM HEADS
Styrofoam wig heads make great prop heads. You can purchase them from wig or beauty shops. I got mine through KC Store Fixtures via the Internet. Their phone number is 1-800-862-0899. The prices are $4.25 for male heads, $2.75 for female and $2.25 for faceless.
SIDEWALK CAN LIGHTING
Instead of buying premade paper bag candle holders or fancy candle holders, make them yourself from cans. Clean several cans of various sizes. Put water in them and set them in the freezer. Remember the ice will expand, so don't fill them too high.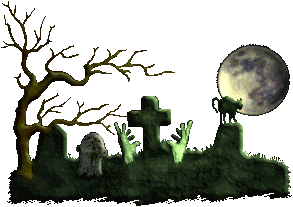
GRAVEYARDS
Tombstones are easy. You can use styrofoam or cut them from old wood. Crosses are easier. Two boards nailed together.
Paint them white and put a name on them.
For one gravesite, we used 6 boards, stuck into the ground. The face is an old toy.
We made the headstone from a very old piece of styrofoam and put a toy rat, spider web and my neighbor's stuffed animal on it. It was placed on a Haunted Trail behind the house. In the dark it looked great.
For the "haunted fence" around your graveyard, use some garden gate...available from Walmart, Kmart, or any garden shop. I got mine for just $2.00 a section. It was white, but I spray painted it black and added web. It looks great. See graveyard photo, and look near the ground. You will see the one I made.
Or click here to see a better view of what I mean.
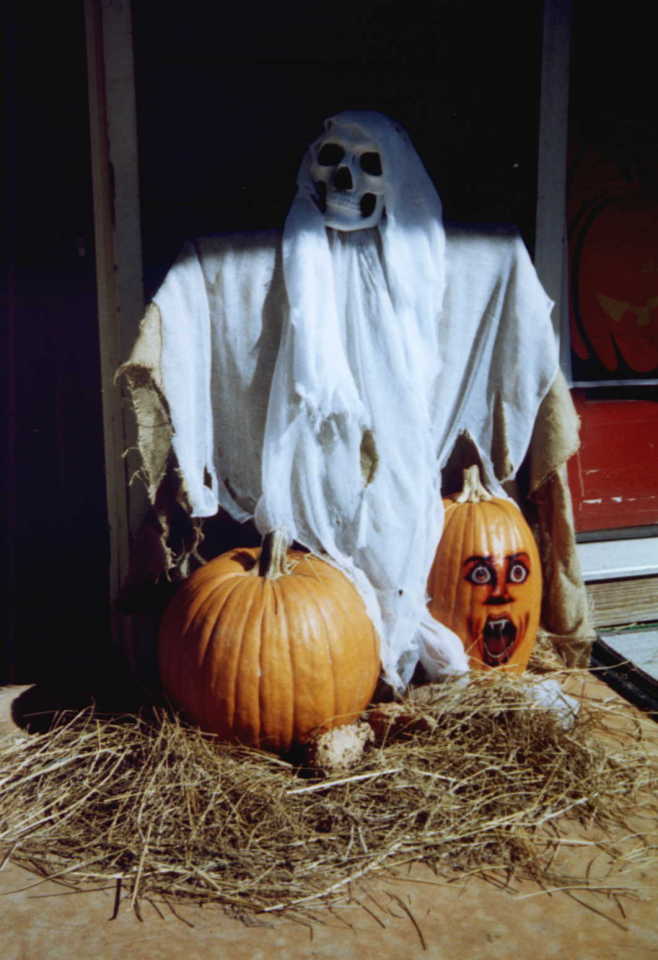
EASY GRIM REAPERS
Make simple grim reapers for practically nothing!
First, obtain a cheap plastic skull. Big Lots has them for just 99 cents each.
Next get 2 small boards; one about 2 feet long, the other 3 feet long. Even paint stir sticks will do for this. Nail the 2 boards together so that they form a cross or "t" shape. Now place the plastic skull on top of the "t". You may have to cut the plastic to fit the skull on.
Next, take some old cloth and wrap it around or over the arms of the "t" frame. Take an old sheet, burlap, cheesecloth or a black rag and drape it over the frame. Glue a hood to your grim reaper's head with plastic cement or similiar glue. You are done.
You can stand the grim reaper between pumpkins, (as my photo shows), or you can attach a rope, fishing line, or twine to hang it from a tree or ceiling. I put one over my cemetary and one from the porch top.
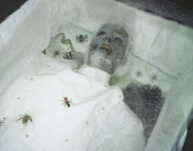
PLEXIGLASS DEAD GUY
Make simple plexiglass dead guy that looks really great and is one of the best decorations I have ever made.
Click here to see Plexi-guy before adding the plexiglass top.
Click here to see the finished prop.
Plexiglass man created by Trisha Morse. She made the face of Paper Mache, and used the directions on the website. Check out her website: Trisha's Halloween Haunt
 First, make a coffin from boxes. This is easier than it sounds.
Remember that details wash out in low lighting. So any decoration does not need to be 'perfect' to work.
To make a cardboard coffin, get 3 boxes of equal size and length. Any will do depending on how big you want your coffin to be.
I will try to write how to do this without confusing anyone.
1. First cut one side off 2 of the boxes that will be used to make the ends of your coffin. This will leave you with a "U" shaped box or boxes.
2. To make the center of your coffin, cut the ends or sides off the third box.
3. Take one of the boxes that you cut one side off and use it as the top of the coffin. Spread the sides out...like a coffin has. You may need to cut the bottom of the box to let the sides fan out, but that's fine.
4. Now take the box that you want to use for the center and tape this to the top or head box. Use masking tape. Now you should have the top of the coffin and the center, ready to go. All you need now is the bottom. Simply tape the last box to the center one. Use lots of masking tape to keep all three boxes together. If you did it right, you should have a cardboard coffin, ready to paint. Note this coffin has no "lid". You can make that out of one piece of large cardboard, if desired.
5. Spray paint the entire thing black first, then lightly...lightly...spary paint white on the coffin to make it look old.
*** If I confused the heck out of anyone...please email me! I will try to provide photos of everything soon to illustrate!***
Cost of my coffin was less than $3.00. My only expense was the masking tape and paint. You can get cheap spray paint, from Walmart or Kmart for around $1.00.
Next add a styrofoam head, explained earlier, or any mask you want.
Stuff a shirt, dress, gown, whatever you want the dead person to be. Newspaper works just fine. I used a pillow for the body myself, as this lays on the floor.
Now put some Christmas snow on your 'creation'. This gives the effect of the corpse being cold! Add spiders, lizards, snakes, if you like for effect.
Now take a sheet of plexiglass to cover the entire thing. This makes the coffin look covered with cold glass.
For the old look to the plexiglass, spary it lightly with white spary paint or use Christmas snow around the edges. Place the plexiglass over the coffin.
To cut plexiglass I used a hacksaw. I put masking tape on either sides of the plexiglass, put it on top of my cardboard coffin and cut it slowly. It need not be perfect. Indeed if the plexiglass cracks while cutting, it just adds to the effect.
Trust me, I am no carpenter, but I cut mine on my own...slowly..and it worked for me.
Sand the edges so they are smoothe.
Finally, place a string of white Christmas lights around your corpse.
In the dark this is one of the most effective decorations I have ever made.
HOUSE DECORATING
These suggestions just flat out work!- White Sheets - Put sheets over the furniture in your living room. It is very effective. They don't have to be old, just white. Click here to see a picture of how it looks.
- Black Flowers - Get some cheap plastic flowers from any discount store. I got a bundle from Walmart for just $1.00. Or use some old twigs with leaves or a stiff bush clip from your yard.
Spray paint the flowers or leaves black with cheap black spray paint. Set in an old can, spray painted black or grey. Or use an old vase. Looks fantastic on a coffee table or dining room table.
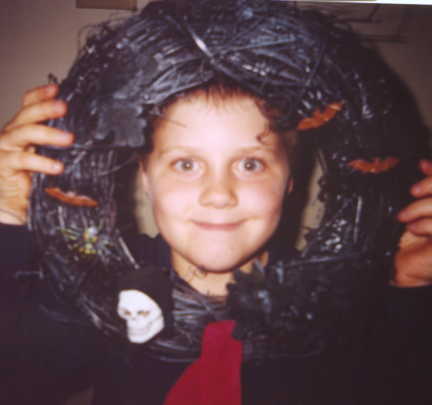
- Black Wreath - I went to a store and saw a black stick wreath for $14.99. I went back home and made the exact same thing for less than $4.00. Click here to see a completed Halloween wreath.
Here's how:
Make a circular wreath from sticks and old plyable branches, or buy one ready made. I got mine at MJD Designs craft store for only $2.50. I also saw one at Walmart for $2.00.
Attach some old plastic flowers to the wreath too.
Spray paint the entire thing black, then LIGHTLY spray over it with white spray paint. This gives the effect of looking old.
Now add a red ribben or bow, and plastic skull, pumpkins, bats, spiders...whatever you want.
Photo of this great looking decoration coming very soon!
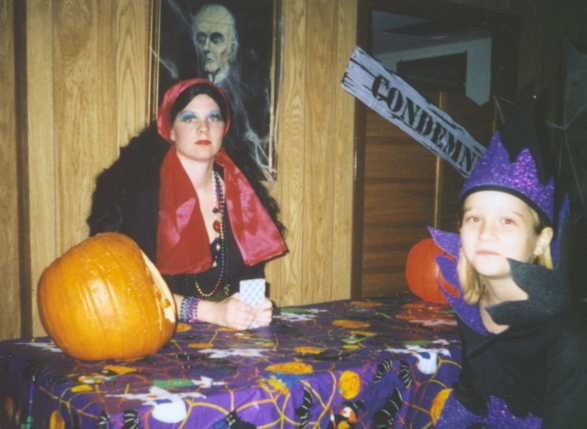
- Fortune Teller - For parties this is a real hit with smaller children ages 12 and under.
 Simply dress in bright clothes, with lots of beads, earrings, bracelets, rings. Mardi Gras beads are fantastic for this.
Put a veil on the head, and cover the table with an old table cloth.
Have the person who is fortune telling have a deck of old cards or download fun ones from this website. (Under construction)
Click Here (under construction) for details of making this a great party hit for younger children.
Simply dress in bright clothes, with lots of beads, earrings, bracelets, rings. Mardi Gras beads are fantastic for this.
Put a veil on the head, and cover the table with an old table cloth.
Have the person who is fortune telling have a deck of old cards or download fun ones from this website. (Under construction)
Click Here (under construction) for details of making this a great party hit for younger children.
Click here to view a nice Ouija board, you can print and use on your fortune telling table.
To make a Ouija Board, you need this picture set on a table, and to make a 'tear-shaped' device for moving about the board. Click here to see a sample of a "Planchette", or pointing device to your Ouija board.
Instructions for playing the Ouija Board can be found by clicking here.
EVERYTHING you ever wanted to know about a Ouija Board can be found by clicking here.
- Lighting - Lights should be low. Use candles and/or black lights or colored bulbs whenever possible. This adds effect to any project you do.
- Bug Floor! - Place plastic spiders, rats, bugs, on your floor in corners or areas that won't be walked on. They look great in low lighting. Kids think they are real! Ok...so do adults!
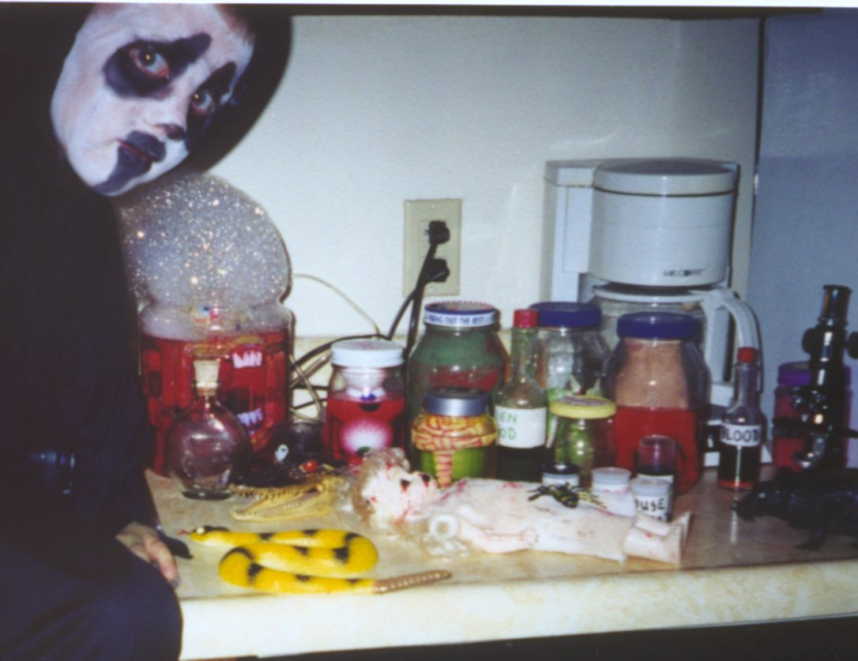
- Mad Laboratory - This is a real hit every year. Make a "lab" from old junk. I used some car parts, old wires, and nailed them in all sorts of ways to a board. In the middle place a fake plastic hand. Stick some of the wires into the hand. Add a plastic skull available from Big Lots for a $1.
Get an old plastic jar, or soda 2-liter bottle. Clean it out and cut the top off. Place a fake plastic face, skull, plastic bugs, nearly anything inside. Add water. Put in a drop or two of red food color to color the water a pink tingue...not too red.
Now take an old fish aquarium pump and place a plastic hose down, under the plastic skull or face, so the air bubbles pass around the head.
This gives the effect of a head in boiling water! My son put in a drop of dishwashing detergent....one drop...and it foamed like crazy!
Also, make fun things to smell for small kids. Use old bottles and jars. I used old film roll containers for mine. I also used plastic milk jars....the small ones. I painted the outsides eerie colors...oranges, greens, red. Spray paint is best and fastest. Don't worry if the paint runs. It is really effective!
Place things in each container for the kids to either see or smell.
Smelly objects include Parmesian cheese....I say it is mummy dust. Burnt matches, become bats hair. Green Tabasco sauce, in it's own jar, becomes alien blood! Tobasco, can be anything from Frankenstein's blood, to slug juice!
I cooked spaghetti and put it into a jar, added some red food color, and had guts in a jar! I know that sounds sick, but kids love this sort of thing!
Lastly, to light your masterpiece, I used white christmas lights. I put a string of them behind and between the wires, and definately behind the "head in a jar".
- Ghostly Jar - The object is to have a jar that smokes.
Simply take any glass jar, I used one that tea comes in at a convenience store, and painted it a neon color. Click here to see one used in my dining room scene.
Once dry put a stick of incense inside the jar and leave it alone. I suspended mine from the top of the jar with a simple wire wrapped on the free end of the incense.
This gives the effect of a smoking, good smelling, jar. Great for fortune tellers!
- Wizard of Oz Witch Fun - How about some fun with a famous scene from the movie "The Wizard of Oz".
Get 2 old striped socks, preferably red and white ones. Stuff them with newspaper and place them near the edge of your house...where your house and ground meet.
Place some plastic flowers around the feet...just like in the movie.
If you recall, a house fell on the witch. It was a famous scene in the movie.
Why not recreate it, in a visible place where Trick-or-Treaters can see it, or at a party.
- Florescent Light Ghosts - This effect works in you have florescent lights in your kitchen or ceiling.
Get a plastic skeleton, preferably a flat one that light can shine thru.
Remove the cover that is over your florescent fixtures.
Put the skeleton inside the cover and put it back in place.
When you use your florescent lights it will show the skeleton thru the fixture cover.
I originally saw this at a skating rink, and it was quite effective.
- Horror in a Box - This one is truly fun.
Get an old refrigerator box or similiar large box and spray paint it black. Cut a hole in the front so that a child's hand will fit inside.
Staple an old cloth to the inside of the box, something that will hang down over the hole, from inside the box.
Place a bowl inside the box so Trick or Treaters have to reach inside the box to get their candy.
This can be as detailed or easy as you want.
You can also place items in some spray painted boxes that the little hands must reach into. You can use cold spaghetti for guts, unpopped popcorn for monster teeth, cold peach halves for a monster liver, grapes for eyes, jello for a decaying heart.
Place the items in each box, dim the lights, and have the children reach inside to feel the 'monster parts'. This is a real hit with younger children.
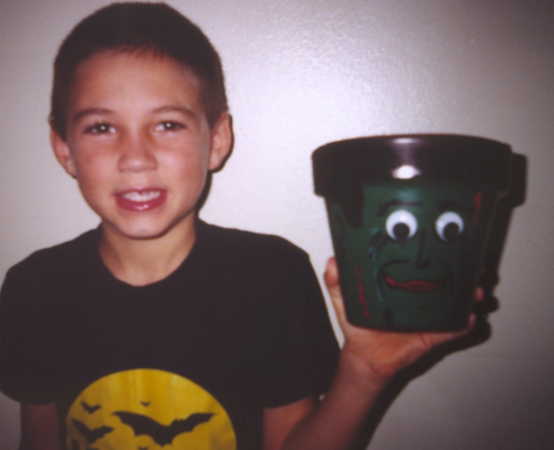
- Pottery Craft
- Simple decorations made from clay pots used for plants. You can use these to hold candy. Easy to make. Click here to see a sample of a Frankenstein clay pot.
Just paint the face and add fun eyes that can be glued right to the pot. This one is easy, cute and cheap. Cost me less than $2.50 to make.
- Stories!!
- Use the haunted pictures you can download from this site, and make up some stories from them.
Sit the kids down and make up a story about the pictures. If you can't think of what to say, get a book and read it, but use the pictures to illustrate the story.

You can contact me, Kimberly, at
flygal46@yahoo.com
or just click on the Spook Mail Link below!


Kimberly King
