
Easter's Restoration Page
(1999 - Year 2)
1998 came to a close without much more work being accomplished. The frame was placed inside to wait out the winter & to give the bank account time to recuperate. From Jan - Mar '99, I resealed all of the seams on the exterior firewall & cowl. I also sandblasted, painted & undercoated the underside of the body. New fuel lines, brake lines & body mounts were installed.
On April 3, 1999 I finally got the frame back under the body. Almost a year had passed since I had separated them; it was a good feeling to have her rolling again.
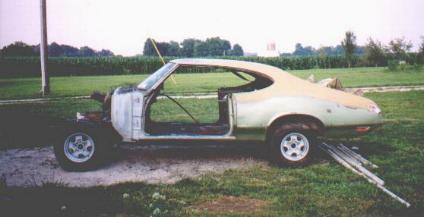
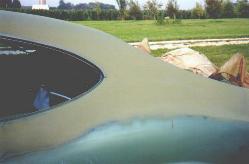
With the body now down on a firm footing, I removed the vinyl top. The original glue was challenging - sanding, scraping & sandblasting all proved futile, I finally tried paint stripper & it worked very well, but was messy. Several spots under the top had completely rusted through; two small spots in the front pillar on the passenger side, one on the rear pillar of the driver's side & numerous holes above the back glass. These were filled with a various combination of weld, POR-15, fiberglass, industrial epoxy & "metal-fil" body filler. Since I've decided against re-installing the vinyl top, I welded up the trim mounting holes, ground down the trim clip attaching posts & started smoothing everything out using the metal-filled filler.
As the summer wore on, I realized that I couldn't afford the sheet metal work I had planned for this year. A new trunk pan, inner & outer wheelhouses, trunk extensions, & quarters were all needed. The Olds Nationals & South East Regionals took a big bite out of my resto money, so I continued the disassembly in order to fix what I was capable of fixing, and to save money for the real "body man" next year. The steering column, dash, heater box, vents & ducts; all came out. The headliner & insulation (what was left of it) were removed. I sealed, undercoated & painted the inside of the firewall, the passenger compartment & underneath the dash. I installed a new firewall pad, dash insulation and headliner insulation. I cleaned up the heater box, inspected & pressure tested the heater core. I also installed the floor shifter & brackets for a console - she was originally a column shift/bench seat car, but no more!
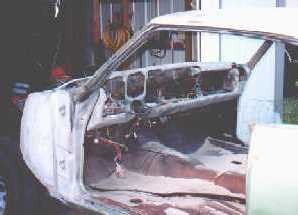

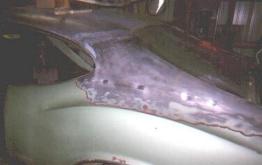
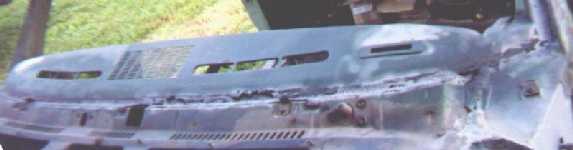
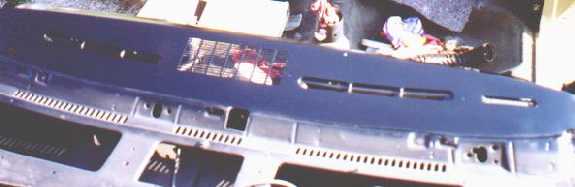
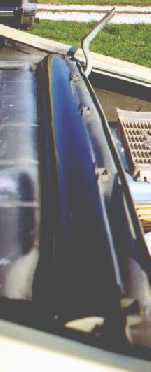
In mid-July I removed the windshield chrome trim plate, the windshield and rear glass. Under the windshield & rear glass, I found several large areas of rotten metal - AAARRRGGG!!!. At this point Easter's "resurrection" almost stopped. Fixing this the correct way would require much more skill and money than I have. But since the base metal of the dash & package tray area were reasonably sound, I decided to experiment a bit and ordered some titanium filled industrial epoxy. Using that & POR-15, I have rebuilt & sealed the damaged areas. I'm very pleased with the results but time will tell how well it lasts. Hopefully, with some pampering, it'll last longer than I do. I painted the dash and package tray areas with black "centari" enamel it’s a bit too glossy for my taste tight now but it’s growing on me.

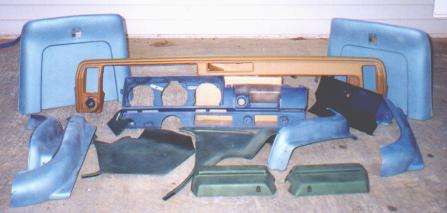
Throughout the summer, I amassed a motley assortment of interior parts. Using SEM dye/paint, the change to a black interior is almost completed. I am very pleased with the results of the SEM dye on most of the parts – I’m especially pleased with the dashpad, but the bucket seat backs didn’t suit me - I’m going to try repainting them. After this photo was taken, I found a set of black bucket seat skirts, which should clean up nicely.
Probably the biggest challenge of the summer was changing the shroud on the steering column with a spare I had from a floor shift column. I repainted the column bowl & shroud with the same SEM paint used on the interior but when I applied the SEM low luster clear, it "attacked" the SEM black paint underneath. I had to strip & repaint those parts. The second time around, I used black lacquer with clear lacquer topcoat. I found out the hard way that there are some differences in some of the internal parts between an automatic and manual column and that there are some small plastic washers (that apparently held things together during "sub-assembly" of the column) that aren’t necessary to the column’s function. It took a few days of "head scratching", digging through a parts illustration manual and several e-mails to other Olds enthusiasts to get everything working properly.
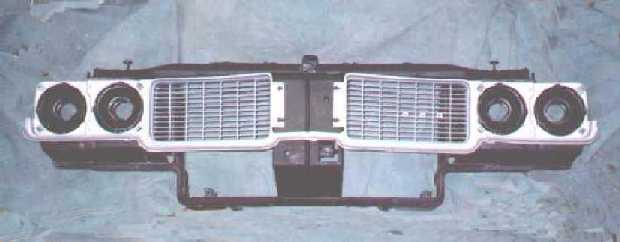
After tracking down some dull aluminum spray paint at the local home improvement store, I tried my hand at grill and headlight door refurbishing. I used combinations of fiberglass and POR putty to rebuild the broken/missing sections. A little bit of clean-up/polishing on the headlight bezels (purchased on eBay) and the core support will be ready to set in place.
The second great experiment of the summer was repairing the front fenders. I ordered a set of repair panels and was disappointed with the quality. Even if the panels had been what I expected, the bodyshops didn’t want to do a "small" job & all of the independent bodymen were booked up well into 2001. So, I used a combination of POR-15 (putty & paint), along with fiberglass matting, galvanized wire cloth and bondo-hair (a plastic body filler mixed with short-strand chopped fiberglass) to repair the damaged sections. All the areas between the fender frame and skin (where water, mud, leaves, etc. accumulate) were filled with seam sealer, then painted and undercoated. This is not the way I wanted to fix the rust-out but NOS or "Arizona" fenders were simply out of the question. Also, I’m trying desperately to remember that I started this whole mess intending to build a "driver", not sink so much money into a car that I’d be afraid to take it out of the garage.