Pool I Round-Robin Game
|
|
Ancrik (Criks) |
|
||||||||||
| versus | ||||||||||||
| Snap, Krackle, Die! (snap) |
|
Game 1

| Game 1 Results | ||||
|---|---|---|---|---|
| Team | Units Lost | Points | Scoring Breakdown | Result |
| Ancrik | 55 | 5 | win + 24% | Win |
| Snap, Krackle, Die! | 93 | 0 | Loss | |
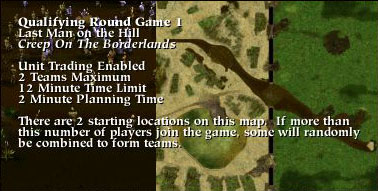
Both teams decided to trade for archer heavy armies with Ancrik (SW) choosing 4 wights while Snap (NE) opted for 2. A conventional strong middle approach was used by the 'Criks. While they sent archers and warriors to the middle, Snap deployed thrall platoons on their flanks. A successful wighting in the west gave Ancrik an early edge and shortly thereafter an archer war developed. Warriors from both sides rushed into the fray, to be joined later by western thrall. Snap, Crackle, Die! was a little too spread out for the middle battle and it took crucial minutes for the eastern thrall platoon to charge to the flag. Even then, there was a puss filled bundle of joy waiting for them in the deep water. Had Rust Dragon's warriors gotten to the middle earlier it might have been even closer, but the game ended in a win for Ancrik.
Game 2

| Game 2 Results | ||||
|---|---|---|---|---|
| Team | Units Lost | Points | Scoring Breakdown | Result |
| Ancrik | 26 | 8 | win + 5 flags | Win |
| Snap, Krackle, Die! | 50 | 1 | 1 flag | Loss |
On the second day of battle Snap assembled an archer heavy, 1 wight, 1 dwarf army in the western side of the desert. Ancrik decided to use maximum ghols and no wights. As both armies rushed out of the gate Ancrik performed a nice (if defensive) bridge block. While this was executed well it seemed a bit odd to do (as bridge blocks normally are used to defend wights..of which Ancrik had none). Snap sent 50% of their troops south in a flank while the rest remained near the bridge. Ancrik left a decent, but slow, force at the bridge and sent small warrior-ghol flanks to both the north and south. Once the north flank began bearing down on the enemy Ol' Dirtae ordered the 'Crik forces to charge the bridge. With the assistance of the flank Snap was defeated in the midwest. Meanwhile in the south minor skirmishes break out, but little real damage is done. Up 78% to 46% Ancrik goes for an early six flag victory. However, they made the mistake of taking the SW flag just as 5 Snap thrall were arriving, who were able to retake it. This resulted in a 5 flag to 1 flag win when sudden death ended.
Game 3

| Game 3 Results | ||||
|---|---|---|---|---|
| Team | Units Lost | Points | Scoring Breakdown | Result |
| Ancrik | 13 | 7 | win + 4 flags | Win |
| Snap, Krackle, Die! | 22 | 4 | 4 flags | Loss |
Snap started in the north with Ancrik in the SE (both armies chose a standard 3/20/13 unit mix). The 'Crik army sent a platoon of mixed infantry south, 3 trow and 5 berzerks middle, and 15 'zerks northeast. Their opponents to the north sent a full company of infantry NE, one trow NW, and 2 trow mid. Snap won the race to 3 flags, but a superior Ancrik middle forced them off the west flag (taking some damage in the process). As the western Snap trow began to sneak southwest its two brothers retreated to the south, being chased by 2 Ancrik trow and a few 'zerks. As a standoff occurs in the NE Ancrik sends 1 trow to tag the NW, leaving a lone zerk on the middle east flag. This results in Ancrik tagging a fourth flag first, but shortly after this happens a lone Snap zerk uses his claymore with legendary skill and takes the middle east flag for his order. With this lead 'Crik begins to form up in a defensive posture in the south. Before reinforcements can arive Snap trow engage the southern defense with both sides taking heavy damage. Smart trow work by OD and a solid defensive game plan ended this game with 4 flags for each time (Ancrik winning due to their early tag).
Match Summary (films)
| Match Results | |||||
|---|---|---|---|---|---|
| Team | Game 1 | Game 2 | Game 3 | Total | Result |
| Ancrik | 5 | 8 | 7 | 20 | Win |
| Snap, Krackle, Die! | 0 | 1 | 4 | 5 | Loss |
Despite a minor snafu in the desert game Ancrik fought well. Better coordination between disparate parts of the Snap army could have evened the score a bit, but this was not to be the case.
- Wintermute