
Well, it's 2004, and a new year means a new computer. Since I have a digital camera, I decided to document the build with pictures.
Because I have gotten some complaints about the picture sizes, I have reduced the images.
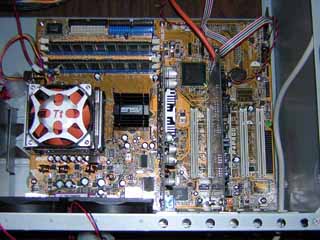
I started out by attaching the mobo to the case, as shown here:
Isn't it pretty? It's an Asus P4P800 which uses Intel's i865 chipset. The board has support for any 478 pin Pentium 4, including the upcoming Prescott line of processors. It has an 8x AGP port, 2 IDE connectors, 2 SATA-150 headers, and most importantly: dual-channel DDR capability.
Now we're talking components, For now, I'm using my old 2.26 GHz Pentium 4. When I took it out of my old system, it was covered with thermal grease. After applying some rubbing alcohol, the heat spreader actually shined. Here's a picture of it all pretty and clean.

Now, I've blanked out the serial number. Why you ask? Well, I say why not! But you can see that it is a genuine Pentium 4 from Intel. It has printed on it 2.26 GHz /512/533/1.5v. As you can guess, the 2.26GHz is the speed. 512 means it has 512 kb of on die cache. 533 is the Front Side Bus speed. Finally, the 1.5v is the voltage requirement. Next to the processor is a syringe of arctic silver 5, which is a special type of thermal grease. You apply the thermal grease to transfer heat from the processor to the heat sink.
Let's now take a look at the numerous other components.
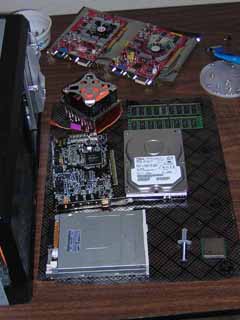
At the top you can see the video cards. One is brand new and the other is out of my old computer, but I'll talk more about them later. To the far left you can see the front of the new case, with fan controllers installed. The orange thing is the Thermaltake heat sink that kicks the crap out of the old sink. To the right of that are 2 512MB pc2100 266MHz DDR DIMMS, but I'll explain more about those later. Below the heat sink is a sound blaster Audigy sound card. To the right of that is a 40GB IBM hard disk drive. Next is the floppy drive. I know, I know, why a floppy drive, right? well, I like floppy disks and they aren't dead yet! Then in the lower-right corner is the processor pictured above. NOT PICTURED: one DVD drive and one CDRW drive.
Let's take a closer look at the video cards.

The card on the right is an nVidia GeForce 4 ti4200. That's the old card, which my sister is now using. It's a really nice card, but not direct X 9 compatible. That's the reason I have the card on the left. That beast is an ATI Radeon 9600XT. Fully Direct X 9 compatible, it delivers the best graphics in the $200 card market. Each card has 128mb of ram, which at the time I got the nVidia card was more than enough. But having 128 on a Direct X 9 card is the market standard. I can tell you from first hand experience that the heat sink on the ATI board is much better than the nVidia board.
Let's start putting everything together!
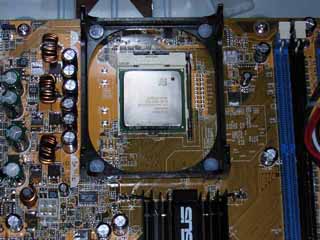
Here's the processor, seated happily in the ZIF socket. It just looks like it belongs there.
Without any hesitation, it was time to install the heat sink. First, I placed a thin layer of thermal grease from its syringe. Then I locked it down as outlined in the instructions. Here's the picture!
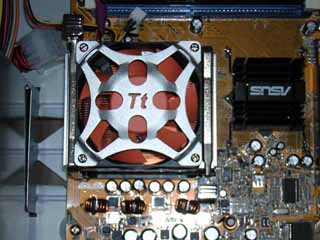
Ohhh, isn't it all special looking? Yeah dog, that's the stuff. It's mostly made of copper, and damn does it have a lot of fins. See what I mean?
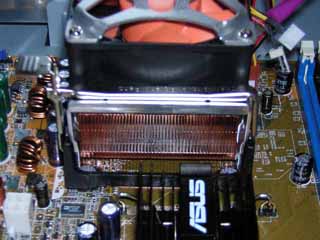
That means lots of surface area to whisk away heat, and it does a really good job.
Now with the heat sink locked down, it was time to install the memory.
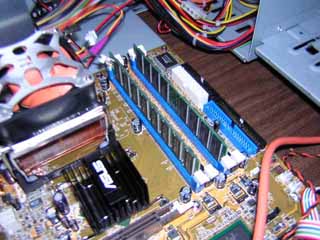
Now, this board has room for 4 memory sticks. of course, I only used 2 sticks. You might notice that the memory is installed in similarly colored sockets. That puts the memory into dual-channel mode, I might talk about that later, I don't know. Just know that I have 1024mb of memory.
DUAL-CHANNEL MEMORY EXPLANATION:
So what is "Dual channel memory" you ask? Well, it's a way to double
the memory bandwidth through the Northbridge. The DDR-DIMMS that I am using
are running at 266mhz, and the memory bus is 8 bytes wide. So, 266Mhz x 8 bytes
is approximately 2,133 megabytes per second. The processor is running on a 533mhz
front side bus, and it also uses an 8 byte memory bus. So, 533Mhz x 8 bytes
is approximately 4,266 megabytes per second. Normally, the system can only send
the 2133 mb/s because it only accesses one stick during one clock cycle. So,
essentially my processor was only eating half of what it wanted. I think of
it as my processor starving. Now, using 2 identical DDR-DIMMS, the Northbridge
can access both sticks during one clock cycle. So, the system is now sending
2133mb/s x 2 which is about 4,266mb/s. As you can see, this keeps the processor
full. Now, this is just a quick explanation. The long version has me going into
rants about quad pumped front side bus speeds and that the DDRs actually only
run at 133mhz but are double data rate, simulating 266mhz, and it just keeps
going from there. Now back to what you came to see, pictures...
I then installed the video card and sound card.
The video card is the center of the picture and the sound card is to the right of it.
That's all there is to installing board components. So from here it's all wires, so many wires, so so so many wires...
Thankfully, I used some wire ties to make sense out of everything.
I then installed the optical drives beneath the fan controllers, I also installed the floppy drive. Here's the front panel.
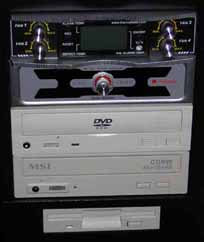
Doesn't that look cool? Well, I wanted to paint the faceplates, but I don't trust myself to paint plastic. So that's a job for the future.
Not much more from here.

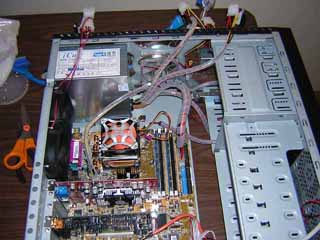
Here's the whole machine wired. Most of the wires are from the fan controllers. I've got some great wire pictures further down the page.
Well, cross your fingers, it's time for "First Boot".
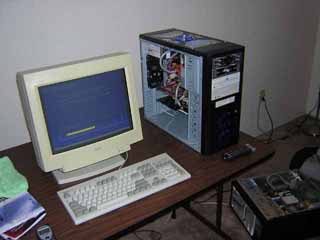
Holy Crap, it worked on first boot! No additional tweaking necessary! I'm sorry to say that I installed windows. I was formatting the hard drive when this picture was taken. You can see the slight blue glow from the fans. It looks really cool in the dark. to bad my camera doesn't take night shots that well. But I'm working on getting a tripod for non-focused night shots without using the flash.
Here's a picture with the case all closed up.
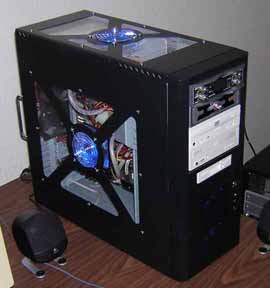
You can see the cool windows in the top and side panels. I think the side fan looks really cool in this picture.
Well, with everything working, it was time to clean up and attach the external components.
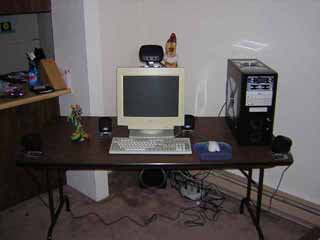
Booyeah! You can see my new speaker system, and damn are they nice. The green dragon is guarding the system from intruders. The fox-squirrel (named Z) is the computer's mascot. On a side note, I was not paid by SC Johnson for the Windex product placement. My lawyers are still negotiating, but I don't like the chances.
Well, the problem with fan controllers is that they add lots of extra wires to the case. Here's a couple of pictures of what I call the "snake nest".
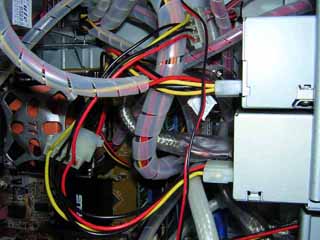
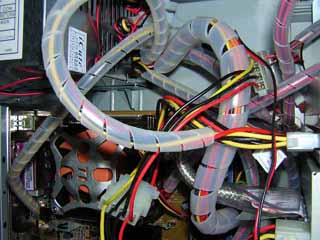
This is the next thing to fix, and I'm still looking into possible remedies.
These pictures are ©2004 Annihilator God from Annihilation
L.L.C.
Any rips or references must be cleared by him.