Instructions for making Assault Trooper missions
using Mission Builder
1. General Instructions
- Add items (wall/ground/object/route point/target) with the left button of the mouse
- Remove them using the right button of the mouse
- Select items from the bar on the right side of the screen
2. Making Environment (Ground and Wall modes)
At the very beginning, it's good to stop for a while and think what you want to make.
The mission should have a one clear theme, like 'escape from a jungle camp'.
Mass destruction missions don't give too much, at least if there's too many of them.
It's best to start with making environment. Select the ground from the bar on right
side and paint the ground with the left mouse button. Then change to the Wall mode and
put walls in their positions. Left button adds and right one removes a wall.
The size of the map could be changed with the arrow keys on the bottom part of the screen.
It's not wise to put objects in this time yet, because changes of walls would be difficult
afterwards.
When the map is nearly ready, add yet some obstacles as shelters where necessary.

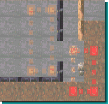
Step 1. Ground and walls
3. Creating Objects (Object and Route modes)
Creating of objects is usually very simple. Just pick a desired object from the bar and
put it to the map. You may remove the object using the right button of the mouse.
All moving objects need route information. They always go round the path that was
selected when you added the object (a little confused explanation, but in other words,
when you add a enemy, be sure you have right route selected). This is probably the most
critical part of creating missions, because you can't change the route after adding the
object.
All object from the beginning of the list up to the dog are 'moving' objects and therefore they
need route information. Other objects are still so routes mean nothing for them.
Make a route choosing the Route mode and then clicking corner points to the map. Right mouse
button removes the last point.
The 'new' selection on sidebar starts a new path.

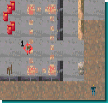
Step 2. Paths (red dot lines)
The number of objects should be kept quite small (under 100, if possible), because they
decrease the speed of the game significantly. Also don't waste first aid and ammo packets
throwing them all over, some packets after a tough situation is fine.

Step 3. Objects
When the map seems to be okay, it's time to start planning the mission.
4. Planning Mission (Target mode)
Missions consist of three different kind of targets. Two first ones (elimate & touch)
demand a target object. Depending on the mode, you have to either eliminate or just
touch the object. You could invent a proper reason for targets,
like turn off the alarming system or free the prisoner.
The last target type is a checkpoint. At present, you can use it only as a last target because
it always looks like a rope ladder.

Step 4. Targets
5. Operations of Menus
- Settings: Two line description of mission, time limit (0 if no limits)
- New: Reset the mission (with or without saving the map)
- Open: Load mission
- Save: Save mission
6. Closing Words
Mission Builder is not available in shareware version, sorry.
If you have difficulties using Mission Builder, drop a line to
jkauppin@iName.com.
And don't forget to save often, ESC quits without warnings...


