![]()
 Materials:
You should have two different color washcloths. I like to use the solid one for the middle. So take the printed or pattern one to use as your outer piece.
Lay your printed washcloth flat on your workspace and roll each end towards the middle. Do not roll it all the way in. You will need to leave room for the solid color washcloth. Use a couple of clothes pins to help hold it from unrolling on you.
Take your solid color washcloth and roll both ends towards the middle. On this one you need to roll it all the way to the middle so that the both sides meet up in the middle.

Once you have the solid color one rolled, then place it in the middle of the first one you rolled.

Once you place the solid one in the middle then you will need to carefully flip it all over on your workspace and fold it in half.

Turn your washcloths so that the folded side is at the bottom. Next take your Ribbon and cut it about 20" long...you can cut it longer and trim it off. It's better to have too much then not enough. It depends on how thick your washcloths are as to how much you really need. Slip your ribbon under the washcloths. Slide it down about 2 and 1/2" from the top. If your washcloths are smaller you might not want to come down so far. I used large thick washcloths.

Now bring your ribbon around to the front and tie a bow.

Take your some more of your ribbon and rap it around the 12" strip of paper twist ribbon. I put a dab of hot glue on the end to hold it while I wrapped it. Once you have it wrapped all the way to the other end just dab a bit of hot glue on that end also to hold it.


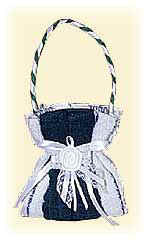
When its done it should like something like this one. If yours does not bend like the picture of mine that's ok it will when you add it to your washcloths.
Now fold back the top layer of washcloth down to your ribbon. Put some hot glue on the top of the left side the bottom set of washcloths. Now take one end of your paper twist Ribbon and secure it. Once you do that then put some glue on the top of the left side and press down to hold it. Repeat for the right side.

Now comes the fun part. This is where you want to add any little embellishments you want. I have added a white bow I purchased at Wal-Mart. You can add lace, pearls buttons anything you want. Let the crafter in you come out!!!
|
Copyright © 2001-, Terry Muse Revised: April 2, 2002 URL: http://crafts_and_kids.tripod.com/ http://geocities.com/mounthollynj http://seaside_park_nj.tripod.com http://westlake_village_md.tripod.com Contact: Terry J. Muse |
 |
 |