
 |
| Here's Murphy playing "Queen of the Couch." I've used this image in most of the lessons. |
I spent waaay more time than I should have on this next one, but it was fun.
 |
| I can't even begin to describe all that went on with this, but it included layer upon layer, selections, blend modes, Feedback, the Glass Mosaic effect, and much more. |
Sally, you'll be thrilled that I no questions about Canvas Size. (grin)
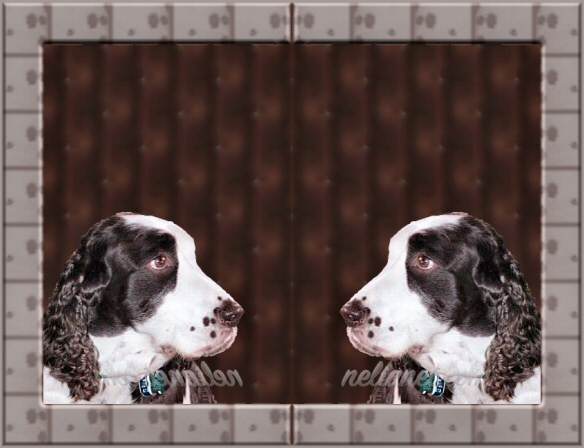 |
I took a photo I'd edited for a Today screen on my Axim (Pocket PC). The image sits low on purpose, so that the
text on the Today screen will on be top and not overwrite the image. The handsome fellow is my boyfriend's Springer,
Clyde. I had used the new Background Eraser to get a nice image of him, then added a kaleidoscoped background.
I added brown canvas to the top, right, and bottom only - nothing to the left side.
Then, not being able to let well enough alone, I copied the freckles from Clyde's nose and used them to fill flood the new
canvas area as a new layer.. I let a bit of the brown canvas show through around each image, so it appears they are
tiles.
I then reduced the opacity of the "tiles," so that they weren't so much of a stark contrast with the rest of the background and then merged both canvas layers and did an Inner Bevel on them.
Now I could see that this was crying for more fiddling. (grin) Clyde was looking at something here and I needed to show what
that was. I copied the entire image and mirrored it. Then I copied
both images into one larger one. I left the center Inner Bevel shading show (though I could have cropped it out) to prove that
this was really an offset canvas and not an added Border.
 |
 |
| I used Posterize and Manual Color on this. It's the one image from this lesson that stands on its own as a good graphic and not a lesson. |
I used Horizontal Perspective to get the background stripes, then Bubbles and Balls for the center to get a "Murphy Ball." |
Copyright © 2003 NeliaNet.com. All rights reserved.