This week we got into painting and using brushes. This is fun stuff! In addition we learned about grain, paper, opacity, and the color picker.
 |
|
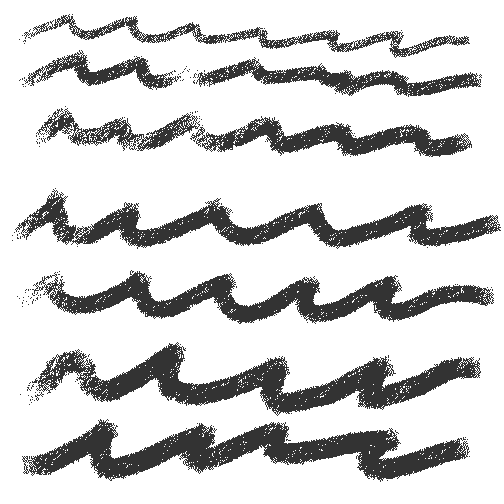
We ventured beyond the #2 Pencil this time and used the Square Chalk for this exercise. We increased and decreased the brush size by using the square bracket keys. |
 |
|
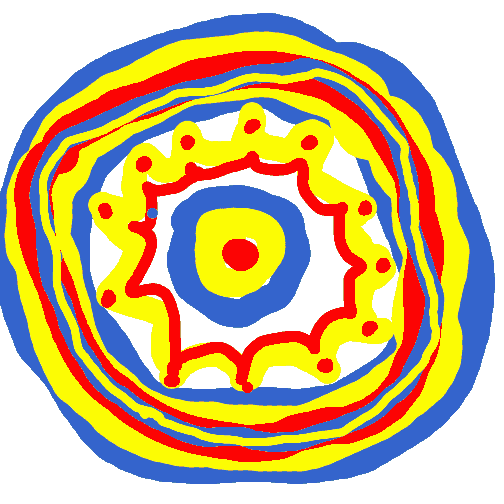
This is another method of changing the brush size. Using the Pen, Flat Color, I drew a ring. I used blue as my outside ring. Then I made a yellow ring 3/4 the size of the blue ring by Ctrl-Alt and then dragging the marquee about 3/4 of the way across the blue. And so on and so on until the lines became too small to continue. |
Resetting the brushes each time to the default setting is a bit of a pain, so we programmed the F1 key to do this for us.
 |
|
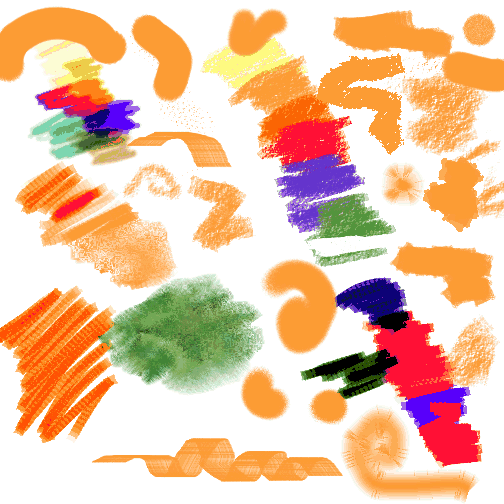
The upper left squiggle of colors is our old friend the #2 pencil. To the right is another quite different looking squiggle of colors. That's because I used a different brush - Square Chalk. When layered, they give quite a different look due to their differing methods. Pencil marks "build up" or combine to become darker to almost black. Square Chalk's method is "Cover" and you can see that each color covers the previously laid down one. Then I was to experiment with the other methods and subcategories and erasers, being sure to understand the difference between wet and dry paint and how the erasers work or don't work on them. There sure are thousands of possibilities here. Christine is absolutely right about learning a few brushes well before moving on. Trying to learn all of them at once would just be too confusing. |
While playing around, it's almost certain that you'll create a look you'd like to save. Painter accomodates this. Go to the Brushes Palette and click on "Save Variant" and save it with your new name.
 |
|
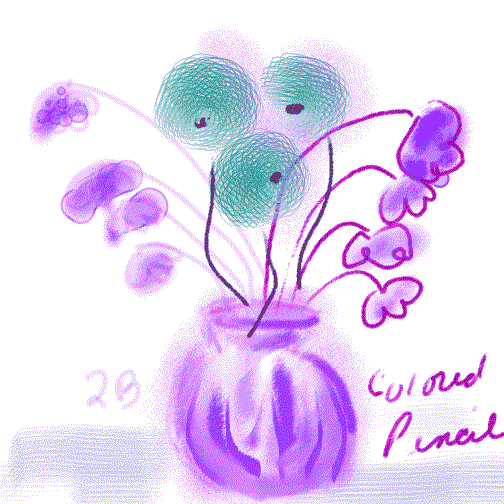
The left side of this drawing with done with the #2 pencil and the right side is done with the Colored Pencil. They give quite different looks. I played with the grain settings to see how those worked. I experimented with different Watercolor brushes for painting the flowers. I also tried the Pure Water Brush on a wet canvas as well as the Just Add Water brush. |
 |
|
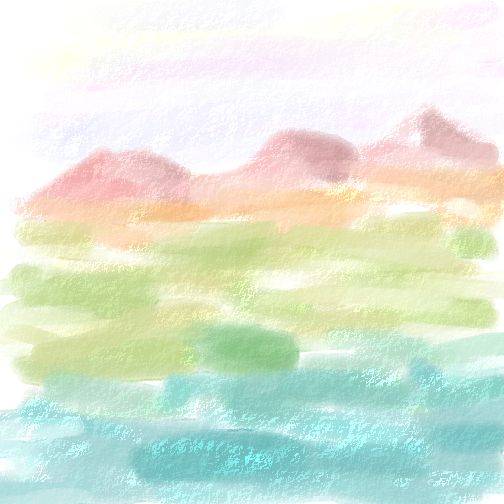
We used the Broad Water brush to make sweeping strokes to represent the sky, mountains, and a foreground. Then we used the Pure Water brush to blend the strokes. This does really look like a water color. |
For this exercise we go back to our vase in Exercise 6. We used Smeary Flat, with the Dab set to Camel Hair and came up with a flower that sort of resembles a teal chrysanthemum. Then Smeary Flat was used again to add the bottom background with different pressure settings.
 |
|
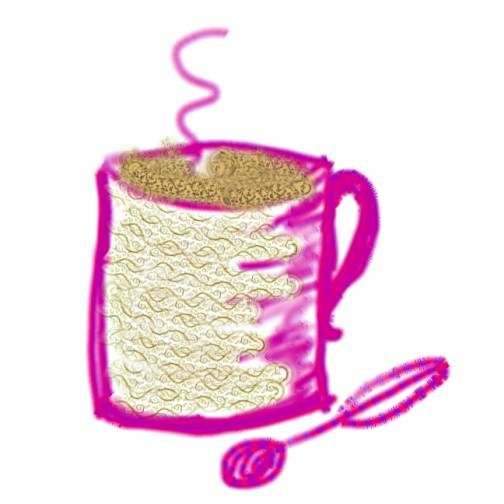
Select two colors with a lot of contrast. Use Artist Pastel Chalk, Dab = Rendered, Source = Gradient. Use the Two-Point Gradient. Sketch a coffee cup. Add a spoon using Gradient Repeat. Then use some patterns for the Rendered Dab. We also learned how to save the Painter settings in case they become corrupted. I stored my copies in a safe place. |
Copyright © 2002 NeliaNet.com. All rights reserved.