
Selections are a very powerful part of any graphics program. Painter is no different and offers a variety of selections and ways to work with them.
 |
|
Create a rectangular selection. Paint with magenta inside, blue outside, and yellow across both inside and outside. Use the selection icons at the bottom of the canvas to choose these. |
 |
|
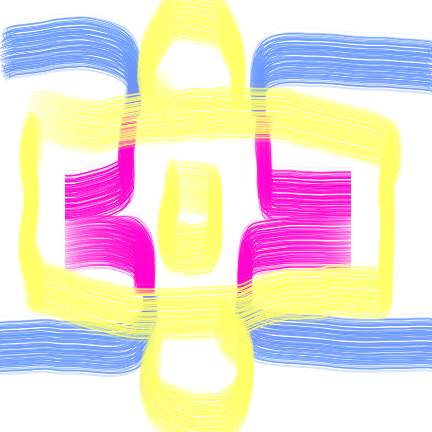
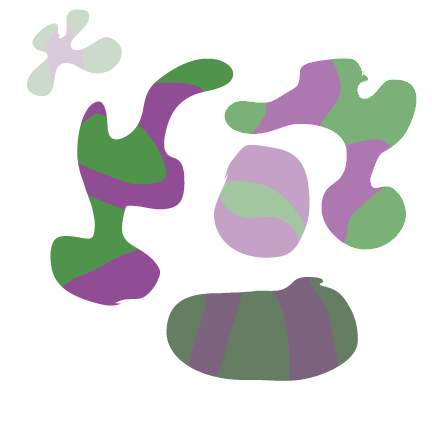
Create another rectangular selection. Ctrl-F to fill flood it with blue. Paint inside with magenta. Draw outside with more magenta. Deselect and add another selection, this time Elliptical (O). Press and hold the Shift key to add a rectangular (R) selection to this. Both shapes are now included in one selection. Fill flood this new selection with yellow. Change to blue and Ctrl-F, but this time move the opacity slider down to about 30%. The selection is now green. |
 |
|
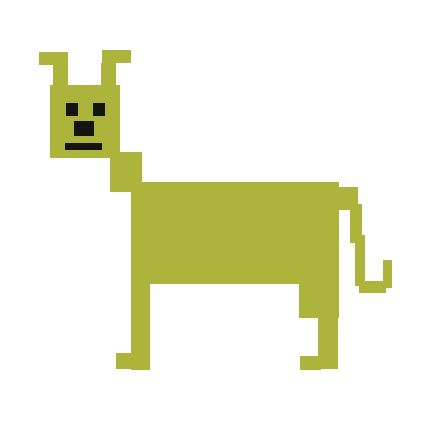
Create a dog made from selected rectangles, one rectangle at a time. This was saved as a .gif, because it has only 3 colors - gold, black, and white. And, yes, this is supposed to be a dog! |
 |
|
Create a cat from selected ellipse. I did another dog. Most of the ellipses were selected at once using the shift key, but I added others of another color later. |
 |
|
Open the graphic from Exercise 2. Click the wand (W) on any part of the white, outer section. Presto! All the white is selected. Fill flood with a light blue. Explore the Wand's options - Tolerance, Feather, Anti-alias, and Contiguous. Note that the controls are dynamic. |
 |
|
Use the Lasso Tool (L) to drag new shapes onto a new canvas. Fill them with various colors. Use the lasso to create an odd shape that includes portions of the previous shapes. Effect, Tonal Control, Adjust Colors. Move the Hue slider and notice that the colors inside the selection are moved around the color wheel. |
 |
|
Use the wand to select the white background, then Select, Invert to again choose the shapes. Effects, Tonal Control, Brightness and Contrast. Move the Brightness slider to the left and the contrast to the right. |
 |
|
Create a rectangular selection for the outside of the window. Fill it with 4 blue gray selections for the panes by using the Shift key to add to the selections. Use the Lasso to drag a leafy area. With the Elliptical Selection (O), add red flowers by holding down the Shift key as you make as many as you want. Select the background with the wand(W) and fill with dark blue. Drag a marquee around the window with the Crop Tool (C) to cut off excess area. Click inside the marquee to execute the crop. |
 |
|
Use the Oval Selection (O) to make an oval about 3 inches high. Hold down th Control key and drag another oval inside the first one. This will subtract the center area. Fill flood with red. |
 |
|
Select the purple areas, and only the purple areas, of the sweater and fill them with pink. 9 was around the best tolerance setting. Clicking on more areas of the purple added more selections. Dragging across a purple area seemed to add too much, as many areas outside the sweater were selected, even with the Tolerance turned down. That could work for other things, though. Experiment with using the Lasso to "rope out" (subtract) unwanted areas or add in new areas. Effects, Tonal Control, Adjust Color and move the slider to change the color to pink. This is more life like than a straight fill flood. |
 |
|
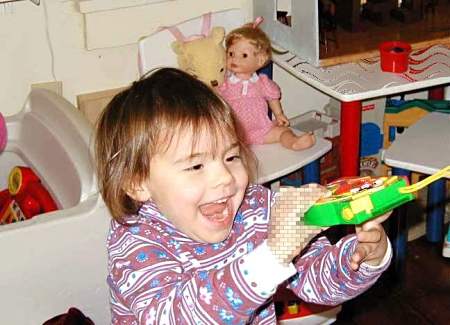
Making a complex selection can take a long time, so it's great to be able to save a selection. Select, Save Selection, New. Wand the white cuff and adjust the tolerance until the white is completely selection. Rope out any unwanted portions. Save. Deselect. (Ctrl-D) Trace a new selection around the bear's head using the lasso. Save. Select and save the doll's left arm with the lasso. Select and save the doll's dress. Select and save the desk top and then do the same for the coffee cup Load the desktop selection. Select, Load Selection. Then subtract the coffee cup from it. Apply Effects, Esoterica, Apply Marbling. Create a new selection with the hand and toy. And another one with the hand and sleeve. Load the first one and intersect it with the second one to leave a new selection of just the hand. I fill flooded Alexa's hand with Tiles to show it off. I also selected out her red eye and filled with a more appropriate color. |
 |
|
I then loaded the previously saved selections and changed the color of the bear's head and doll's dress. |
 |
|
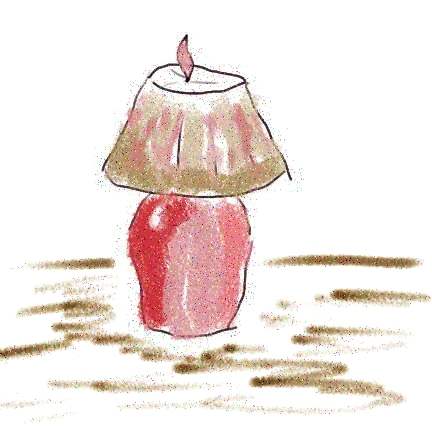
I don't have PS, but do have PSP and it works the same way. Graphics can be saved as .psd files and opened in both programs at the same time. This allows you to use the features of each program including layers. Paint a lamp and save it as a .psd file. Open it in PSP and use Punch, 50 to fatten it up. Add Noise, 12. Add another layer and go back into Painter to add a table surface. And so on. Be sure to use the .psd format, because it is lossless unlike the .jpg format. |
Copyright © 2002 NeliaNet.com. All rights reserved.