
Layers and masks are two more features that allow users more options in Painter. Layers are like transparent sheets that are stacked on top of each other. Masks are selections that can limit the area being worked, much like in house painting, where you mask off areas you don't want paint getting on. Masks in Painter can either select areas for painting or areas not to be painted. There are two types of masks, User and Visibility Masks. User Masked are saved selections. Layer Masks are visibility masks and determine which portions of a layers will show and which portions will be transparent.
 |
|
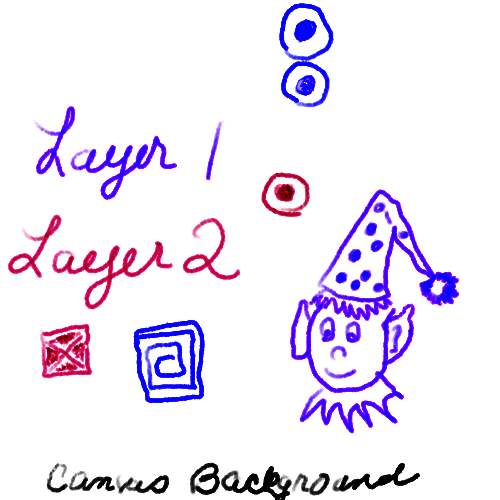
This image has 3 layers: the black background or canvas layer, the blue Layer 1, and the red Layer 2. Each layer can be moved and drawn on independently. The order of layers can also be changed by dragging a layer up or down the stack. |
 |
 |
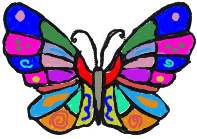
Create a butterfly using at least 14 layers, putting new elements on each layer. Each color is on its own layer in the first image and then decorative lines and dots were added to different layers. The second image has the layers rearranged, so that the elements appear different, depending on what's being blocked by the layers above. The elements on the layers also block viewing of elements on layers below, if the elements are in the same pixel area.
During this exercise we created, saved, and loaded masks.
To float the canvas layer, select all, F, and click on the image. The canvas
is now a layer. Close the visibility eyeball of Layer one. Make it active. Fill
flood with a color that contrasts with the sketch. Take it through all the composite
methods and see what happens.
Put Layer one back to Normal or Default. Uncheck the Contiguous box on the Controls
panel and use the Magic Wand to select out the white. Backspace to delete it.
You can float parts of the canvas by making a selection and clicking on it with the
F tool. This becomes a new layer that can made invisible, moved, painted, dropped, etc.
 |
|
I did all of the above with a black squiggle on a tanish background. Then I did a bit more. I got Painter 7!!! I selected the black squiggle and applied a KPT 5 Shapeshifter Black Chrome preset I made. Then I inverted the selection and filled the background with another KPT 5 SS preset that I'd created. Not wanting to stop, I added a FraxFlame on top. Fun! It sort of looks like an alien alphabet letter. |
 |
We used a copy of Christine's painting for this exercise. I selected the yellow
flowers using the Magic Wand with a tolerance of 4, contiguous unchecked. I then added
selections until I had most of the yellow flowers. I roped in the centers of the flowers
and roped out the vase and other extraneous things. I then saved this selection and it became
New Mask 1 on the Mask Palette.
I then made the mask visible and it could be seen as a rubylith. The next step was to paint
on the mask using pure white to erase extraneous parts and black to get the yellow outlines
selected. Saved. Then Load Selection, close the eyeball on the New Mask. The flowers are
selected. Effects, Surface Control, and Apply Surface Texture. I then repeated the process
for the reddish flowers and the vase.
 |
Create a painting using layers and selections.
Paint part of the image on the canvas.
Float the canvas, Select All, F tool, click on the image.
Delete part of Layer one, so the new canvas becomes visible.
Paint on the canvas. Add a new layer and paint on it.
Add two more layers and paint.
Change the stack order.
Name each layer and work on them - erasing, drawing, changing the order as needed.
Group two of the layers and then combine them into one layer.
Drop one of the layers down to the canvas.
Select a part of the drawing from the canvas and float them. (Select and then
use the F tool and click.)
Select a part of the drawing from a layer and copy it to a new layer. (Ctrl C, Ctrl V)
Change the composite modes of some of the layers.
Drop the layers to the canvas and save as a .jpg.
Copyright © 2002 NeliaNet.com. All rights reserved.