 |
|
Surfcasting blanks are relatively expensive items to buy. When added together with the price of quality guides and building cost, a surf rod may easily cost near or over a thousand dollar. Economy wise, its a good idea to pick up DIY rod building. It not only saves you money but most importantly it allows freedom in deciding how you want your pole to be built.
Detail rod building will not be covered here. Instead, a brief description with tips on the equipment needed will be discussed. Nowadays, the internet are full of sites explaining on this skill. But to me, nothing beats learning from one who really know this trade well. Practical on hand training is important and faster. Over the years, DIY freelance surf rod builders are growing. Contact them and maybe they may guide you along. Experiment yourself after learning the basics.
Main step of surfrod building:
1.) Check blanks for possible sign of crack or fracture. Return
suspicious blank immediately. It will break if cast hard after
your painstaking building.
2.) Determine and mark spine position with white china (any
visible colour). Most Zziplex and Conoflex manufacturers makes a
marking with marker pen at the edge of the tip. This marking is usually the
spine position.
Confirm it yourself first.
3.) Consolidate all the required guides. File the footings of
each guide flat for easier thread 'climbing'.
4.) Determine guide spacing and position. Most Zziplex, Conoflex and
Century company provides standard guide size and spacing specs
for their models. Check here or contact them. Mark
their position accurately.
5.) Decide on thread colours, length of each bind etc. Mark where
necessary. Consolidate and systematically place required tools
around the work area. Start binding when the guide is aligned.
6.) Start binding from the end of the footing towards the guide
footing itself. Complete for all guides and check alignment
regularly. Check alignment by holding blank at different angle. Look through all guides,
makin sure they really run straight. Do this at well-lit areas. Under your ceiling lights
or under sunlight etc. You may be surprise at how different guide
alignment may look under different lighting condition. Confirm
what you see is not false visual.
7.) Upon completetion, apply colour preservative over thread if
required and leave to dry.
8.) Place blank over support and give thread first epoxy coating.
Preferably done with the blank on a drying motor or similar.
Leave all coating over night to harden.
9.) Apply second coat if necessary. Follow above steps.
10.) Mount all other rod fittings to complete rod.
The above steps may consist of other sub-steps in between. Please consult rod builders for more detail. For those who really need a professional rod builder to build up their blank, try Sabre Stroker at Beach Road.
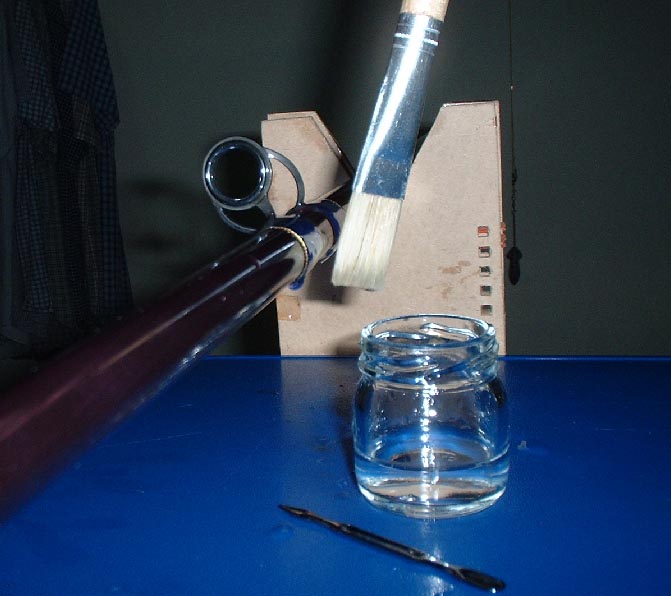
Basic rod building items.
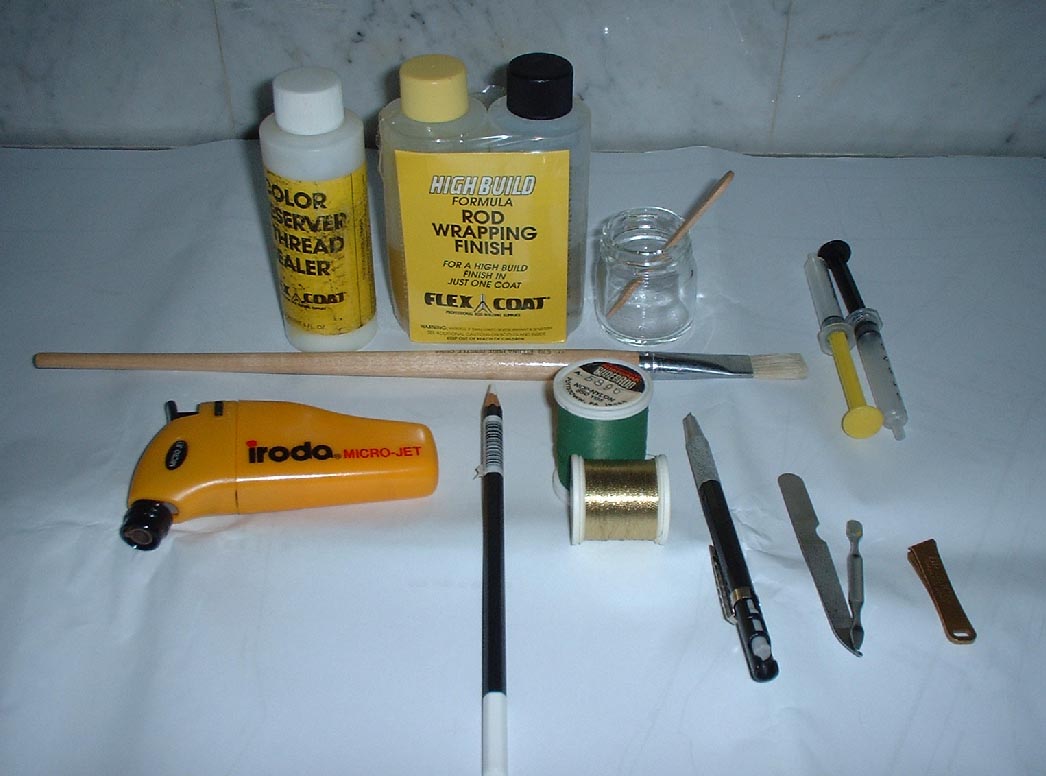
From top left : Colour preservative , 2part epoxy finish , glass
mixer cup w/ stirrer , measuring syringe , paint brush.
From bottom left : Blow touch , China crayon, color threads , pen
cutter , stainless steel burnishing tools and thread cutter.
Other essential
items not shown includes:
Drying motor, rod rest with clamps , paper napkins , thinner
solution and other items which will come in useful during or
after the process of rod building.
Tips for a better pole finish.

Use proper components like a V-rod rest construct from thin
plywood and mounted to work bench with clamps.. Standard rod
building roller can be bought from tackle shops specialising in
rod building. I find a home made V rest sufficient.
Photo shows my blank after epoxy coating. Resting on my V-rest ,
it was being rotated for nearly 24 hours on a drying motor on the
other end.
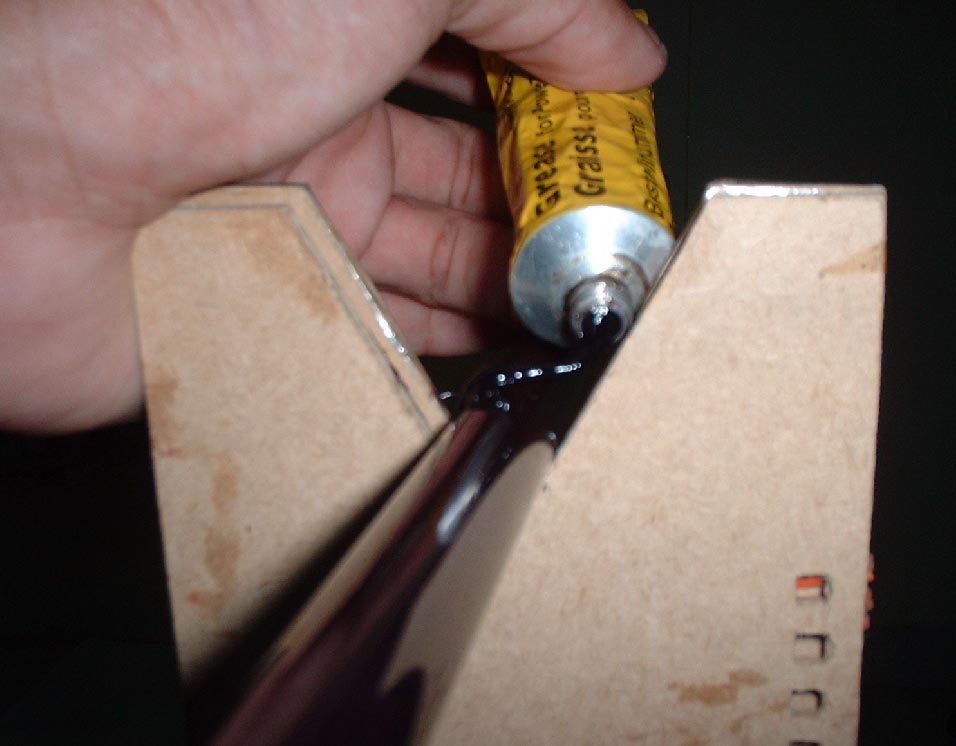
I applied some grease on the blank at the V-rest to take some
friction off during rotation. This will prevent light scratches
that may be cause by the plywood edging of the V-rest during the
prolong drying rotation. Pay extra attention as not to let any grease come to
contact with areas requiring epoxy application.
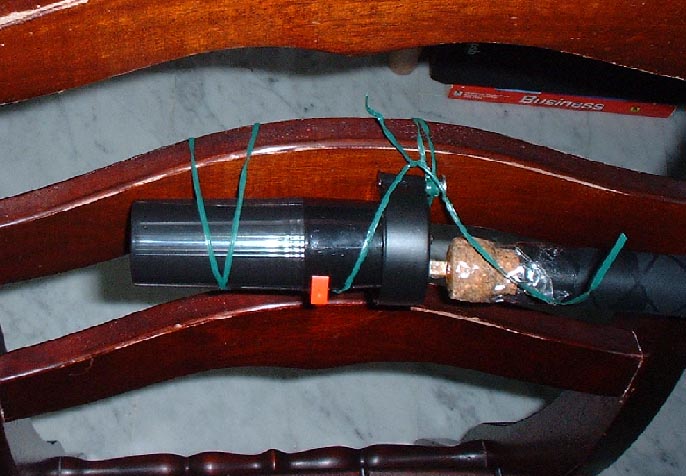
For better epoxy finish, rotate blank with a drying motor during
application and drying of the epoxy coating. This will allow a
high build coating with even surface. Photo shows a drying motor
which was initially a grilling motor use for cooking. It runs on
a single D size dry cell and is strong enough to rotate the
entire 13 feet surf blank for more than 24 hours. You can buy a
standard drying motor from tackle shop or make do yourself with
other electrical components.
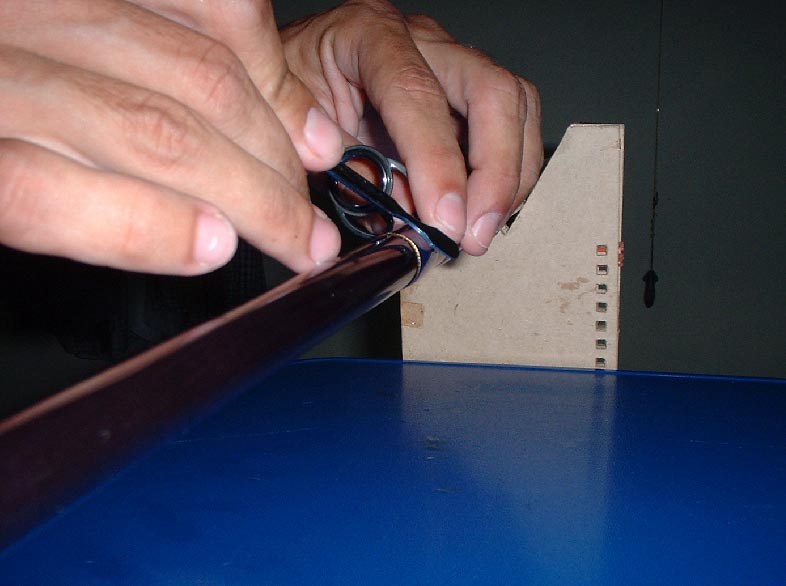
Use stainless steel burnishing tool for pushing and thightening
threads. Brush tool over and around completed threads so that
whippings will look flat and close. Better finishing look.
Try to avoid plastic for those items that contacts directly with
the epoxy resin. Some plastic or rubber material may contain
silicon base substance that may contaminate epoxy resin. This
will cause finishing problems such as sticky finishing surface
and non-curable finishing. Preferably use glass mixer cup and
stirrer and stainless steel tools. Also avoid using paper plates
to mix epoxy as paper will introduce more air to the mix.

For the frustrating bubble in the epoxy finishing, pop it by
activating the jet torch over the affected area. Do not over
apply, it will cause the epoxy resin to 'boil'. A hair dryer can
also be use with the same effect. Angle of aim is important as
wrong blow direction will cause wavy finishing. Both methods of
getting rid of bubbles in finishing works equally well for me.
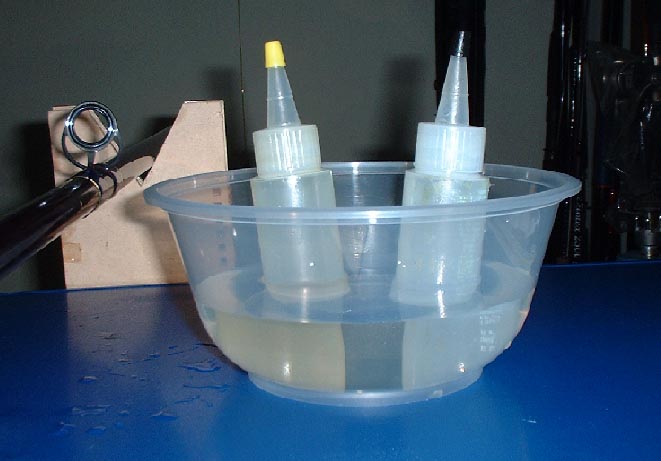
Before mixing any epoxy part, I usually dipped the separate
bottles of mix into a bowl filled with warm water for around 5
minutes. This warms up the mix, reducing their viscosity. The
resulting mix is smoother flowing and clear. I find lesser
bubbles on the mixes too.
Workplace condition.
In order to have clear finishes, the room whereby the rod was
intitially finished has got to be free from airbourne dust
particle. Although these may not seemed visible to the eye, dust
particles tends to settle on the epoxy finishes during the curing
stage. Choose to work in areas that are free from 'curious hands'
or items which may dislodged and land on the rods. As for room
temperature, its best to do whipping in cool temperature. For me
I do whipping in air-con room to free my hands from sweat. As for
epoxying and drying, I do it in normal room temperature. Before
epoxy application, some builders may go to the extent of spraying
water mist onto the room. The purpose is to let water droplets
settle the air bourne dust particle.
For other tips not discussed here, feel free to email me with full details. I will add useful tips so as to benefit other surf rod builders or those interested to build their own surf rods.
Back to![]()