|
Please do not copy this tutorial to any
web site without my written permission as I, Copyright 2000 © Kanded Kreationz,
all rights reserved, own this tutorial. I don't mind if you share in online
groups to learn PSP as that's what I write them for ~ Enjoy If you have any
questions please email me at Kanded
Kreationz©
3 Layered Outer Bevel Tag
Done in PSP 7
Open up a NEW TRANSPARENT IMAGE 400 x 400.
I like to work with LOTS of room and resize at the end.
Add a NEW LAYER.
Click on your PRESET SHAPES Tool 
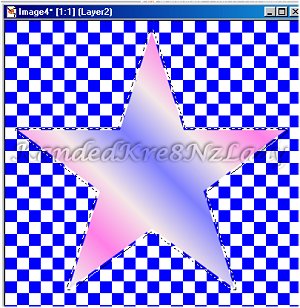
Pick the shape you would like to use from the Tool Options Box by Clicking on the black arrow. I am going to use the STAR 2.
 
Go to your COLOR PALETTE and pick the COLORS you want to use.
You can use solid colors, Gradients, or Patterns.
I am going to use a GRADIENT for my COLORS as you can See.

Go To Your BLANK IMAGE and Draw the Shape you choose.

Next you want to DUPLICATE Your Shape Image 2 times.
Do this by doing a SHIFT + D 2 times.
Next click on your MAGIC WAND ICON . .
On your first shape IMAGE click on an area outside the SHAPE with the MAGIC WAND so your MARCHING ANTS are around the SHAPE And the BOX.
See Pix Below:

Next go to SELECTIONS, INVERT. This will make it so your marching ants will be around your shape only.
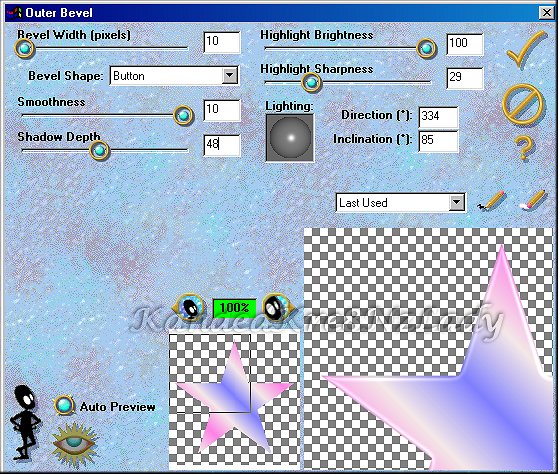
Next what you want to do is go to EFFECT, PLUG-INS, EYE CANDY 3.0, OUTER BEVEL.
These are settings I used feel free to play around with them until you get something you like.
Once you have your settings the way you want click on the check mark in the UPPER RIGHT HAND CORNER to apply the settings to your image.
Now get rid of the MARCHING ANTS by going to SELECTIONS, SELECT NONE.
Next what you want to do is make one of the DUPLICATE SHAPES your active one.
Click on your MAGIC WAND ICON . .
On your shape IMAGE click on an area outside the SHAPE with the MAGIC WAND so your MARCHING ANTS are around the SHAPE and the BOX.
Next go to SELECTIONS, INVERT. This will make it so your marching ants will be around your shape only.
Click on your FLOOD FILL ICON  . .
Pick A COLOR From your COLOR PALETTE to flood fill your shape with.
I am going to use WHITE.
Flood Fill your SHAPE.
This is what mine looks like:

Next what you want to do is go to EFFECT, PLUG-INS, EYE CANDY 3.0, OUTER BEVEL.
Use the same settings as the first time.
Now get rid of the MARCHING ANTS by going to SELECTIONS, SELECT NONE.
Next you want to resize your shape.
Go to IMAGE, RESIZE.
I found that resizing it down to about 75% was a good size but play with the settings until you get something you like.
Then go to EFFECTS, SHARPEN.
Next go to EDIT, COPY then ACTIVATE your FIRST SHAPE do an EDIT PASTE as a NEW LAYER.
See Picture Below:

Click on your MOVER TOOL ICON  . .
Line up your second shape over your first one.
Then go to LAYERS, MERGE, MERGE VISIBLE.
Now make your last shape you DUPLICATED your active one.
Next click on your MAGIC WAND ICON . .
On your DUPLICATE shape IMAGE click on an area outside the SHAPE with the MAGIC WAND so your MARCHING ANTS are around the SHAPE And the BOX.
Next go to SELECTIONS, INVERT. This will make it so your marching ants will be around your shape only.
Click on your FLOOD FILL ICON  . .
Pick A COLOR From your COLOR PALETTE to flood fill your shape with.
I am going to use A Light Purple.
Flood Fill your SHAPE.
This is what mine looks like:

Next what you want to do is go to EFFECT, PLUG-INS, EYE CANDY 3.0, OUTER BEVEL.
Use the same settings as the first time.
Now get rid of the MARCHING ANTS by going to SELECTIONS, SELECT NONE.
Next you want to resize your shape.
Go to IMAGE, RESIZE.
I found that resizing it down to about 50% was a good size but play with the settings until you get something you like.
Then go to EFFECTS, SHARPEN.
Next go to EDIT, COPY then ACTIVATE your FIRST SHAPE do an EDIT PASTE as a NEW LAYER.
See Picture Below:
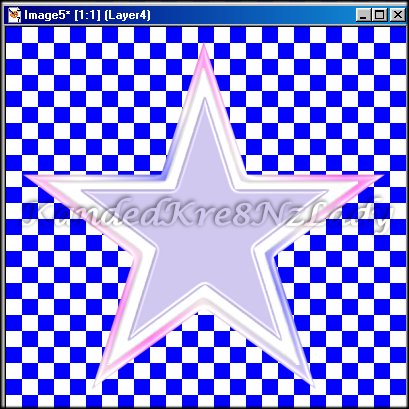
Click on your MOVER TOOL ICON  . .
Line up your third shape over your second one.
Then go to LAYERS, MERGE, MERGE VISIBLE.
Now you can export it as a tube for future use.
Now you can add any tube and text to decorate it up.
Here is my final Results.

If you have any QUESTIONS please feel free to e-mail me at:
KandedKre8NzLady@aol.com

All Web Graphics And Design By: Dazee's
Attic of Treasures©
Copyright 2000, Kanded
Kreationz©, All Rights Reserved.
| 