|
Please do not copy this tutorial to any
web site without my written permission as I, Copyright 2000 © Kanded Kreationz,
all rights reserved, own this tutorial. I don't mind if you share in online
groups to learn PSP as that's what I write them for ~ Enjoy If you have any
questions please email me at Kanded
Kreationz©
Vortex Tag Tutorial
Done in PSP 7
Open up A New TRANSPARENT IMAGE.
400 x 400.
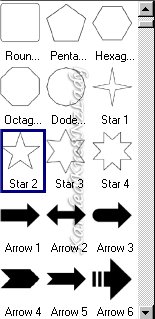
Click on your PRESET SHAPES TOOL ICON 
From The TOOL OPTIONS PICK your STAR 2 and use the SETTINGS I USED.
On Your Color Palette pick a FOREGROUND COLOR and then LOCK OUT Your Background COLOR.
Draw your STAR on Your Transparent IMAGE.
Now go to EDIT, COPY, EDIT PASTE AS A NEW SELECTION.
Now you will have 2 STARS. Place the one you just COPIED and pasted on top of the first one.
The 2nd star will have MARCHING ANTS around it.
As you can see it looks like there is only 1 STAR but there are 2.
See Pix Below:

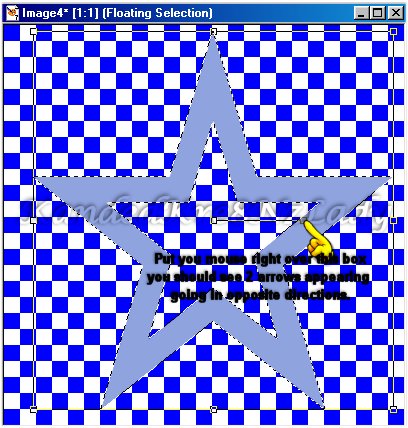
Next click on your DEFORMATION TOOL ICON . .
As you can see there is a lined box around with little squares around the star.
Your IMAGE should look like mine below:

Next you want to put your MOUSE CURSOR over the LITTLE BOX
where you see the yellow hand pointing.
Move it over it very slowly until you see 2 arrows appear each going in different directions.
(Screen Shot Would not work on that Park would not show little 2 arrows so hoping I am making sense)
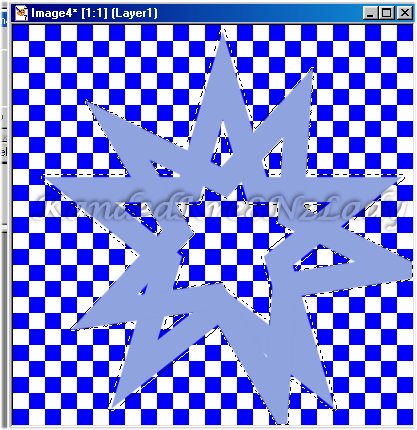
When you see the arrows start turning your IMAGE to the right.
Line your 2nd STAR points in between your first STAR points.
See Pix Below:

Once you have them the way you want go to your TOOL OPTIONS and click on APPLY.

Now holding down the "SHIFT KEY" on your keyboard, click on your magic wand  . Now click on the first STAR you made so that both STARS have the MARCHING ANTS around them. . Now click on the first STAR you made so that both STARS have the MARCHING ANTS around them.
See Pix Below:
Next go to EFFECTS, PLUG-INS, EYE CANDY 4000, HSB NOISE.
The settings below are what I used. But Play with the SETTINGS until you get something you like.
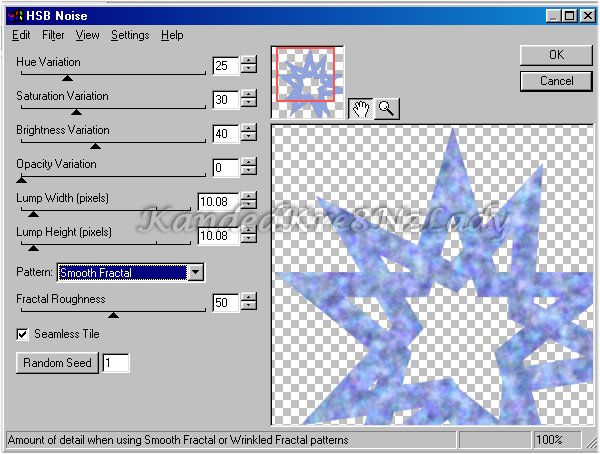
Then click on OK when you have it the way you like.
Next go to EFFECTS, PLUG INS, EYE CANDY 3, INNER BEVEL.
Again play with the settings here until you get something you like.
These are my settings I used:

Then click on  to Apply the settings. to Apply the settings.
Go to SELECTIONS, SELECT NONE.
Now go to EFFECTS, GEOMETRIC EFFECTS, TWIRL.
These are the settings I used but play around until you get something you like.
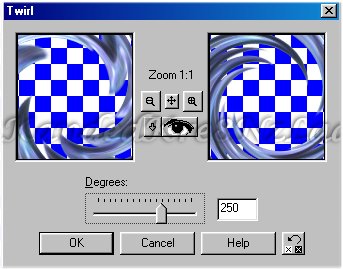
Then click on OK.
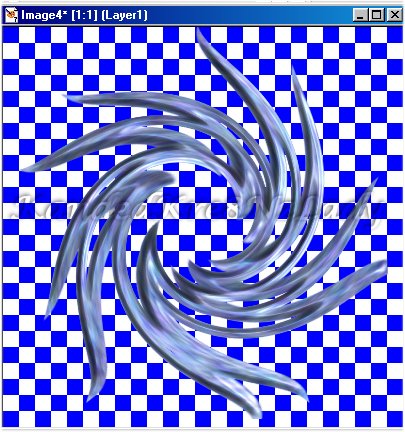
You IMAGE should look something similar to mine.
See Pix Below:
Now we are going to add motion trail to this.
Go to EFFECTS, PLUG INS, EYE CANDY 3, MOTION TRAIL.
Here are the settings I used. Again play with the settings until you get something you like.
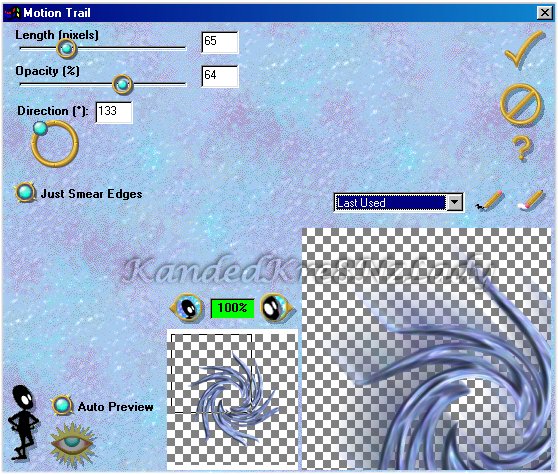
Then click on  to Apply the settings. to Apply the settings.
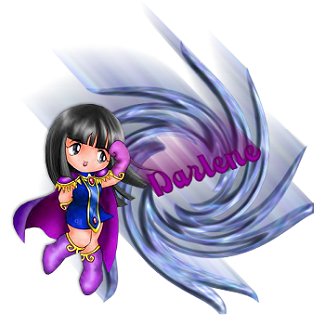
Now all you have to do is decorate it up with TUBES and text.
Here is my FINAL RESULT.
Get Your Free Counter From: www.digits.com

All Web Graphics And Design By: Dazee's
Attic of Treasures©
Copyright 2000, Kanded
Kreationz©, All Rights Reserved.
| 