Lesson 4
Hat

With photo's and instructions by
Marsha Olson
(printout 9 pages)


1. Cut the crown from the thin cardboard. The back
cover of a notebook, or the cards that come in
Wrights trim packages both work well.

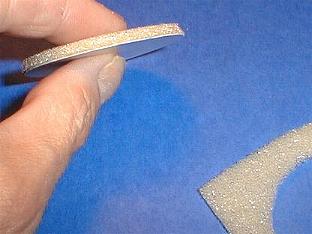
2. Glue the cardboard piece to the foam and trim.
Smoothing with a toothpick, run a line of glue
around the edge.
Use this same glueing method between each layer.

3. Glue and trim the batting.

4. Glue and trim the fabric, pulling all the edges
nice and tight so there are no gaps or wrinkles.


Note: You can skip lining the crown if you wish,
but it only takes a few minutes and gives your hat
a nicely finished touch.

5. Using a hot steam iron, press the HeatnBond
to a scrap of taffeta or any piece of fabric you
wish to use as a lining.

6. After the bonded taffeta cools down, peel off
the paper backing and steam press the taffeta to the
inside of the finished crown. Trim the edge closely.
Add a paper label or logo at this point, if you have one.

Your crown is finished.
On to the crown sides!


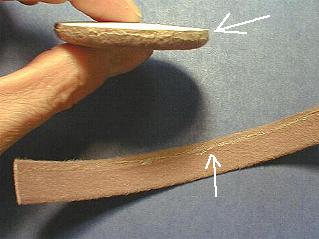
7. Trace the side pattern on to a piece of heavy buckram
and cut out.

8. Press the HeatnBond to a piece of fabric 3 times
the height of your side pattern.
(about 6 1/2 x 1 1/4 inches)
Before peeling off the paper, trim the piece down
to fit around the buckram side piece.
Peel off the paper backing.

9. Place the buckram on the bonded fabric.
Press the top edge down on to the buckram about 1/8 inch.
10. Fold the bottom portion up to check that the
two fabric edges meet. (Trim off any overlap).
Press the bottom edge up.
Your buckram side should be completely enclosed
now in the fabric. This method not only covers
the sides with your fabric, but also creates
your lining for narrow side pieces.

11. Immediately after pressing, while the side piece
is still hot from the iron, roll it up into a small
coil to shape it.

12. Fit the side around the edge of the crown.
With a pencil, mark the overlap and trim the
side piece so the two ends meet.

13. With the edge of a toothpick, run a line of glue
around the edge of the crown and along the line where
the fabric meets on the inside of the sides.
Work fast, the glue dries quickly.
14. Wrap the sides around the crown and hold it
in place until the glue bonds.
15. Glue the two ends of the sides together,
or stitch the two ends together.

The crown and sides are finished.
On to the brim!

Note: By doubling the height of the buckram piece
for the sides, you can use this same pattern and
directions to make lovely pillbox hats!


16. Using the brim as a guide, cut 2 squares of fabric
and 1 square of buckram.
17. Steam press the HeatnBond on to both of the
squares of fabric.
Let cool. Peel off the paper backing.
18. Layer the buckram between the two pieces of
fabric and bond the three layers together.

19. Trace the brim pattern on to the bonded fabric
square. Carefully cut out the brim, trimming away all
the tracing marks.
20. Measure the crown/sides part against the opening
in the brim and trim as needed
for the two openings to match.

21. Stitch the brim to the crown from the bottom.
If you are very neat with the glue, you can glue
the two pieces together instead, but unless you have
an absolutely perfect fit between the two pieces,
it may not hold well. Stitching seems to hold
the pieces together much better
even though it takes more time.

I used some vintage braid and a curled ostrich
feather for trim.
Good Luck and happy hat building!!


By printing out these pages and putting them in a
3 ring binder, you will have a good start on an
excellent personal sewing book. Write notes in the
borders that will help you the next time.
Have fun!
Marsha Olson

This page can be printed out
or saved as complete webpages (including photo's).
Instructions For Making a Desktop Folder
and Saving Lesson Pages!


You are visitor number


A perfect hat from Alana Bennett!
"It took me about 30 minutes, start to finish!"
Gotta love that!


HOME CLASSES CLASS 8 INDEX LESSON 1 LESSON 2 LESSON 3