Lesson 5
Perfect Pattern #2018
"Sewing the Skirt to the Bodice
and Finishing the Gown"
With photo's and instructions by Marsha Olson
(printout: 5 to 6 pages)
Fold back and pin all the petals going down both edges so they won't get caught up in the sewing.
1. On the overlap side of the skirt opening, stitch the skirt and lining together from the waist edge down to the clip mark.
2. On the extension side of the skirt opening, stitch the skirt and lining together from the waist edge down to 1/4" above the end of the extension. Turn a sharp corner and stitch over where the back seam allowance will start, lockstitch.
3. Clip on an angle up to the lockstitch.
4. Trim the corner off of the extension.
5. Tuck one side of the skirt inside the other, folding the skirt in half so the back seams are right sides together.
Note: At this point, if you have done everything right so far, you should be
able to see four separate layers of fabric. The two layers of lining will be
together and the two layers of skirt fabric will be together.
6. Pin the two skirt seams together and the two lining seams together matching up the seamed corners at the hem where the lining and skirt are already sewn together.
7. Stitch the back seam and the lining seam in one continuous motion.
The skirt can now be turned right side out through the waist opening and pressed.
8. Take a couple of hand stitches to hold the extension in place at the bottom end of the skirt opening inside.
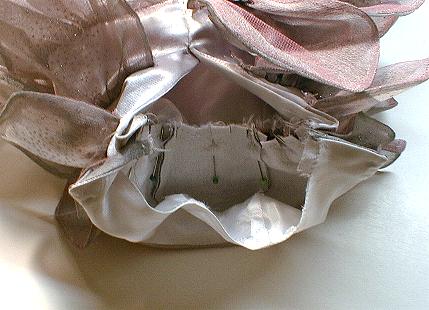
9. Pin the last gathered row of petals to the waist of the skirt. Stitch through all layers.
10. Stitch 2 rows of gathering stitches along the waist edge of the skirt.
11. Gather down the waist of the skirt to fit the waist of the bodice.
12. Pin the skirt and bodice together starting at the center. Use the center petal as a guide and match it to the center of the bodice.
13. Stitch the skirt to the bodice.
14. Trim the waist seam close to the stitching.
15. Hand stitch the bodice lining in place.
16. Finish the back opening with small sew-on snaps or hook and loop closures depending on how much overlap you have.