1. Clip the curves and |

|
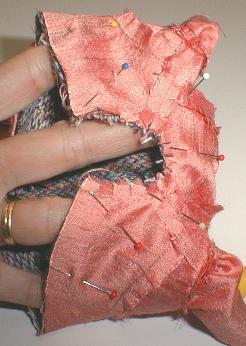 |
2. Turn the dress right side out. |
You will notice that both sides of the |

|
|
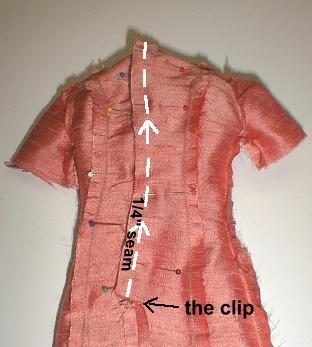
4. Starting at the lower right back |
5. Starting at the neck edge of the |

|
1. Clip the curves and |
|
|
|
2. Turn the dress right side out. |
You will notice that both sides of the |
|
|
|
4. Starting at the lower right back |
5. Starting at the neck edge of the |
|

|
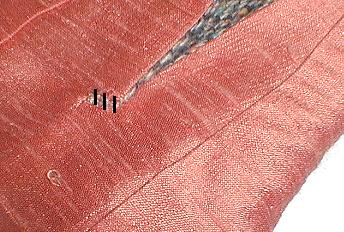
6. Stitch around the neck edge and clip the two corners off at an angle. |
|
7. Turn the dress, making sure the corners at the neckline are as sharp as possible without pushing the corners to the outside. 8. Fold up 3/8" of the raw edges of the sleeves and hem on the lining. 9. Fold up 1/4" of the raw edges of the sleeves and hem on the dress. |

|

|
10. Match up the underarm seams on the sleeve and lining. 11. Finish the sleeve hem with an invisible hem stitch. |
|
12. Match up all the seams on the dress and lining. 13. Finish the hem with an invisible hem stitch. |

|
|
14. Trim off any fraying threads from the raw end of the overlap. 15. Tack down the bottom raw end of the overlap on the inside of the dress with a few long stitches. |
|
16. Space your snaps down the back for an even closure. |

|

|
A perfectly fitted princess style dress. |
| HOME | CLASSES | CLASS 29 INDEX | LESSON 1 | LESSON 2 | LESSON 3 |
| LESSON 4 | LESSON 5 | LESSON 6 | LESSON 7 | LESSON 8 |