Use spray starched cotton voile or batiste. |

|

|
2. Trim the seam down to 1/8". |
3. Finish with a narrow zigzag stitch. |

|
 |
4. Finish the back opening edges with a narrow surger or zigzag. |
5. Press the right back opening edge in to align with the raw edge of the center back seam. |

|

|
7. Run a double row of gathering stitches along the waist edge, starting about a half inch from the edges. |
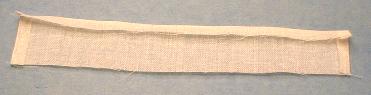
8. Press the two short edges and one long edge of the waistband in. |
|
We all have our own methods of gathering long edges down so that the gathers are evenly spaced across the work.
This is the method I favor so I'll show you how I do all my waist gathering.
 |
9. Fold the waistband in half and using either that or the exact measurement for your gathering guide. Fold the edge of the pantaloons in half and separate the threads of the two rows of gathering stitches. Making sure that you have the four thread ends from either the inside or the outside, it doesn't matter which as long as both sets are from the same side. |
That's as clear as I can make the instructions. Once you figure out this method of gathering, I think you'll like it for the fact that you end up with exactly the same amount of gathers on both halves.
10. Pull all four threads at the same time so your gathering is even on both sides. Gather down to match the folded waistband. |
 |

|
11. As you pin the pantaloons to the waistband, you will have to spread the gathers even a little more to compensate for the flat place in the center. |
12. On each end, unfold the waistband ends and refold them to the inside and pin them in place tightly. |

|

|
13. Stitch the waistband to the pantaloons from the wrong side so you can make sure the gathering stitches are enclosed in the seam. Make sure the waistband ends stay folded to the inside on both ends. |
14. Trim the corner of the seam back at an angle. This is a standard method to eliminate bulk and facilitate a smoothly turned corner. |

|

|
15. Flip up the waistband corners. You will see what a neat corner has been made. |
16. Fold the pressed edge of the waistband to the inside. Finish by slipstitching by hand into the line of machine stitching. |

|
This method of gathering to a waistband can be used now on the petticoat and the skirt. It works to make a neat finish on any type of fabric so bookmark this page to come back to as a refresher the next time you are making a skirt. Folding back the ends of your waistband to the inside can also be used on a straight lined skirt with no gathering. A simple but effective method.
Hand sewing is easy, but there is an art to doing it correctly so that the stitches don't show.
For this demonstration I have chosen to use a dark color fabric so the white thread shows better.
Always use the fabric itself to hide the longest part of the stitch.
 |
17. Start out by hiding the knot. Angle the needle tip |
18. As you make each stitch, you want to |
 |
 |
The pale pink represents the hidden part of the thread. |
19. Finish the entire waistband in this manner with small fine stitches. Once you get into the rhythm of hand sewing, it takes little time and can be very satisfying to see a perfectly neat finished piece of work.

20. Lightly press the gathers flat for about 1/2" down from the waistband to give the pantaloons a smoother fit below the waist.
Now is the time to decide whether or not you will be tucking the camisole into the panaloons as the next step will determine how far the waistband will overlap and where the snap or button placement will be.
The next exercise is merely an observation that I wish you to take note of at this time, we will coming back to it later.
Try the pantaloons on your doll, with or without the camisole, whichever you have decided on. Overlap and pin the waistband and back opening at the bottom.
or saved as complete webpages (including photo's).
Instructions For Making a Desktop Folder
and Saving Lesson Pages!
You are visitor number
| HOME | CLASSES | CLASS 39 INDEX | LESSON 1 |
| LESSON 2 | LESSON 3 | LESSON 4 | LESSON 5 |
| LESSON 6 | LESSON 7 | LESSON 8 | LESSON 9 |
| LESSON 10 | LESSON 11 | LESSON 12 | LESSON 13 |