24. For the next step you'll need a pencil, a tube turner or something to pull the elastic through the narrow casing, 1/8" elastic or narrow ribbon to measure the dolls leg, and a ruler to measure and mark the elastic.
|
 |
 |
25. Using the 1/8" elastic or the narrow ribbon, measure the leg just below the knee.
|
26. Mark the elasic with the leg measurement, leaving 1" of extra elastic at each end.
|
 |
 |
27. With the tube turner, draw the elastic into the casing and secure the first end.
|
28. Pull the elastic through the casing, gathering as you go, until you can see the second pencil mark. Secure.
|
 |
 |
29. From the right side the casing will be invisible and will simple look like a single line of gathered stitches.
|
30. Sew the center back seam up to the clip.
|
 |
 |
31. Clip to the stitching.
|
32. Trim the seam down to 1/8".
|
 |
 |
33. Finish the raw edge of the seam with zigzag or serger.
|
34. Flip out the end of the opening overlap and stitch across through both layers to the point of the clip.
|
 |
 |
35. Stitch the entire inseam.
|
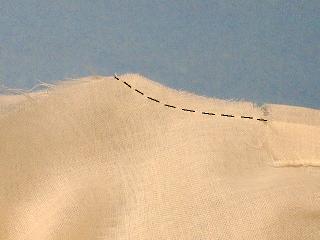
36. At the base of each leg, trim back at an angle.
|
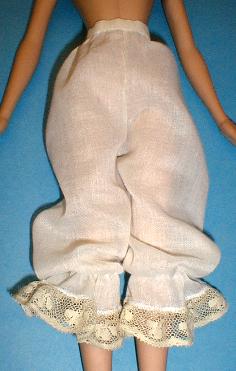
 |
 |
37. Finish the seam.
|
38. On the doll, pull the elastic casing up to below the knee. The pantaloons will billow out above the knee.
39. Finish the back opening with a snap, button, or ribbon ties. Overlap will be more than 1/4" in order to give you the option of having loose fitting pantaloons in order to make less bulk around the waist if desired.
|
 |


