| Sharing Science | |||||||||||
| Kids Teaching Kids: Student Outline | |||||||||||
| Be An Einstein...Ask Why? | |||||||||||
| On-Line Physics | |||||||||||
| Enrichments | |||||||||||
| Collaboratives | |||||||||||
If you would like any information on these or other collaborative programs please use the following e-mail address: send mail to kskrutvold@uswest.net.

Open-ended activities are a great way for students to learn. The bubble activities below encourage the whimsy of trial-and-error experimentation of the discipline of the scientific method. They're also a marvelous way to get your lab tables cleaned.
What recipe makes the best bubbles? Provide students with liquid soap, lots of water, measuring cups, and mixing bowls. Start them off with a basic bubble solution. Then have them alter this recipe and compare the quality of the bubbles produced. They could change the soap concentrations, test various brands of liquid soap, and add glycerine in a range of quantities to see whether the changes make any observable differences in the size, color, or durability of the bubbles.
What tools form the best bubbles? The basic blowing tool is a straw. The basic blowing method is to stick the straw into the bubble solution, and place a finger over the top of the straw to trap some solution inside. Let most of the solution drain out, and gently blow out the rest. Other possible bubble generating tools that can be dragged through the bubble solution include various sizes of capillary tubes, plastic pipes, slotted spoons, frames from straws and string, and cans open at both ends. Have the students determine which tool produces the largest bubble.
What factors affect bubble production? Have students moisten the surface of their lab tables with the bubble solution and then gently blow into this thin, wet layer. How do amount of solution, ambient temperature, and force of breath affect the bubbles formed? Have the students observe the colors of the bubbles and predict bubbles' lifetimes.
How do bubbles mass together? Tell your students to blow one bubble on the table. This bubble will be their nucleus for bubble "condominium" construction. They should add bubbles to the nucleus and determine the maximum number of bubbles that will share sides with the nucleus and that will adhere to each other.
"Blowing Bubbles"
People have always appreciated bubbles and films for their beauty. Now science is finding that these delicate structures are useful for demonstrating and modeling systems in chemistry, physics, biology, and astronomy. Science teachers can take full advantage of these modeling ideas to connect their students' experience of the fun of bubbles to the scientific implications of bubbles. Here's a host of fascinating demonstrations, requiring only a few inexpensive props.
Let's begin with a simple bubble solution recipe: To about 8 liters of distilled water, add about 250 milliliters of liquid detergent, such as dish washing liquid. Liquid detergents dissolve more quickly than powdered detergents, making heating your bubble solution unnecessary. I have found the brand "Joy" especially good at bubble making.
Detergent molecules have two very different parts--a polar or ionic part, such as a sulfonate group, and a non-polar part, consisting of a long hydrocarbon chain. (In the case of soap, a type of detergent, the polar group is carboxylate.) The polar part of the molecule is hydrophilic, meaning that it is attracted to water. The nonpolar part is hydrophobic, meaning that it is repelled by water.
Bubbles consist of gas surrounded by films of water. In water films, detergent molecules are lined up at the interface between the gas and the water, with their hydrophilic ends dissolved in the water and their hydrophobic ends pointing to the gas.
Water molecules are strongly polar and hydrogen-bonded to a significant degree. The hydrogen bonds form between the slightly positive hydrogen atoms of one molecule and the slightly negative oxygen atoms of another molecule. The amount of hydrogen bonding is such that water possesses unique characteristics. For example, water expands on freezing to allow room for the geometry of the hydrogen bonds, its boiling point is higher than you would expect based on its size, and it exhibits unusually high surface tension.
When you introduce detergent molecules into water, the hydrophobic groups change the structure of the water and interfere with hydrogen bonding between the water molecules. Consequently, the hydrophobic groups are expelled to the surface of the water, where the detergent molecules are oriented with their hydrophilic ends in the water and their hydrophobic groups away from it. For this reason, molecules such as detergents are often called surfactants, or surface active agents. The replacement of water molecules by detergent molecules results in a decrease in the surface tension of water. The ability of detergents to remove dirt is due partially to this decrease in water's surface tension.
Imagine introducing a gas into a liquid--by blowing into it, for example. In certain liquids, thin films will form around rising bubbles of the gas as the bubbles come to the liquid's surface. If films are elastic, they will not break immediately. Airborne bubbles are the result. Pure liquids do not give rise to elastic films. Something must be dissolved in a liquid to give the liquid elastic properties--that something is usually a surfactant.
Bend a metal coat hanger or twist a few pipe cleaners into a circle. Dip the circle into a container of bubble solution. If you draw the circle out slowly, the frame will "capture" a detergent film. Wave the circle in the air to show your students the amazing strength and flexibility of the film. Why does the film form? The frame carries air into the solution, and the air comes out with a thin film around it.
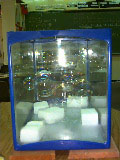
Certain rules govern bubble formation, which your students can investigate. Place about 10 mL of the bubble solution in a clear beaker--a rectangular container such as a small aquarium is even better. Use a straw to blow bubbles in the solution until the container is full of overlapping bubbles. Have your students examine the collection of bubbles carefully for regularities in its structure. You might let the students test their powers of observation and detect for themselves these "bubble rules":
- ·exactly three films meet in a line
- ·exactly four lines meet in a point
- ·exactly six films meet in a point
- ·lines meet at equal angles (for example, three lines meet at 120o, and four lines meet at approximately 109o).
Other arrangements of bubbles are possible, but they are unstable and eventually stabilize to follow the rules.
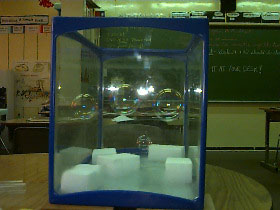
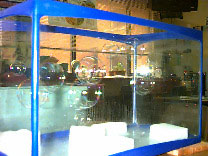
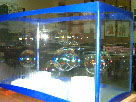
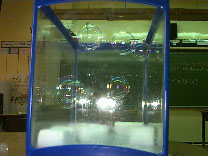
The regularities can be seen most easily in isolated systems, or systems consisting of just a few bubbles or films. Make a frame shaped like a triangular pyramid or a cube out of wire hanger or pipe cleaners. Lower the frame into the bubble solution, then remove it gently. The same regularities you saw before are now visible in stunning form inside the frame. For example, the pyramidal frame has four films meeting inside the frame. For an even more amazing demonstration, wet a straw in the bubble solution and place this wet end onto a point created by the films meeting within the frame. Gently breathe some air into the point. A pocket of air trapped by the films will form a bubble in the shape of a pyramid or a cube, depending on the shape of your frame.
Cubic bubbles do exist. They are remarkably similar in form to a type of sea life called radiolarians. Cubic bubble models can enhance our understanding of microecology.
You can also do bubble experiments to explore chemistry. These experiments require the use of various gases. You should only do them if your laboratory undergoes at least six air changes per hour. Do not allow any of the gases to run for more that 5 minutes in each hour, or more that a total of 20 minutes in a day. When working with gases, make sure that no sources of ignition are present and that you and all your students wear face shields and safety goggles.
To make a gas bubble, attach a short piece of glass tubing to a source of gas with a rubber hose. dip the end of the glass tubing into a beaker of bubble solution, turn the gas on low, and blow a gas bubble. As the gas fills and distends the bubble, you can gently prod the bubble to release it at any size you wish.
To study density, fill one bubble with methane gas and on with carbon dioxide. Have your class observe the behavior of the bubbles. The differences in density and specific gravity (air comparison) between the gases are visible. Methane has a lower density than the surrounding air so the methane bubble rises. Carbon dioxide has a higher density than air, so the carbon dioxide bubble sinks.
Next, to study reactivity, fill two plastic petri dishes that are 100 mL in diameter or less with bubble solution. Into one dish, bubble hydrogen gas so a layer of bubbles forms near the surface. Into the other dish, bubble helium gas. The bubble masses should be no more than 5 cm high. Toss a lit match onto each mass of bubbles. The hydrogen "whoosh" is an effective way to demonstrate the difference in reactivity between substances with one electron in the first energy level versus two.
For the next experiment, teachers will have to wear plastic or latex gloves. Fit a two-holed stopper with two glass bends. Connect one glass bend to a methane gas jet and the other end to the rubber hose and glass tubing apparatus from before. Place a small test tube containing no more than 1 mL of concentrated hydrochloric acid and a small test tube containing no more than 1 mL of concentrated ammonium hydroxide in an Erlenmeyer flask. Fit the stopper into the flask. The flask should be in a hood behind a safety shield.
As the two chemicals vaporize, they will react and form ammonium chloride, a white smoke. When you see the ammonium chloride, slowly start a low flow of gas. Dip the tip of the glass tube into the bubble solution. A bubble will form and rise into the air. Interactions with the ammonium chloride make this bubble more fragile than an air-filled one. The ammonium chloride dissolves readily in the bubble's water layer, forming hydrogen bonds with the water molecules. As the water molecules hydrogen-bond more with ammonium chloride and less with one another, the strength of the bubble film decreases. The rising bubble gets thinner as water continually drains from the inner layer. Finally the bubble bursts, releasing the ammonium chloride smoke. Friction between the smoke and the edge of the just-breaking bubble film will cause the smoke to form a donutlike ring. If you do the ammonium chloride experiment, remember that you can only have the methane on for 5 minutes each period, for the maximum of 20 minutes a day.
Bubbles can help demonstrate physics topics too, such as interference colors. White light incident on a thin film is reflected from the top and bottom layers of the film. As the light is reflected from the film, some wavelengths are destructively interfered with and never reach an observer's eye. Which wavelengths the film subtracts depends on the thickness of the film. The observer sees those colors with wavelengths complementary to the wavelengths the film canceled.
Blow a bubble or collect a film on a frame. Place the bubble or the film over a dark surface. As the thinner water layer drains due to gravity, the film thins, and the path the light traverses changes. Have students carefully observe the sequence of color changes. This demonstration in interference colors is less expensive than one requiring commercial interference filters.
Optics can be explored through bubbles too. Blow a bubble with a pipe-cleaner frame, and you can use it to study concave and convex reflections. The bubble's outer convex surface acts like a convex mirror, producing erect images. The inside back concave face of the bubble produces erect or inverted images depending on the object distances, just as a concave mirror does. Using bubbles this way waves you the purchase of expensive mirrors and lenses.
Bubbles possess static electrical properties. Stroking a Lucite rod with silk or an ebony rod with fur produces a static charge. Bring the rod near a bubble sitting on a wet table. The water and detergent molecules of the bubble's trilayer respond by moving the whole bubble toward the charge. With some practice, you can make the bubble glide across the table toward the charged rod. Just take care to keep the rod dry.
Odd though it may seem, you can even use bubbles to explore cosmology. In recent years, astronomers have proposed galaxies--which they previously thought were distributed uniformly--are clumped into regions of space. Galaxy formation is now being described as part of an inflationary process, similar to blowing many bubbles from one frame. This process produces voids and clusters that resemble multiple bubble systems, such as masses of suds where many films and bubbles surround air pockets.
Had you realized that something as simple as a bubble could be so useful in the school science classroom? From the interactions of molecules to the origin of the universe, demonstrations with bubbles are safe, simple, visual ways to reinforce many science concepts.
Bubbles......Bubbles...................and more Bubbles!